First I will tell you what a scanner is. A scanner is a device for reading an image and presenting it electronically to a computer. You can scan both photographs and text, which can be recognized by a computer using special text recognition programs. And in this article I will tell you,
How to use the scanner.
You put the scanner on the table and what to do with it?
First, connect it to your computer and install the drivers. I also recommend installing a program that has a scanning function. Most likely such a program is on the driver disk. However, you can use programs such as ABBYY FineReader (Program for scanning and text recognition), (Photo viewer with scanning function) and others. To check whether the program has a scanning function, you can go to menu « File» look in the section « Import"if there is an item whose name matches the model of the connected scanner. that means everything is fine.

Let's launch our program. Open the scanner lid and place a photo or piece of text there. Next, select the scanning function in the program.
A window will open where we will need to click on the “ Preview" Then select the area of the sheet or photo that you want to scan. There is also the ability to set the scanning mode depending on the print quality. You have the choice to scan in color or black and white.
Next you can select the resolution. If you are scanning photographs, I advise you to set the value to a larger value to ensure a good quality image. After you have set all the settings, you can click on the “ Scanning" We are waiting for the scanner to digitize our sheet and transfer its digital copy to our program.
A digital image will appear on the screen that you will need to save or recognize. In order to save our image, select the menu “ File" and click on the button " Save" or " Save How" Now we set the extension and file name. To recognize it, I advise you to use the ABBYY FineReader program. This program has a simple interface: all the necessary buttons are located on the toolbar, and I don’t think it will take long to understand the functionality.
Advice for offices or for people who have several computers and one scanner at home: you can use the scanner over a network. scanning is no different from that described above, you will only need to make a number of preliminary settings. Go to menu " Start» « Control Panel" and select " View networked computers and devices" There, in the list of devices, select the desired scanner model. and everything is ready.
I hope you were able to learn how to use the scanner. You might find this article useful
Both the speed and quality of data processing will depend on the parameters of the selected scanner. It should immediately be noted that with a large number of forms (over 100 daily), a conventional flatbed scanner is not applicable. These devices, which are widely used in offices and do a good job of digitizing photographs and ordinary documentation, are unsuitable for streaming input: they have low performance and a relatively small resource. Just imagine what the glass of a flatbed device will turn into after scanning a thousand pages!
For complete, fast and high-quality input of a large number of forms, you need a special device. What should you pay attention to when choosing a scanner? The main criteria for choosing a scanner for automated form entry are as follows:
Format. Most often, devices capable of scanning sheets of A3, A4 and A5 formats are used to enter forms.
Optical resolution. To enter forms, a resolution of 200–300 dpi (dots per inch) is required, and all scanners support such modes. Scanning at higher resolutions is bound to slow down, and scanning speed can be one of the most critical parameters when streaming forms.
Duplex scanning. Many projects require the use of scanners that can perform both single-sided and double-sided scanning in black and white or color modes. The latter mode must be used, for example, when cleaning images from color prints and saving color photographs from questionnaires.
Availability of a device for automatic paper feeding - automatic document feeder (ADF, Automatic Document Feeder). This device, which allows you to load forms into the scanner in batches, usually of 25, 50 or 100 documents, is necessary in almost any case. Otherwise, the work of the input operator will consist of 90% manipulations with paper and scanner.
Performance. Often the speed of the entire automated input system depends on the speed of the selected scanner. There are three main categories of office document scanners: low-, medium- and high-performance. Devices of the first category are capable of processing from 500 to 2,000 pages per day, the second - from 5,000 to 10,000, the third - up to 60,000 or more pages per day.
Control of double sheet picking. If the scanner feed mechanism catches more than one sheet of paper, it may result in some form not being processed at all. To prevent this situation, many scanners implement control systems: by weighing the captured paper, measuring the thickness of the paper, or monitoring the light flux passing through the scanned paper.
However, these methods are not applicable if the flow of forms is non-uniform, i.e. if forms of different types are entered (on different paper sizes, different colors, densities, etc.). Therefore, the most widespread are control systems based on ultrasonic sensors, which ensure that the reflected signal comes from no more than one surface, that is, from one sheet of paper.
Availability of special features. Some devices are equipped with assistive devices that can be very useful. Among them:
a printer for imprinting a special index on one side of the scanned document (endorser) to identify the document in the future;
hardware module to improve the quality of the resulting image;
hardware image compression module;
colored backlights to remove a certain color from the so-called “background” (drop-out) forms, usually red, less often blue or green;
caching images using the scanner's own memory, which also increases system performance.
How to choose a scanner for your home
Scanner. What is it, what is it for, and how to choose the right inexpensive but high-quality scanner model for home use? I will try to answer these and other questions in this article.
In general, a scanner is an electronic-mechanical device designed to convert graphic information of various types into a computer (digital) form for subsequent editing or printing. What does a scanner mean for the home? In this concept, I included inexpensive scanner models (priced up to $200), which are not intended for such professional use as, for example, scanning an image to create advertising posters or other professional graphics. In this article I will try to explain how to choose the right scanner for home use. Those. everything that I will say further about scanners will apply only to amateur scanner models. Professional scanners are a topic for a separate article, because... I think that lumping scanners for $200 and scanners, for example, for $15,000 into one “barrel” is at least unreasonable.
Where should you start when choosing a home scanner? Firstly, you must clearly understand that choosing a scanner is a serious and responsible matter. Judge for yourself, if, when choosing your computer, you did not sufficiently equip your system unit, then in this case you can come to a computer store at any time, buy all the necessary hardware for your computer and upgrade it. But, unfortunately, the scanner cannot be upgraded. And you, as a future user, must choose for yourself the scanner model that would suit you in all its parameters, and also work reliably and quickly enough throughout the entire time you use the scanner. In the same case, if you make a mistake with the chosen scanner and suddenly discover that its characteristics do not meet your needs, then, I think, you will have to either sell your scanner at a bargain price, or “throw” it on the farthest shelf. However, there is a definite advantage to this - in the future you will have something to show your grandchildren. But I think it’s still not worth spending money on a scanner that will only serve you as an antique in the future. And in my opinion, the choice of a scanner needs to be approached thoughtfully, competently and very seriously.
First of all, when choosing a scanner, you must be very clear about what specific purpose you plan to use your scanner for. Those. you must decide for yourself what the main tasks will be for your scanner. Its price will greatly depend on this. After all, a scanner is a very interesting thing, in the sense that an illiterate user can overpay a lot of money when buying a scanner for those functions that he will never use in his life. So, remember that the ironclad rule “the more expensive the better”, which is true for many computer components, such as RAM or hard drive, simply does not apply when buying a scanner. All you have to do is keep your eyes open and think so as not to overpay and buy a good scanner.
So, you need to clearly decide for what purpose you are buying a scanner. If you plan to use this scanner to scan only black and white text for subsequent editing in some text editor, then, in principle, absolutely any scanner from those currently offered on the computer market, even the cheapest one, will suit you for this purpose . It is best, of course, to take a flatbed scanner - in my opinion, it is the most convenient to use. Indeed, you cannot pass a book, for example, through a broaching scanner. In addition, now the prices for amateur models of flatbed scanners are quite low, and you can easily pick up a decent scanner for scanning text from the family of “tablet scanners” for sixty dollars.
The fact that this scanner is selected for scanning text does not mean that it cannot be used to scan a color picture. In fact, now there are no longer any black-and-white flatbed scanners on sale, and, as a rule, all offered models are color. But the question of how well a color image will be scanned on the cheapest tablet remains open. In any case, be prepared for the fact that the quality of the scanned color image if you purchase such a scanner may greatly disappoint you. In general, when choosing a scanner for scanning text, you should not pay attention to scanner parameters such as color rendering or dynamic range. The most important thing is to pay attention to what optical resolution this scanner has and how fast it works. To scan text, as a rule, it will be enough to purchase a scanner with an optical resolution of 300 dpi (dots per inch), because this is enough for most text recognition programs (for example, the most famous text recognition program now is ABBYY FineReader). With a resolution of 300 dpi, you can scan even very small text quite clearly.
Only in rare, almost exceptional cases, for very small text, will a scanner with high optical resolution be required. But still, scanning speed combined with the quality and speed of the scanning program, in my opinion, is the main condition for choosing a scanner for scanning and further text editing. In the same case, if you are going to use scanning a color image quite often and want to get a good result, then your task of choosing a scanner becomes much more complicated, and you should pay attention to some other characteristics of the scanner. Let's take a closer look at the most basic characteristics, exactly those that you should pay attention to when choosing a scanner.
Scanner resolution is, in my opinion, one of the most important characteristics of a scanner. After all, the higher the resolution, the finer details of the image you can scan with acceptable quality, and the higher the resolution, the more you can enlarge the resulting image for further editing or printing. There are two types of scanner resolution: optical and interpolation. And here, be especially careful.
Do not pay attention to the inscriptions on the box, such as 12000 dpi. This is all a cunning trick by the manufacturer, designed for inexperienced users. In general, make it a rule to never pay attention to all kinds of inscriptions on the boxes of devices; as a last resort, you should pay attention to the characteristics of a particular device described in its technical data sheet. And in general, in my opinion, when choosing this or that device you should trust only your own eyes. So, as for the resolution. In fact, we are only interested in the optical resolution of this scanner, not the interpolation one. After all, it is the optical resolution that is responsible for how well the optics and all scanner mechanisms are configured. Optical resolution is the resolution with which a given scanner can scan an image.
Interpolation resolution is the so-called software resolution. Those. the resolution that is obtained by processing the image received from the scanner using the appropriate program - the driver for this scanner. The mechanism for obtaining interpolation resolution is as follows: the scanner scans, say, with a resolution of 600 dpi, and the program, processing the resulting image, inserts intermediate pixels into it, analyzing neighboring ones and, thus, artificially increasing their number. The result is a picture with a resolution of, say, 2400 dpi, but these extra pixels are of absolutely no use. And we do not get anything useful in this case, but only have huge amounts of memory occupied by such a file.
So, be careful not to fall for the manufacturer's canard regarding interpolation resolution. And yet, the scanner resolution is usually indicated as follows: 600x1200 dpi. In this case, the optical resolution we are interested in is a smaller number; it indicates the optical resolution across the width of the scanner (horizontally). The larger number is responsible for the vertical resolution of the scanner; it depends only on the step at which the scanning matrix can move. But how do you choose the right scanner optical resolution that you need? The answer to this question lies in what purposes the scanned image will be used in the future. I will give several recommendations on this matter. If you are scanning an image to use it in full size only on a monitor screen, for example, to post it on Internet pages, then in this case it is even more than enough for you to set the resolution to 100 dpi. If you are going to use the resulting image enlarged, for example 2 times, then the resolution for scanning should be set 2 times higher. But remember one important detail here - the original from which you are scanning itself has a certain resolution.
And if you set the scanning resolution to be higher than the resolution of the original, then in this case you will simply scan the detailed structure of each grain of the image, which, of course, is of no use. If you are scanning a picture for a printed magazine, then a resolution of 300 dpi will be just right in this case. In the event that you scan a picture for subsequent printing on a printer, then there is some interesting feature when choosing the required resolution. Since we are talking about home scanners, as you know, at home, to print a color image, an inkjet color printer is most often used, which has a certain resolution (for example, 600 dpi). So, the scanner resolution should be set exactly three times lower than the resolution of the printer used (in our case, it should be set to 200 dpi).
The fact is that to produce a color image on an inkjet printer, ink of three primary colors is used. And each dot of a certain color is obtained by mixing three dots of different colors and, in fact, the resolution of the resulting print is three times less than the resolution of the printer. So the formula: scanner resolution = printer resolution/3 works ideally when choosing the required resolution for scanning a picture for subsequent printing. But here we should not forget that if you enlarge the image before printing it, then you need to set the resolution to a higher one.
The next, also important scanner parameter is color rendering, which is determined by such technical characteristics of the scanner as color depth. You should pay attention to this characteristic if you are going to use scanning color images. Color depth essentially determines the number of colors and shades that are produced in a scanned image. And, naturally, the greater the color depth, the more accurate color rendering your scanner will have. A scanner's color depth is measured in bits and depends on the quality of the analog-to-digital converter (ADC) and the quality of your scanner's CCD. It would seem that with this scanner parameter everything is simple and clear: the higher the color depth, the more colors the scanner transmits, which means the higher quality image you will get. But, unfortunately, not everything is so simple. Let's find out why.
With a black-and-white image, everything is clear: here the 8-bit scanner transmits 256 shades of gray, which is quite enough to transmit a black-and-white image of photographic quality. But when scanning a color image, to achieve the desired color rendering quality, we need at least 24 bits (8 bits for each color channel). In this case, you are guaranteed a picture with the number of colors and shades that the human eye can discern. But scanners with a color depth of 36 bits or even 48 bits are also widely represented on the computer market. Do such scanners really allow you to get, for example, a 48-bit image that will be of simply perfect quality? Unfortunately no.
Practice shows that such scanners produce a 24-bit image as a result of scanning. But what is it? Is this a fraud by the manufacturer? No, not a deception, but just a rather cunning “feint” that allows you to mislead an inexperienced buyer. In fact, any scanners (I mean only amateur models) use only 24 bits for color reproduction when scanning, and the remaining bits (for example, 24 bits for a 48-bit scanner) are noise. Those. they contain additional noise, as well as some service information. With such scanners, these noises are ultimately taken into account when creating the final 24-bit image, resulting in a cleaner image. So, remember and don’t fall for this “bait” with bits. The main idea here is this: you get a 24-bit image in any case, regardless of how many bits in the image are stated by the scanner manufacturer. But don't be upset, because you still won't be able to edit an image with a color depth greater than 24 bits.
Indeed, even such a professional graphics software package as Adobe Photoshop only allows you to edit a 24-bit image. What then can we say about other graphics packages? As for the difference in color rendering, for example, between 24-bit and 48-bit scanners, I, for example, don’t see a deep difference. Moreover, I saw a 24-bit scanner that I liked better in terms of scanning quality than the 48-bit one. Here, in my opinion, the scanner manufacturer still plays a big role. And again, the good old truth comes to light - trust only your own eyes! So, only you yourself can really assess whether this scanner is satisfied with its color rendering or not when you check it at a computer company upon purchase. And try not to listen to the advice of computer company managers. And always remember that their main task is to “sell” you a more expensive scanner, and they, as a rule, have a very good tongue and are able to “talk” many buyers, especially inexperienced ones, so their advice can lead to the wrong choice .
Dynamic range is a scanner parameter that, as a rule, is not indicated on most amateur scanner models, so we will not consider it in detail. I can only say that you should pay attention to it if you are going to scan X-rays and photographic negatives or slides.
But I think that few users will want to do this at home. And activities such as scanning X-rays are still a professional field, which means they are not relevant to this article. It’s a completely different matter that now for a large number of scanners, manufacturers offer so-called slide adapters in the kit, which are designed for scanning photographic film. But personally, I treat these slide adapters as some kind of children's toy. After all, in fact, these slide adapters are simply not capable of scanning photographic film with good quality. So, with the help of them you will never get high-quality photos. Moreover, the resulting image will also need to be printed on a good photo printer, which is by no means a cheap pleasure. So, my advice to you is to take your film to any darkroom, and there you will get high-quality and inexpensive prints.
Another important point that you should pay attention to when purchasing a scanner is its connection type. Now there are many different interfaces, but you have to clearly determine for yourself which one to choose. The most once common and, probably, the most ancient connection methods today are through LPT and COM ports. These connection methods are simple and convenient, but it should be borne in mind that the speed of data transfer to the computer when using them is quite low, and now it no longer meets the requirements of an increasing number of users, whose demands, as we know, are growing by leaps and bounds. hours. However, they are growing as quickly as computer technology is developing now.
But that’s not the point: before you even blink an eye, the scanner you bought yesterday is no longer being produced today. In addition to the low data transfer speed, through these ports you can also stumble upon all sorts of problematic conflicts with other peripheral devices, for example, with an LPT printer or with a mouse.
A USB port is a very common way to connect scanners today. It undoubtedly has many advantages compared to LPT, and even more so with COM ports, although it is a little more expensive than the latter. Firstly, USB scanners work faster: information flows through a USB cable at a fairly high speed. As a rule, there are never problems with other peripheral devices, but, unfortunately, some models of USB scanners have problems with some motherboards.
For example, I myself was convinced that some UMAX USB scanners simply refuse to work with motherboards based on the 815 chipset. So, if you decide to buy a USB scanner, I advise you to check your scanner when purchasing it to see if it works with your system unit and make sure that everything works fine. Well, where are the roots of such conflicts buried? Probably no one will give an exact answer to this question. Perhaps the answer lies in the already outdated drivers for the UMAX scanner, which for some reason no one is in a hurry to update. Perhaps the USB ports are still quite “raw” and still need to be improved. In any case, the problem exists, and you should not turn a blind eye to it when choosing a scanner.
SCSI controller. This is also a very common way to connect scanners lately. There are simply no disadvantages to such a controller - only advantages. Firstly, this controller works without conflicts with the equipment. Secondly, on this controller, in addition to the scanner, you can “hang” a bunch of external SCSI devices. The operating speed of such a scanner is the highest, but such a scanner is somewhat more expensive than similar scanners with a different interface. But trust me, this price difference is worth it!
And finally, the combined interface. Sometimes scanners use a combined interface, for example SCSI + USB. But, in my opinion, there is no point in overpaying for a dual interface. Isn’t it better to immediately choose the right one for yourself?
So, you are already armed with some knowledge necessary to choose a scanner for your home. All I have left to do is give you some more helpful tips for choosing the best scanner for your needs.
Pay attention to the software that comes with the scanner. It is very important. And the first thing that must come with the scanner is its Twain driver. The fact is that Microsoft did not include scanners in the list of standard Windows devices; leading scanner and software manufacturers created this standard on their own, and it became known as TWAIN. The Twain scanner driver is a software application with a graphical interface. The comfort of your work with the scanner depends on how well the scanner driver is made.
Using it, you can completely control the scanning process: set the required scanning area, select scanning parameters. Pay attention to what kind of interface this program has, whether it has all the necessary settings to obtain an image of maximum quality, such as color correction, adjusting the brightness and contrast of scanning, and other specific functions necessary for complete high-quality setup of the scanner. Please note if it is possible to save custom settings. This is, in fact, very convenient: you just sit and suffer once, but configure your scanner properly, and you will never need to repeat its settings again.
In general, take a closer look at all the features of the scanning program and determine whether it meets your needs. After all, sometimes it happens that the scanning program does not include practically any scanner image settings, and only a few standard scanning modes are offered to choose from. This kind of universalism will not lead to optimal image quality. And you still have to “squeeze” the best image from an amateur scanner manually.
When you decide on a specific scanner model and come to buy it from a computer company, be sure to test it in action. Scan a sheet of color image on a white background. Be sure to scan the entire sheet, and not just some part of it, because... a scanning defect may appear in any corner of the sheet. Pay attention to how accurately the colors are transferred to the monitor from the original, especially if you are buying a scanner to scan primarily color images. Pay special attention to how the white background color is rendered. Is there any noise (dirt or just any shade other than white).
I want to warn you right away that almost all amateur scanners produce noise on a white background, and here you only have to look at how intense they are. On this occasion, I want to give you advice: if you see any noise on a white background, then try to slightly increase the contrast and at the same time the brightness of the scan. Personally, this helped me almost completely get rid of noise. In general, carefully study the resulting scanned image. Are there any stripes, spots, streaks or other image defects? Pay attention to the clarity of scanning of small parts at the appropriate scanner resolution. In general, trust only your own eyes and your own feelings.
After all, you yourself are the user of this scanner, and it is you who will have to work with it in the future. And it is how seriously and competently you approach the problem of choosing a home scanner that determines how high-quality and necessary a scanner you will purchase for your needs, spending the least amount of money on it.
A scanner is an office device designed to analyze, read information and transfer it to digital format. Information received on a computer using this device is usually called scans, or scanned copies.
Transfer process graphic or text information into electronic form is called scanning. That is, this equipment performs the reverse of printing - it transfers information from paper to a computer in the form of a file.
The scope of their application is wide, ranging from home use to the creation of printing. It does not allow you to make a copy of a document immediately, but only after processing on a computer, unlike a copier, which immediately prints the result.
What types of scanners are there?
There are quite a large number of types of scanning devices. At a minimum, the most basic and modern, seven categories.
Film scanner
They are designed to recognize images captured on the negative, photographic film or slides. Such a device can only scan a transparent image.
This variety must have certain properties. The first is permission. In modern models, this parameter varies from 4000 dpi and above. Therefore, the images obtained when working with them have maximum accuracy.
Second parameter - optical density. The equipment works with films and slides of various formats. However, it maintains high operating speed and output image quality.
Depending on the cost, it is equipped with various additional functions. For example, color correction, removing dust and scratches, removing fingerprints and many others.
Laser scanner
This device is widely used for reading various barcodes. This is what allows us to uncontrolled monitoring specially programmed zone. For example, in shops, ticketless transport, for monitoring an object, etc.
This technology allows you to create a 3D model of any product, building or other object without drawings. 
Handheld scanners
It is used mainly for working with small amounts of text material. Scanning is carried out by moving the handle slowly across the working area.
Exists many modifications such a scanner:


Wide format scanners
This device is used to scan information from large formats. For example, technical documentation of designers, architects, builders, etc. This species is quite mobile. They are easy to move, light weight and compact in size.
One of the types of wide format scanner is plotters, which are used mainly in offices, design bureaus and the advertising printing industry. 
Professional scanners
The fastest type of scanning equipment. Mainly used in educational, scientific, financial and other administrative institutions.
This device is capable of operating in a continuous flow, automatically submit original documents for scanning. It has high quality file processing and the function of editing the resulting images. 
Book or planetary scanner
Used for scanning without contact with the original. Most often, it is used to digitize books and images of historical value. It is contactless work that allows you to quickly and without damage transfer the necessary information into digital format. 
Flatbed scanner
The most common and affordable type of digitization equipment. It is used everywhere. Suitable for both home use and work in organizations. Capable scan any documentation up to A4 format. 
How does a scanner work and how is it designed?
The standard device is a portable rectangular plastic case with a hinged lid on it. Under this cover is glass surface, on which the sheet to be scanned will be placed.
Inside, the equipment consists of a movable carriage with a mirror system, lens and backlight. When the light from the lamp hits the scanned original, it is reflected and falls on the optics located inside. The resulting electrical impulse contains information about the shape, color and other parameters of the original. 
All this information goes into the computer and deciphered special software drivers. After which, on the monitor you see a scanned image that fully matches the document that you loaded into the scanning device.
How to use the scanner
Turn on the equipment. Connect it to your computer using a special cord. Once the device is connected, click the " Start» on a standard panel on a PC. You need the item “All programs”, then click on “ devices and printers"(or use the search in the system).
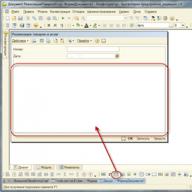
Click on " Scan" in the lower left corner of the opened program window, and then select "New Scan" from the toolbar.
A new dialog box will open in which you need to click the list “ Profile" and select the line "Documents". This section will automatically display the default scan settings, you can change them if you wish and preview what the scanned copy will look like. To do this, click “View”.
To start the scanning process, click the " Scan».
Important! Correct operation is possible only if there are special software drivers on the PC that match the brand of the device. They can be downloaded from the official website or installed from the disk included in the package.
It is worth noting that the procedure is identical for printers with a built-in scanner.
Basic Settings and Precautions
There are several basic important parameters, they are the same for all devices:
- File type. The resolution of the file in which the scanned image is saved on your computer. For example, PDF, JPEG, etc.
- Permission. A parameter characterizing the detail of the resulting digital copy. The larger this property, the more memory is required to store it.
- Scan type. Determines the color depth of the image. There are types such as black and white scanning, grey, color and auto.
- Brightness. Used to adjust image detail. The standard value is 0, the adjustment range is from -50 to 50.
- Contrast. Increasing this setting emphasizes the dark and light areas of the picture. When reduced, on the contrary, they lighten and dim.
- Duplex scanning. Selecting this option will copy both sides of the document.
- Auto-rotate image. Automatically changes the orientation of the resulting scan result.
- Skip blank pages. Eliminate pages without information from the final document.
Precautionary measures using:
- Use the power source supplied with the device only.
- Do not leave the equipment plugged in after use.
- Do not connect the scanner to the computer when its power supply is turned on.
- If there is a malfunction, do not use the equipment until the technician arrives.
- Make sure that dirt, water and other substances that can harm the device and render it unusable do not get into the equipment.
- If your device gets hot, makes strange noises, won't scan, etc., don't try to fix it yourself.
How to use a copier on an MFP
MFP is a device that combines copier, scanner and printer capabilities.
In order to photocopy, the MFP must be connected to an electrical outlet, but it does not have to be connected to a computer.
Place the required document under the equipment cover, press the " Start" on the case and the device will give you a sheet with a scanned and printed copy.
It is worth noting that photocopying means obtaining one or more exact copies on paper.
What to do if the scanner does not scan
First of all, see if it is connected to your personal computer. Are the connecting wires damaged?
Try restarting your device and PC. If the scanner still does not work, call your hardware service center.
The scanner is designed to create digital copies of images. The process of obtaining such an image is called scanning. Before you start, connect your scanner to the network and to your computer or laptop, and place the document you want to scan inside the scanner (on the glass surface, according to the instructions). Here's how to start scanning with your scanner:
If you are using Windows XP, you can use the Scanner or Camera Wizard:
Insert the document you want to scan into the scanner.
From the Start menu, select All Programs, Accessories, and then Scanner or Camera Wizard. The Scanner or Camera Wizard window appears. Click "Next".
On the Select Scan Preferences page, select the Image Type that best suits the document you are scanning, and then click Next.
On the “Select Image Name and Destination” page, enter a name for the image, select the JPG file format, and specify the folder where you want to save the scanned image, and then click “Next”.
Windows will scan the document. On the Other Options page, select Nothing. Then click the “Next” button.
On the Completing the Scanner or Camera Wizard page, you can view your scanned document by clicking the link provided. If the result does not meet your requirements, click the Back button to return to the Select Scan Preferences page. Click the “Finish” button to close the wizard window and open the folder with the scanned document.
If you are using Windows 7 or 8, you should use “Windows Faxes and Scanners”:
Click the Start button, select All Programs, and then click Windows Fax and Scan.
Click the “Scan” button at the bottom of the left panel.
On the toolbar, click the “New Scan” button.
In the New Scan dialog box, click the Profile list and select Documents. The default document scan settings will then be automatically displayed and you can apply or change them.
To see what the scanned document will look like, click Preview.
To scan a document, click the “Scan” button.
Please note that correct scanning on your scanner is only possible after installing the correct device driver. You can download it from your scanner manufacturer's website. You need to install the driver before starting the scan. If your scanner is combined with a printer, use the driver from the manufacturer of your MFP. And you can always buy a good scanner or MFP in ours.
Many of you, more often or less often, are faced with the need to transfer information (text, graphics, photographs) from paper to a computer. The main assistant in solving this issue is a scanner. This can be either a stand-alone device or an MFP with scanning capabilities.
Preparing to scan from your printer to your computer
In order to begin the scanning process itself, you must have a computer and a scanner (or an MFP with the latter function) at your disposal.
- Turn on the computer and printer.
- Connect the MFP (or scanner) to a power source and to your computer.
- Place the document, book, photograph or other paper medium from which information should be read with its front side on the scanner glass.
This completes the preparatory stage.
How to scan an image from a printer to a computer
Paint program
The presence of this graphic editor will help you carry out the procedure for transferring data to your computer easily and quickly.
- Launch the Paint program. To do this, click on its shortcut (icon) on the desktop or go to “Start” - “All Programs” - “Accessories” - “Paint”.
- In the upper left corner of the program that opens, go to the “File” menu or click on the white rectangle with a drop-down list (in the same corner).
- In the list provided, select “Get image” – “From a scanner or camera” (or “From a scanner or camera”). If this menu item is not active, it means the scanner is not ready for operation (check the connection of the device to the power source and the computer).
- A window appears on the screen in which you select the required device - your printer, the type of image to be scanned (color or black and white).
- Afterwards, press the “Scan” button.
- Ready. Here is a scanned image that you can edit if desired.
- To save the picture, go to the “File” menu and select “Save As,” indicating the path in the directory where the resulting file will be stored. The most common saving formats are .JPEG and .png.
Using a scanning app
- Install the necessary drivers for your printer on your computer. To do this, you can use the disk that came with the device, or download them from the Internet.
- Go to “Start” – “Devices and Printers” (or “Start” – “Control Panel” – “Devices and Printers”).
- Right-click on your printer icon and select “Start Scan” from the drop-down list.
- A window opens in which you set scanning parameters: the type of source document, color or black and white image will be received, the resolution of the finished image, in what format the file will be saved.
- Click the “Scan” button.
- As a result, a scanned image will appear on the screen, to which you assign a name and indicate the path to place it on your computer.
Image resolution when scanning from printer to computer
Resolution is one of the important parameters of the final image. It is he who determines the detail (clarity) of the picture. For text documents, you should not set excessively high values - this is not necessary, and more time will be spent on the scanning process. And remember that you can reduce the resolution of the resulting image (in a graphics editor), but you cannot increase it; you will need to rescan the document.