Google has officially released Android Oreo for the eligible Nexus and Pixel devices but the Android Nougat still remains the most awaited OS update for millions of Android users. The Galaxy J7, a mid-range offering from Samsung, was launched in the mid-2015 with Android Lollipop and it received the Marshmallow update the last year.
At a time when most J7 users had lost hopes of getting any major software update, the news of the Nougat update rollout for the devices has taken its users by a pleasant surprise. Yes, the Android Nougat OTA update with build version J710FNDDU1BQH7 is being rolled out in select countries. If you own the SM-J710F or SM-J710FN models of the Galaxy J7 (2016), you can install the Android 7.0 Nougat Firmware on Samsung Galaxy J7 right away.
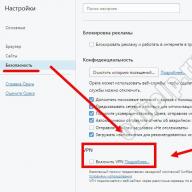
If you have not yet received the Nougat OTA update notification on your Samsung Galaxy J7 (2016), you can check the availability of the update by going to Settings> About device> Software update and tapping the “Download updates manually” option. Alternatively, you can download the official Android 7.0 Nougat firmware from below and install it using Odin.
Being an old phone, the Android 7.0 Nougat is a really big update for the Galaxy J7 because it brings a whole new experience and features along with the Samsung Experience UX 8.1. Having updated your devices to the latest software, you will be able to enjoy features like-
- Fast performance.
- Improved battery life with all-new power saving modes.
- A higher degree of home screen customization.
- Revamped UI and Quick Settings and notification panel.
- New Doze mode for better management of running in the background.
- Many others…
Screenshots
Download Android 7.0 Nougat Firmware for Galaxy J7 (2016)
Firmware details
- device: Samsung Galaxy J7 (2016)
- Model: SM-J710F | SM-J710FN
- Software version: Android 7.0 Nougat
- Security Patch Level: 2017-08-01
- PDA: J710FNDDU1BQH7
- CSC: J710FNODD1BQH6
- Country: India
SM-J710F:
SM-J710FN:
Install Android 7.0 Nougat Firmware on Samsung Galaxy J7 (2016)
Now here are the Android Nougat firmware installation instructions.

When your Samsung Galaxy J7 boots up, go through the initial setup and then you’ll be able to enjoy the all new Android Nougat on your phone.
I bring to your attention a detailed, step-by-step instruction for flashing a Samsung Galaxy J7 SM-J700 smartphone to a new official or custom firmware. Obtaining root rights on the Samsung Galaxy J7 SM-J700, installing custom TWRP Recovery.
Installing the official firmware on the Samsung Galaxy J7 SM-J700 smartphone using the Samsung Odin service program. In order to install a new firmware on a smartphone, you first need to download several files to your PC:
Download the latest Official Firmware for Samsung Galaxy J7 SM-J700 – Android_6.0.1_J700HXXU2BPF2 or Android_5.1_J700HXXU1APA3
Before flashing your phone, you first need to decrypt it.
To remove the lock from the Samsung Galaxy J7 SM-J700, you need to disable the reactivation lock. Go to "Settings" - "Lock screen and protection" - "Find my phone" and turn off "Activation Lock" Before and after the firmware update procedure, you must do a general reset of the device to factory settings in order to avoid all sorts of errors and slowdowns of the interface.
When you perform this procedure, all your data and files will be permanently deleted.
Option 1: On the device, open "Settings" > "Backup and reset" > "Account" > "Data reset" > "RESET DEVICE" and click "Delete everything"
Option 2: Turn off the device, press and hold the buttons "Volume Up (Volume Up)", "Home (Central)" and "Power (Power)" and after a few seconds the "Recovery" menu will appear. In the "Recovery" menu, select "Wipe data / factory reset" -> "Yes - delete all user data", the deletion of all user data will begin. After the process is complete, select "Reboot system now" and the device will start to reboot.
You can skip this step, but remember! If you do not reset the data, after the update, “lags” and unstable operation of the device as a whole may appear due to the tails of the previous firmware, and more recently, before completely resetting the smartphone, you also need to delete your Google account, otherwise the smartphone may be blocked.
After you have downloaded everything, unpack the archive with the driver for Samsung Galaxy J7 SM-J700 and install it. Then unpack the archive with Odin and the firmware.
We launch the Galaxy J7 Odin firmware program as an administrator. To do this, hover over Odin and right-click and select Run as administrator, then click Yes.
After starting Odin, we arrange the firmware files in the following order:
The BL file……….tar.md5 is inserted into the “BL” field
The AP file……….tar.md5 is inserted into the “AP” field
Insert the CP file……….tar.md5 into the “CP” field
The CSC file……..tar.md5 is inserted into the “CSC” field

We check that the “checkmarks” are only in the fields “Auto Reboot” and “F. Reset Time”
We transfer the Samsung Galaxy J7 SM-J700 phone to the firmware mode. To do this, turn off the phone and then press and hold the "Volume Down", "Home" and "Power" buttons and after the menu with a yellow triangle appears, press the "Volume Up" button
We connect the smartphone using the supplied USB cable to the PC and in the Odin program, the inscription “COM” should appear in the upper left corner, highlighted with a blue background, after which we press the “Start” button.
Note: If for some reason your PC does not recognize your device, try reinstalling the driver and / or try other USB ports.
The smartphone firmware process has been started. After successful firmware, the device will reboot automatically and “Finish” will appear in the Odin program.

Installing custom recovery TWRP Recovery v3.0 on Samsung Galaxy J7 SM-J700

And so let's start installing custom recovery on Samsung j7
If you have not installed the Samsung drivers on your PC yet, then download and install. Then connect your smartphone to your computer using a standard USB cable. After the PC recognizes the phone, additional drivers and updates will be automatically installed before the phone is installed.
We need the Odin 3 program, download Odin
Then download the custom recovery for Samsung J7 SM-J700 TWRP Recovery for firmware J700HXXU2BPF2 (OS 6.0.1)
Turn off your smartphone, and then (with it turned off) press and hold the “Sound down” + “Power” + home key until the phone boots into Odin mode (Download Mode). You will see a warning, confirm the desire to boot in this mode by pressing the "Volume up" key.
Transferred phone to Odin Mode, connect to PC using a standard USB cable.
Run the Odin 3 flash driver on the PC as an administrator
In the AP line, specify the path to the previously downloaded file with custom recovery J7 TWRP Recovery with the extension “.img.tar” and select it
Remove the checkmark from “auto reboot” and press start (the phone should flash, the flashing time is no more than 30 seconds, the result should be like this (succeed 1/ failed 0);
Until the firmware process is completed, do not touch the Smartphone, usually the firmware lasts no longer than 30 seconds.
Without including the gadget in working condition, directly from the Download mode we go to the newly installed TWRP Recovery by holding down three buttons (volume up + home + power button, release the buttons when Samsung appears).
All! We rejoice.
Installing custom firmware on Samsung Galaxy J7 SM-J700
To install custom firmware on a Samsung Galaxy J7 SM-J700 phone, you need to have TWRP Recovery custom recovery, if you don't have it, see the paragraph above.
Download to your PC any custom firmware that you like, for example - Notexperience_Rom_For_J7_V2.zip or cm-13.0-20160521-UNOFFICIAL-j7eltexx.zip
Then copy the firmware file to the phone's memory. Then turn off the smartphone and boot into the custom recovery TWRP Recovery (on the switched off phone, hold down the power buttons + volume up button + HOME)
And through TWRP Recovery install the firmware file:
Go to Wipe and select Advanced Wipe
Check the boxes: “Davlik Cache”, “System, Data”, “Cache”, “Android Secure”.
Doing "Swipe to Wipe"
Go to Install -> Select the memory where the custom firmware is located, and select Swipe to Confim Flash, the installation will begin
After installation in the recovery, select the Reboot -system item and the device will reboot.
Ready! You have successfully flashed custom firmware! reboot your smartphone and use it with pleasure (without paying attention to custom firmware bugs)
Samsung Galaxy J7 (2016) SM-J710F is a branded smartphone running on Android 5.1. Here you will learn the characteristics, how to get root or reset the settings, and you can also download firmware (for Odin, for example) and instructions for Samsung.
Root Samsung Galaxy J7 (2016) SM-J710F
How to get a root for Samsung Galaxy J7 (2016) SM-J710F see instructions below.
If the applications did not help, ask in the topic or use the full list of root utilities from the topic header.
Characteristics
- Type: smartphone
- Operating system: Android 5.1
- Case type: classic
- control: mechanical / touch buttons
- SAR level: 0.35
- SIM card type: micro SIM
- Number of SIM cards: 2
- Multi-SIM Operation Mode: Alternate
- Weight: 169g
- Dimensions (WxHxD): 76x151.7x7.8 mm
- Screen type: color AMOLED, 16.78 million colors, touch
- Touch screen type: multi-touch, capacitive
- Diagonal: 5.5 inches.
- Image size: 1280x720
- Number of pixels per inch (PPI): 267
- Automatic screen rotation: yes
- Camera: 13 megapixels, LED flash (front and rear)
- Camera Features: Auto Focus
- Aperture: nF/1.9
- Video recording: yes
- Max. video resolution: 1920x1080
- Front camera: yes, 5 million pixels.
- Audio: MP3, AAC, WAV, WMA, FM radio
- Headphone Jack: 3.5mm
- Standard: GSM 900/1800/1900, 3G, 4G LTE
- Support for LTE bands: FDD LTE: 2100, 1800, 850, 2600, 900, 800 MHz; TDD LTE: 2300 MHz
- Interfaces: Wi-Fi n802.11n, Wi-Fi Direct, Bluetooth 4.1, USB, ANT+, NFC
- Satellite navigation: GPS/GLONASS/BeiDou
- Processor: 1600 nMHz
- Number of processor cores: 8
- Built-in memory: 16 GB
- The amount of memory available to the user: 10.80 GB
- n RAM: 2 GB
- Memory card slot: yes, up to 128 GB
- Battery capacity: 3300 mAh
- Battery: Removable Talk time: 23 hours Music time: 96 hours
- Speakerphone (built-in speaker): there is a control: voice dialing, voice control
- Flight mode: yes
- A2DP profile: yes
- Sensors: proximity, Hall
- Flashlight: yes
Review Samsung Galaxy J7 (2016) SM-J710F
The smartphone was liked primarily by its autonomy, performance, but at the same time the case is rather slippery and it is inconvenient. For example, in terms of battery life: 2 days of using the phone (connection, Wi-Fi, games, some gps, a lot of social networks and forums) and there are still 19% left. It also happens that it slows down a little, a little bit (perhaps because of the tachwiz). The case is not a monolith, there are no creaks, but it does not reach the feeling of monolithic iPhone. If you look closely, you can see the pixels (well, it's understandable, because the resolution is not extremely high). Such another moment, in auto mode, the connection is constantly interrupted, it is better to choose 3G / 2G. As you understand, 4G does not always catch.
»Firmware for Samsung Galaxy J7 (2016) SM-J710F
Android 5.1 official firmware [stock ROM file] -
Samsung custom firmware -
If custom or official firmware for Samsung has not yet been added here, then create a topic on the forum, in the section, our specialists will quickly and free of charge help, incl. with backup and manuals. Just do not forget to write a review about your smartphone - this is extremely important. Firmware for Samsung Galaxy J7 (2016) SM-J710F will also appear on this page. Please note that this Samsung model requires an individual ROM file, so you should not try firmware files from other devices.
What are custom firmware (firmware)?
- CM - CyanogenMod
- lineageOS
- paranoid android
- OmniROM
- Temasek's
- AICP (Android Ice Cold Project)
- RR (Resurrection Remix)
- MK(MoKee)
- flymeOS
- Bliss
- crDroid
- Illusion ROMS
- Pacman ROM
Problems and disadvantages of a Samsung smartphone and how to fix them?
- If the Galaxy J7 (2016) SM-J710F does not turn on, for example, you see a white screen, hangs on the splash screen, or the notification light only blinks at all (possibly after charging).
- If it freezes when updating / freezes when turned on (requires flashing, 100%)
- Not charging (usually, hardware problems)
- Can't see sim card
- The camera does not work (for the most part, hardware problems)
- Sensor not working (depending on the situation)
Hard Reset for Samsung Galaxy J7 (2016) SM-J710F
Instructions on how to make a Hard Reset on Samsung Galaxy J7 (2016) SM-J710F (factory reset). We recommend that you familiarize yourself with the visual guide, which is called on Android. . 
Reset codes (open the dialer and enter them).
- *2767*3855#
- *#*#7780#*#*
- *#*#7378423#*#*
Hard Reset via Recovery
- Turn off the device-> go to Recovery
- "wipe data/factory reset"
- "yes - delete all user data" -> "Reboot System"
How to enter Recovery?
- hold and hold Vol (-) [volume down], or Vol (+) [volume up] and the power button (Power)
- a menu with the Android logo will appear. That's it, you are in Recovery!
Reset settings on Samsung Galaxy J7 (2016) SM-J710F can be done in a very simple way:
- Settings->Backup & Reset
- Reset settings (at the very bottom)
How to reset pattern
How to reset pattern if you forgot it and now you can't unlock your Samsung smartphone. On the Galaxy J7 (2016) SM-J710F, the key or PIN can be removed in several ways. You can also remove the lock by resetting the settings, the lock code will be deleted and disabled.
- Reset graph. blocking -
- Password reset -
Detailed, step-by-step instructions on how to flash a Samsung Galaxy J7 (2016) SM-J710F smartphone to a new official or custom firmware. Obtaining Root superuser rights on Samsung Galaxy J7 (2016) SM-J710F, installing custom recovery TWRP Recovery.
Installing the official firmware on the Samsung Galaxy J7 (2016) SM-J710F smartphone using the Samsung Odin service program. In order to install a new firmware on a smartphone, you first need to download several files to your PC:
Download Latest Official Firmware for Samsung Galaxy J7 (2016) SM-J710F
Official service multi-file firmware Galaxy J7 (2016) - J710FXXU1A
official single-file firmware Galaxy J7 (2016) - J710FXXU1AP
Before flashing your phone, you first need to decrypt it.
To unlock the Samsung Galaxy J7 (2016), you need to turn off the reactivation lock. Go to "Settings" - "Lock screen and protection" - "Find my phone" and turn off "Activation Lock" Before and after the firmware update procedure, you must do a general reset of the device to factory settings in order to avoid all sorts of errors and slowdowns of the interface.
When you perform this procedure, all your data and files will be permanently deleted.
Option 1: On the device, open "Settings" > "Backup and reset" > "Account" > "Data reset" > "RESET DEVICE" and click "Delete everything"
Option 2: Turn off the device, press and hold the buttons "Volume Up (Volume Up)", "Home (Central)" and "Power (Power)" and after a few seconds the "Recovery" menu will appear. In the "Recovery" menu, select "Wipe data / factory reset" -> "Yes - delete all user data", the deletion of all user data will begin. After the process is complete, select "Reboot system now" and the device will start to reboot.
You can skip this step, but remember! If you do not reset the data, after the update, “lags” and unstable operation of the device as a whole may appear due to the tails of the previous firmware, and more recently, before completely resetting the smartphone, you also need to delete your Google account, otherwise the smartphone may be blocked.
After you have downloaded everything, unpack the archive with the driver for Galaxy J7 (2016) SM-J710F and install it. Then unpack the archive with Odin and the firmware.
We launch the program for firmware Galaxy J7 2016 Odin on behalf of the administrator. To do this, hover over Odin and right-click and select Run as administrator, then click Yes.
After starting Odin, we arrange the firmware files in the following order:
The BL file……….tar.md5 is inserted into the “BL” field
The AP file……….tar.md5 is inserted into the “AP” field
Insert the CP file……….tar.md5 into the “CP” field
The CSC file……..tar.md5 is inserted into the “CSC” field
We check that the “checkmarks” are only in the fields “Auto Reboot” and “F. Reset Time”
We transfer the Samsung J7 (2016) phone to the firmware mode. To do this, turn off the phone and then press and hold the "Volume Down", "Home" and "Power" buttons and after the menu with a yellow triangle appears, press the "Volume Up" button
We connect the smartphone using the supplied USB cable to the PC and in the Odin program, the inscription “COM” should appear in the upper left corner, highlighted with a blue background, after which we press the “Start” button.
Note: If for some reason your PC does not recognize your device, try reinstalling the driver and / or try other USB ports.
The smartphone firmware process has been started. After successful firmware, the device will reboot automatically and “Finish” will appear in the Odin program.
Installing custom recovery TWRP Recovery v3.0 on Samsung Galaxy J7 SM-J710
And so let's start installing custom recovery on Samsung j7
If you have not installed the Samsung drivers on your PC yet, then download and install. Then connect your smartphone to your computer using a standard USB cable. After the PC recognizes the phone, additional drivers and updates will be automatically installed before the phone is installed.
We need the Odin 3 program, download Odin
Then download the custom recovery for Samsung J7 SM-J710
Turn off your smartphone, and then (with it turned off) press and hold the “Sound down” + “Power” + home key until the phone boots into Odin mode (Download Mode). You will see a warning, confirm the desire to boot in this mode by pressing the "Volume up" key.
Transferred phone to Odin Mode, connect to PC using a standard USB cable.
Run the Odin 3 flash driver on the PC as an administrator
In the AP line, specify the path to the previously downloaded file with custom recovery J7 TWRP Recovery with the extension “.img.tar” and select it

Remove the checkmark from “auto reboot” and press start (the phone should flash, the flashing time is no more than 30 seconds, the result should be like this (succeed 1/ failed 0);
Until the firmware process is completed, do not touch the Smartphone, usually the firmware lasts no longer than 30 seconds.
Without including the gadget in working condition, directly from the Download mode we go to the newly installed TWRP Recovery by holding down three buttons (volume up + home + power button, release the buttons when Samsung appears).
All! We rejoice.
Installing custom firmware on Samsung Galaxy J7 (2016) SM-J710
To install custom firmware on a Samsung Galaxy J7 phone, you need to have TWRP Recovery custom recovery, if you don't have it, see the paragraph above.
Download on your PC any custom firmware that you like, for example - Samsung J7 Mod, FunsterROM v1.2, D_M_R_3.4 (DEODEX_MOD_ROM)
Then copy the firmware file to the phone's memory. Then turn off the smartphone and boot into the custom recovery TWRP Recovery (on the switched off phone, hold down the power buttons + volume up button + HOME)
And through TWRP Recovery install the firmware file for J710f
Go to Wipe and select Advanced Wipe
Check the boxes: “Davlik Cache”, “System, Data”, “Cache”, “Android Secure”.
Doing "Swipe to Wipe"
Go to Install -> Select the memory where the custom firmware is located, and select Swipe to Confim Flash, the installation will begin
After installation in the recovery, select the Reboot -system item and the device will reboot.
Ready! You have successfully flashed custom firmware! reboot your smartphone and use it with pleasure (without paying attention to custom firmware bugs)
Root superuser rights on Samsung Galaxy J7 (2016) SM-J710
Usually, all custom firmware already contains root rights, so to get root, you will only need to install a modified firmware. But if suddenly you do not want to install custom firmware or custom does not contain root, then follow the instructions below.
To successfully root a Samsung J7 (2016), you must have a custom TWRP recovery (you can install it according to the instructions above)
Obtaining Root rights.
1. Copy the file “UPDATE-SuperSU-v2.76-20160630161323.zip” to the root of the SD card.
2. On the smartphone, in the “Developer options” section, activate “USB debugging” and “Unlock, provided. prod. OEM”
3. We go into TWRP (with the phone turned off, hold down “Home + Vol_Up + Power”).
4. Next, go to “Installation” and find “UPDATE-SuperSU-v2.76-20160630161323.zip” on the SD card, install.
5. Click "Reboot to OS". The download will be quite long, the phone may reboot several times, this is normal.
6. Check for Root rights.
7. We don’t touch the “Developer options” - the activated items do not interfere with you.
After installing TWRP, you can format the “Data” partition to return to factory settings. TWRP and SuperSU are not going anywhere.
Samsung Galaxy J7 2016 Android Nougat Firmware is now available for download. The update is an official stable build and based on latest Android Nougat. If you want to flash stock Android Nougat update on Galaxy J7 2016 then you are in the right place here we provide you the Official Galaxy J7 2016 Android 7.0 Nougat Firmware for SM-J710FN models. Download Samsung Galaxy J7 2016 Android 7.0 Nougat Firmware from below.
Galaxy J7 2016 Nougat Update rolling out via OTA for SM-J710FN users in India and soon will be rolled out in other countries also . To install Android 7.0 Nougat update on Galaxy J7 2016 all you need is the Nougat Firmware file for Galaxy J7 2016 and . You can Download Galaxy J7 Nougat Update from below . also,
- This Firmware file is only for Galaxy J7 2016 SM-J710FN. Don't try this on any other device.
- Follow the steps correctly otherwise you may brick your device.
- We are not responsible for any damage to your phone.
- It may erase your data so it is advisable to take a complete for safer side.
- Ensure that your phone has at least 50-60% charged to prevent the accidental shutdown in between the process.
Firmware information:
- Model -SM-J710FN
- Model name – Galaxy J7 (2016)
- Country–India
- Version - Android 7
- Changelist - 12138476
- Build date – Thu, 24 Aug 2017 11:39:11 +0000
- Security Patch Level – 2017-08-01
- Product code - INS
- PDA-J710FNDDU1BQH7
- CSC-J710FNODD1BQH6
- Download Samsung Galaxy J7 Nougat firmware for SM-J710FN – Download
- Download Galaxy J7 2016 Nougat firmware for SM-J710F – Download (Coming Soon)
How to Install Android 7.0 Nougat on Galaxy J7 2016 –
Flashing firmware on Galaxy J7 2016 is very easy, all you have to download the firmware file from above and unzip it. After that flash the file via Odin. If you want detailed instructions with images then check below link.