Hello! Please tell me how the tool works ( F11 Boot Repair) in Acronis True Image 2016? How to activate it and how to use it correctly in UEFI systems and regular BIOS?
Hello friends! Many times you asked us to tell you about the tool Activate Acronis Startup Recovery Manager (F11 Boot Recovery) integrated into the Acronis True Image 2016 program. In fact, there is not much to tell, using this tool is very simple, even a beginner can handle it.
It was developed in case of a serious failure of the operating system and is usually used if Windows refuses to boot for some reason. In this case, when you turn on the computer, you must immediately press F11 and you will be taken to the Acronis True Image 2016 program, where you can apply recovery using a previously created backup copy of the operating system. No boot disk or flash drive with the Acronis program is needed. After connecting Activate Acronis Startup Recovery Manager, when you boot Windows for a couple of seconds, you will be prompted to use it by pressing the F11 key.
« Starting Acronis loader...
Press F11 for Acronis Startup Recovery Manager...»
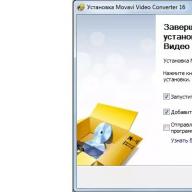
Naturally, to use the tool the first step is to install the program on your operating system .

After installing the program, go to the tab:
Tools->More Tools

Click on the button Activate Acronis Startup Recovery Manager (Activate Startup Recovery).

Boot recovery.
Click "Activate.
True Image can be launched by pressing the F11 button while the computer is booting up."

The Startup Repair module is activated.


From now on, when you turn on the laptop, until the operating system starts, a prompt will appear on the screen to press the key F11 to load into the program Acronis True Image 2016.
"Starting Acronis loader...
Press F11 for Acronis Startup Recovery Manager...»


Choosing Acronis True Image 2016


A spoon of tar :
Unfortunately, Activate Acronis Startup Recovery Manager "F11 Startup Recovery" does not work on most laptops with UEFI enabled, although the program developers promised to solve this problem in the latest version of Acronis True Image 2016.
Competitor:
A similar tool is available from the developer AOMEI, called - and is (in my opinion) the easiest tool for backing up and restoring operating systems.
If for some reason the operating system stops loading, then " Boot recovery" will allow you to start Acronis True ImageHome 2011 without booting the operating system.
You can launch the standalone version of Acronis True Image Home 2011 and restore corrupted partitions by pressing the F11 during download. Unlike booting from bootable media created by Acronis, you do not need separate media or a network connection to run Acronis True Image Home 2011.
To activate "Startup Repair" , on the toolbar, click "Tools and Utilities" and select "Startup Repair".
You can also run Acronis True Image Home 2011 from bootable media: from a CD or from a USB flash drive.
Some motherboards have a boot selector that can be opened by pressing a specific key or key combination, such as F11 ( F8, F10 F12) , depends on BIOS version.The boot menu allows you to select a device to boot from a list of bootable devices without changing the BIOS settings. You can determine the keyboard shortcut at boot time when the hardware is being tested.
If there is no boot selector, then the BIOS of the computer has a built-in Setup utility, which is designed for the initial setup of the computer. The Setup utility is entered immediately after the computer is turned on while the computer is booting up by pressing a certain key or key combination - this can be Del, F1, Ctrl+Alt+Esc, Ctrl+Esc, there may be other key combinations. It depends on the BIOS version. As a rule, the required key combination is displayed immediately after turning on the computer at the bottom of the monitor. Pressing this key combination when the computer boots up will open the Setup utility menu.
If you have previously installed the operating system yourself, then it will not be difficult for you to open the Setup utility and change the boot priority, if you have not done this, then it is better to contact a specialist for the first time.
Let's consider system recovery at boot, for example, from a bootable flash drive that contains a bootable version of the program, and also created a backup copy of the operating system.
Turn on the computer or restart the computer. During the boot, when the hardware is being tested, press and hold the F11 key (sometimes a short multiple press is required). If the key F11 load selector will be called BIOS, a menu will appear with the available options for booting from bootable devices.

If you have "Startup Repair" enabled, you can leave booting from the hard drive, press the Enter key, then the F11 key again. The standalone version of Acronis True Image Home 2011 will be loaded. If the BIOS boot selector on your computer is invoked by another key (keyboard shortcut), the standalone version will load immediately when you press the F11 key.
If you want to download the program from a CD, select the option to download from CD-ROM.
Select boot from Flash Disk and press the Enter key.

Select Acronis True Image Home (Full) from the bootable media menu. The "Start page" of the program will open.

To start data recovery, select "Recovery" from the "Start Page" menu.

In the (Data Recovery and Backup Management) section, click "Disk Recovery". The Recovery Wizard window will open.

The program will automatically suggest the last created backup to restore. If this is the copy from which you want to restore data, click "Next", if not, select another one.
However, the backup created on the flash drive is not in the list of backups. To add the desired copy to the list of backups, click "Browse".

Open the contents of "Removable Disk", select the backup in the left window and click OK.


Leave the switch in the "Recover disks and partitions" position.
Click next.

Partition and disk images contain a copy of the MBR (Master Boot Record) disk track zero. If you need it to boot your system, restore it every time.

Now you need to select "New storage", that is, you need to tell the program where to place the data from the backup.
Click on the "New Storage" link.

Specify the partition to place the data from the backup.
Click "Accept".


Specify the disk to restore the Master Boot Record (MBR) and click Next.

The final window contains a list of operations that will be performed when you click the "Proceed" button. After clicking the "Proceed" button, the data recovery procedure will begin.


Click OK. Close the Start Page. After the automatic reboot of the computer, a fully reanimated operating system will boot.
Using a bootable USB flash drive, you can easily and quickly restore (transfer, clone) the operating system with all the applications of the old hard drive to a new (different) hard drive.
Using the program's built-in "Startup Repair" feature is easier and will help in 90% of operating system emergencies. The bootable media created by the program is more difficult to use, but it will help in 100% of cases.
If, instead of changing partitions with Acronis Disk Director, which was scheduled after a reboot, you see only the following error message:
ERROR OCCURRED:
Text Error while loading configuration file
Code: 00000000009B0001 C99355CCD3E906BB
SUBERROR:
Text Error: The Specified File Does Not Exist
Code: 0000000000040011 8A6441D30679BD24
SUBERROR:
Code: 00000000D0000034 BD28FDBD64EDB8C6
press
After pressing the key
To solve this problem and successfully download, you must delete the file autopart.exe from the Windows folder, and then from its registry. To do this, you need to do the following steps:
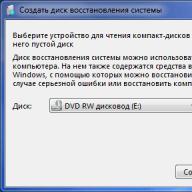
1. Download computer recovery.
2. Run command line:

Restoring a computer in Windows 7

Restoring a computer in Windows 8
3. Determine on which logical drive the Windows folder is located. (We will use the disk as an example D:).
4. Enter the following commands (after entering each command, press the key
- D: (We determine the logical drive with which we work)
- cd \Windows\System32 (go to Windows\System32 folder)
- dir autopart.* (we select all files that have the word autopart in their names. Usually, the selection results will contain files autopart.exe, autopart.opt and autopart.cfg)
- delautopart.exe (remove the file autopart.exe)
5. We restart the computer. Windows should now boot normally.
6. Launch Registry Editor(regedit).
7. Find the key HKEY_LOCAL_MACHINE\SYSTEM\CurrentControlSet\Control\Session Manager.
8. In it, we look at the value of the multiline parameter BootExecute. If it contains autopart.exe- edit remove this line.

(The normal value for this parameter is autocheck autochk *).
9. Close the Registry Editor.
P.S. Delete a file autopart.exe(pp. 1-4) is also possible by booting from any LiveCD.
This article is devoted to such a software product as: Acronis Disk Director Suite. Here we will look at the following:
- What is Acronis Disk Director Suite;
- Installing and Getting Started with Acronis Disk Director Suite;
- An overview of the basic operations with hard disk partitions.
Acronis Disk Director Suite- a comprehensive software package that includes a partition manager, a boot manager and a toolkit for editing records on a hard disk. With Acronis Disk Director Suite you can:
- Create partitions on the hard drive;
- Resize partitions and their position on the hard drive, divide and merge partitions without the risk of data loss;
- Convert file systems of partitions without fear for the safety of data;
- Copy/move the contents of sections;
- Delete sections;
- Restore hard disk partitions deleted as a result of user error or hardware/software failure;
- Format sections, assign labels and letters to them, hide sections and make them visible, assign an active status to a section, and perform other operations with sections;
- Install several different operating systems on one computer;
- Load them from any partition of any hard drive;
- Boot any installed operating systems directly from Windows;
- Install multiple operating systems on one partition;
- Hide any of the operating systems on your computer from strangers or set a password to boot them;
- Duplicate existing operating systems by copying and create the necessary boot configuration for each of them;
- Restore boot records, folder and file structure, detect lost clusters, remove computer virus code from disk, and much more.
Installing and getting started with Acronis Disk Director Suite
To install Acronis Disk Director Suite:
- Follow the instructions of the installer;
- You will be prompted to select Typical, Custom, or Full installation type. Custom installation allows you to choose not to install Bootable Media Builder. You may not need this tool if you have purchased a boxed product that includes a boot CD.
Launch on Windows operating system
In the Windows operating system environment, Acronis Disk Director Suite is launched by selecting Start -> All Programs -> Acronis -> DiskDirector -> Acronis Disk Director Suite.
During the first launch of Acronis Disk Director Suite, you will be taken to the program window, in which you will be asked whether you want to work with the program in the mode of automatic operations on partitions ( Auto mode) or in the mode of manual operations on partitions (Manual mode).
The possibilities provided in the automatic mode are quite enough to create almost any configuration of partitions on the hard drives of your computer.
However, if you need a detailed view of the partition structure on disks, a full set of partition operations, and full control over their execution, select the manual mode.
Working with Acronis Disk Director Suite, you can change the mode at any time.
Acronis Disk Director Suite provides the user with two modes:
- mode " » - designed to perform the most common operations that will be sufficient for most users.
- mode " » - designed to perform any operations on partitions. The mode is intended for users who have some experience and knowledge of the organization of data storage on a disk, and assumes full user control over the execution of operations.
Automatic Partition Operations
In operating mode " Automatic Partition Operations» Operations are performed using the Acronis Disk Director Suite wizards. Four wizards are available to the user:
- partition creation wizard- allows you to create a partition on the unallocated disk space or at the expense of the space of other partitions;
- Increase Partition Free Space Wizard- allows you to expand a partition using unallocated disk space or space from other partitions;
- partition copy wizard- allows you to create a copy of the partition.
- partition recovery wizard– allows you to recover deleted or damaged partitions.
In this operating mode, even the most inexperienced user will be able to perform operations on disk partitions step by step, guided by comprehensive instructions.
Manual operations on partitions
In operating mode " Manual operations on partitions» An advanced user has access to all Acronis Disk Director Suite operations, including relatively rarely performed ones.
Operations on partitions are performed using dialog boxes in which the user enters the necessary operation parameters.
The main difference between the automatic operations and manual operations modes is the following: in the automatic operations mode, the wizards perform a whole set of actions on partitions. In manual operation mode, one operation is always one single operation on a partition/disk.
Switching between modes
Use for this View -> Auto Mode to switch to automatic operations or View -> Manual Mode to switch to manual mode. Acronis Disk Director Suite is managed from the main window. The main window includes a menu, a toolbar, a sidebar, and a tree of disks and partitions (which can be turned on and off using the View menu), as well as a visual list of disks connected to the computer and partitions on them.
The appearance of the main window differs depending on the selected operating mode. This difference concerns the composition of operations offered to the user in the main menu, context menus of sections, side and toolbars, as well as the degree of detail in the presentation of the sections structure.
Considering Basic Hard Disk Partition Operations
All operations on partitions in modes intended for both ordinary and advanced users are called and performed in a single way.
Any operations on partitions can be called:
- selecting operations from the Disk item of the main menu;
- from customizable toolbars;
- from the section context menu ( both in the main window and in the graphical representation panel);
- from the Operations and Advanced lists in the sidebar.
Please note that the list of available operations in the Disk item, as well as the list of Sidebar Operations items, depends on the type of the selected partition. The same is true not only for partitions, but also for areas of unallocated space.
Additional operations
Additional operations on hard disk partitions include the following operations:
- Convert - convert FAT16 partition file system to FAT32, Ext2 to Ext3 and vice versa,
- Hide - hide section/show hidden section,
- Make active - make the section active,
- Resize Root Folder - resize the root folder of a FAT16 partition,
- Change number of bytes per INODE - change the size of the INODE table (for Linux Ext2/Ext3 file systems),
- Change cluster size - change cluster size of FAT16/FAT32 partition,
- Change type - change the partition type.
- Restore - restore a deleted or damaged partition
- Edit — edit data stored on the hard drive Additional operations on partitions are called from the Advanced list of the sidebar, the context menu item of the partition, or from the toolbar with the same name.
Considering Basic Hard Disk Partition Operations
Create a new section
You may need a new partition on your hard drive in the following cases:
- for placement on a section of a large set of data of the same type - for example, a collection of audio files in MP3 format, video files, etc.;
- to be placed on the backup partition ( images) other partitions/disks;
- to be placed on a new operating system partition ( or swap file).
The Create Partition Wizard will allow you to create a partition of any type ( Active, Primary, or Boolean), select a file system, assign a label and letter, and so on.
If you need to create a new partition:
- Call the partition creation wizard by selecting Wizards -> Create partition or a similar item in the sidebar in the Wizards list, or by clicking the Create partition button on the toolbar;
- The wizard will analyze the disks attached to the computer and their partitions. If the wizard finds unallocated space on the disks, you must choose how to create the new partition.
If you want to create a partition on unallocated disk space:
- Set the switch to Unallocated space;
- In this case, the wizard will offer to create a partition on the found maximum size of unallocated space. For example, if you have 5.0 GB and 12.0 GB free areas on your disks, the wizard will offer to create a partition on a 12.0 GB area;
- On the Wizard's Partition Size page, set the size of the partition to be created;
- On the next page of the wizard, select the type of partition you want to create - Active, Primary, or Logical.
- As a rule, the Primary type is selected if an operating system is to be installed on the partition. If the partition is intended for data storage, the Boolean type is selected;
- Select the Active type if you want to install an operating system on this partition that will be loaded by default when the computer is turned on;
- On the next page of the File System wizard, select the file system on the partition. The wizard offers to choose one of the Windows file systems - FAT16, FAT32, NTFS or Linux - EXT2, EXT3, ReiserFS, Swap, or leave the partition unformatted;
- On the next page of the wizard, you will be asked to select a letter for the partition.
Increasing the free space of a partition
You may need to increase the free space of a partition in several fairly obvious cases:
- There is not enough space on the partition to install new programs or write data,
- Some disk-intensive programs, such as defragmentation programs, stop working or work poorly if the free space on a partition becomes less than a certain amount,
- If the free space on the system partition decreases below a certain value, the operating system may malfunction.
The Increase Partition Free Space Wizard will allow you to increase the size of a partition using the free space of other partitions. Moreover, if there is no significant free space on other partitions, this can be done at the expense of unallocated disk space.
If you need to increase the free space of a partition ( partition size):
- Call the Increase Partition Size Wizard by selecting Wizards - Increase Free Space or a similar item in the sidebar in the Wizards list, or by clicking the Increase Free Space button on the toolbar;
- On the Select Partition to Increase page, select the partition you want to increase the size of.
Copying a section
By creating a copy of a section, you will get an exact duplicate of everything that is located on this section. A section copy can be used in the following cases:
- As a partition backup ( first of all, the data placed on it);
- As a backup copy of the system partition, which is reasonable to create if you are planning to update the operating system installed on the partition;
- For quickly transferring the contents of an old hard drive to a new, higher capacity drive.
If you need to create a copy of a partition:
- Call the Increase Partition Size Wizard by selecting Wizards -> Copy Partition or similar item in the sidebar in the Wizards list, or by clicking the Copy button on the toolbar;
- On the Select Partition to Copy page of the wizard, select the partition you want to copy;
- On the next page of the Partition Location wizard, an entry is created with the characteristics of the copied partition;
- The selected disk may not have enough space to place the copy. You can, however, create a copy of a partition by selecting partitions that can be stripped of their space. Do this in the Select Partitions window;
- On the next Wizard's Partition Size page, you can enter the desired partition copy size, while the wizard automatically calculates the minimum and maximum possible copy size;
- On the next Partition Type page of the wizard, you can select the partition copy type: Active, Primary, and Logical.
As a rule, the Primary type is selected if the partition contains an operating system. If the partition is intended for data storage, the Boolean type is selected.
Select the Active type if you want the operating system installed on the copy of the partition to be loaded by default when the computer is turned on.
Clicking the Finish button on the last page of the wizard will cause Acronis Disk Director Suite to generally create a batch of pending backup operations.
If you need to split a section:
- Select the section to change;
- Call the split partition operation by selecting Disk -> Split or similar item on the sidebar in the Operations list, or by clicking the Split Partition button on the toolbar;
- In the folder tree, select the folders that should be moved to the newly created partition. If you want to create an empty partition, don't mark any folders.
Merging Sections
Acronis Disk Director Suite allows you to merge two partitions, even with different file systems. All data will remain intact and will be located on the resulting partition. This partition will have the same file system as the target partition (to which the data from the attached partition is added).
If you need to merge sections:
- Select the section to be attached to the target section;
- Call the merge partitions operation by selecting Disk -> Merge or a similar item on the sidebar in the Operations list, or by clicking the Merge Partitions button on the toolbar;
- Select the target partition;
- Select a folder on the target partition where the data from the attached partition will be placed. You can create a new folder using the icons located above the folder tree;
- clicking the Proceed button will create a pending operation.
The new partition structure on the disk will be displayed graphically in the main window of Acronis Disk Director Suite.
Partition Formatting
- Select a disk and a partition on it;
- Call the partition formatting operation by selecting Disk->Format or a similar item in the sidebar in the Operations list, or by clicking the Format button on the toolbar;
- In the Format Partition window, enter a partition label;
- Select the file system that will be created on the partition as a result of formatting.
- FAT16/FAT32, NTFS - file systems of the Windows OS family;
- Linux EXT2, Ext3, ReiserFS, Swap - Linux OS file systems.
- the smaller the cluster size, the less wasted disk space;
- the smaller the cluster size, the more space the file allocation table (FAT) occupies;
- The larger the file allocation table, the slower the operating system works with the disk.
Acronis Disk Director Suite supports the following file systems:
- Select the cluster size (available options: Auto, 512 bytes, 1, 2, 4… 64 Kb);
- Note that:
- By choosing the Auto option, you will let Disk Director Suite automatically determine the cluster size depending on the selected file system and partition size;
- By clicking the OK button in the Format Partition window, you will create a generally pending partition formatting operation.
Check hard disk partition for errors
Acronis Disk Director Suite provides the ability to check a hard disk partition for file system errors. It is highly recommended to perform hard disk partition check before performing any operations with disk partitions.
If you need to check the hard disk partition:
1. In the main window of Acronis Disk Director Suite, select a hard drive and a partition on it,
2. Call the operation of checking the partition for errors by selecting Disk -> Check or a similar item in the sidebar in the Operations list, or by clicking the "Check" button on the toolbar,
3. If you want to perform not only a check for errors, but also fix the found errors at the same time, select one of the following options:
- Search for errors on the section;
- Search and correction of found errors;
- Search for errors and bad sectors.
Check for errors checkbox Fix found errors,
4. By clicking the OK button, you will directly start the partition check operation,
5. The results of the disk partition check are displayed in the Partition check window.
Partition defragmentation
Defragmentation is the process of reorganizing the way files are stored on a hard disk partition, whereby the data that makes up the contents of a file is placed in sequential clusters.
defragmentation- a procedure for eliminating file fragmentation, in which, as a result of multiple update operations, parts of files are scattered over different parts of the disk.
File fragmentation significantly reduces the performance of a personal computer or server, especially with a significant amount of I / O operations. Conversely, defragmenting files on a hard disk under the same conditions can improve performance by requiring the read head to move around the disk less to read all parts of a file.
Acronis Disk Director Suite performs defragmentation only on Windows XP and Windows 2003 Server. Windows 2000 has its own built-in disk defragmenter. To defragment a partition on Windows 4.0 and earlier Windows operating systems, install a third-party defragmenter.
If you need to defragment a hard drive partition:
- In the main window of Acronis Disk Director Suite, select the hard disk and its partition to be defragmented;
- Call the partition defragmentation operation by selecting Disk - Defragment or a similar item in the sidebar in the Operations list, or by clicking the Defragment button on the toolbar.
File system conversion
The main disadvantages of the FAT16 file system were:
- the inability to support disk partitions larger than 2 GB,
- inability to work with files larger than 2 GB,
- the inability to work with hard drives with a capacity of more than 8 GB,
- limited size of the root folder - it could contain no more than 512 items,
- support for filenames, which could consist of 8 characters in the name, a dot, and 3 characters in the name extension ( in Windows NT this restriction was lifted).
The FAT32 file system was introduced in Windows 95 OSR2 and is supported in Windows 98/ME and Windows 2000/XP. The main reason for its appearance was the need to remove FAT16 restrictions. FAT32 is an evolution of FAT16. The main differences between FAT32 and FAT16 are support for much larger folders, files and disks, more flexible organization of the root folder, which is now unlimited in size, support for long file names.
Convert FAT16 to FAT32
Thus, converting a FAT16 partition to FAT32 is necessary in the following cases:
- If you need to use disk partitions larger than 2 GB;
- If when changing from a small size hard disk to a large capacity hard disk. Otherwise, the space of the new hard drive will be wasted.
If you need to convert a FAT16 partition to FAT32:
- Select the drive and partition with the FAT16 file system that you want to convert to FAT32 in the list of the Acronis Disk Director Suite main window;
- Call the operation of setting the label of the active partition by selecting Disk — Advanced -> Convert or a similar item in the sidebar in the Advanced list, or by clicking the Convert button on the toolbar (or from the context menu of the partition or its graphical representation), in the Convert Partition window, enter the partition type (Boolean - Primary)
The new file system of the partition will be displayed graphically in the main window of Acronis Disk Director Suite.
Here is a quick guide and a description of the basic steps for Acronis Disk Director Suite. A more complete user manual is distributed with the software product itself, and can also be found on the official Acronis website.
As an alternative to the standard Windows functionality for data backup and recovery, the software product from company Acronis work on resuscitation of the operating system can be carried out both in desktop mode and from removable media, and even in its own recovery environment. Just as you can get into the pre-boot troubleshooting mode of Windows 7 by pressing the F8 key during system boot, you can get into the Acronis Recovery Environment by pressing the F11 key during boot.
The Acronis Recovery Environment will be discussed below. Let's consider the functionality Acronis True Image 2016 in Windows preload mode.
Acronis Recovery Environment when booting Windows
Getting into the Acronis Recovery Environment while booting Windows is much easier than fiddling with the regular system environment. In versions of Windows 8.1 and 10, the moment from the computer's self-test to the system boot process is very fast. And the F8 key, as well as the combination Shift + F8, with which, ideally, the standard recovery environment supposedly starts, the operating system simply does not have time to perceive. The Acronis bootloader will also flicker on the monitor screen for a short time, only a couple of seconds, but this time will be enough to press the rescue key F11.
Acronis Recovery Environment when booting Windows- this is the same functionality that True Image offers on bootable removable media created in the desktop mode of the program. This is the ability to restore Windows, non-system disk partitions and individual files in the pre-boot mode of Acronis True Image, regardless of the operating system. In the event of a critical failure of Windows, when it stops loading, you can get into the Acronis Recovery Environment without a bootable USB flash drive or DVD, only by pressing the F11 key. And there already carry out an operation to restore the system from a previously saved backup.
The Acronis Recovery Environment, of course, by those same couple of seconds allotted for pressing the F11 key, increases the usual Windows boot time. But it eliminates the need to create and store bootable media. So, many modern PCs and laptops are already equipped without a DVD drive, and in such cases the only bootable media can only be flash drive. If there is no second computer device in the house so that it can be used to quickly create a bootable Acronis True Image flash drive, a separate flash drive will have to be initially sacrificed in case of problems with Windows.
Alas, not all users will be able to use the Acronis Recovery Environment when loading Windows at a critical moment. Many device owners with BIOS new format UEFI will have to forgo its benefits and enable a regular BIOS if they choose to use a tool such as a third party recovery environment when booting Windows. In the future, perhaps this problem will be solved.
Activation of Acronis Recovery Environment at Windows startup is carried out inside the True Image desktop program. Below we will consider the operation of the recovery environment using the current version of 2016 of Acronis True Image as of the date of writing this article.
Activating Acronis Recovery Environment
Launch TrueImage.


When using the trial version of True Image 2016, which can be downloaded for free on the official Acronis website and freely tested for a month, click the button.

In our case, there are already two Windows backups stored on the non-system disk partition.

Switch to the program section and click the inscription "More tools".

The system explorer will open with separate True Image utilities. We launch the utility.

In the window for activating the recovery environment when loading Windows, click, respectively,.

Recovery environment activated successfully.

That's it - after that, every time you start Windows, for a couple of seconds we will see the Acronis bootloader window with a notification that you can get into the recovery environment by pressing the F11 key.

Windows recovery
Having got into the Acronis Recovery Environment using the F11 key, in case of problems with Windows, we can return it to the state from a previously created backup. Press Enter in the boot menu window.


We get to the start page of the True Image functionality in the preload mode. Choose .

In the next window, click "Update Backups" so that all the files on your computer ".tib"- Acronis True Image backup format files - appeared in the table below. If Acronis backups are not detected automatically during scanning, you can specify the path to them manually using the search button below. After the available backups appear in the table below, select the current one, call the context menu on it and select .

Recovery method during Windows resuscitation - disks and partitions. We press "Further".

We put marks on the boot record MBR, and to the section with Windows . We press "Further".

We do not change anything in the recovery configuration. Just click "Further".

In the target disk selection window (the drive to which the data will be restored) in our case, only one hard drive is visible. Therefore, there is no need to choose. We press "Further".

The Windows recovery process has started. We can wait until it finishes, or we can use the options to automatically turn off the computer or restart.


After restarting the computer, we will find Windows in the state in which it was saved at the time the just used backup was created.
You can disable Acronis Recovery Environment in exactly the same way as you can enable it. We go to the program section, click the inscription "More tools", run the utility from the system explorer. Only now we press the inscription "Deactivate".

Download Acronis True Image 2016 from the official website.