Computer security has always been the most important issue for the user. As you know, viruses that get inside a gadget can bring a lot of discomfort to its owner. There are no ways to 100% protect your desktop from malware penetration, but there are ways to maximize resistance to them.
The most accessible is to prohibit the installation of programs in windows 7. This can be achieved absolutely free of charge, and a program that will help with this is already available on most versions of Windows. The principle of operation is outrageously simple: no programs can be downloaded without the user's permission. And then you will not face such a problem as the appearance, as well as with other problems that viruses bring. How to do it? Let's figure it out.
How to set a limit
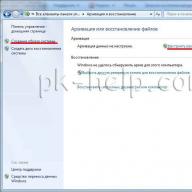
First, you need to open the "Local Security Policy" window. To do this, go to "Start" - "Control Panel" - "System and Security". Then go to "Administration", and there you will see "Local Security Policy" - "Software Restriction Policy". On this line, right-click and create a new software restriction policy.
Now you need to configure some settings for the new policy. To do this, click on the "Application" line and check the box in the same places as in the picture below.

After that, go to the item "Assigned file types" and feel free to remove the LNK extension. Then we go to the additional folder "Security levels", we see the sub-item "Forbidden" in the right part of the window and set it by default (with the right mouse button).
That's all, now all users from your computer will be able to run only those programs that you install, or the system will do it for you. They are usually found in the Program Files and SystemRoot folders, but they can be scattered around other folders as well. If this is your case, then I advise you to add these programs to the list of allowed. To do this, in turn, go to "Additional rules" - "Name", right-click on an empty field. Among the rest of the commands, select "Create a rule for the path", and set the path to the folder where the required program is located.
As you can see, there is absolutely nothing complicated in these actions. These rules will take a few minutes to complete, but think about how you can improve the security of your computer. It's not a pity to set aside a couple of minutes of your precious time for this, do you agree?
You can increase the security of your computer if you install. This will be a nice addition to the above steps!
Video to help
There are several ways to prevent the installation of programs on Windows 7, which will now be considered. Why is this necessary? For example, if you are not alone using a computer and strangers constantly install unnecessary software or games. Also, this ban will be able to protect Windows 7 from imposed software that you do not need. There are many other reasons as well.
Prevent installing apps using the Group Policy Editor
In order to prohibit the installation of applications, you need to open the group settings editor - gpedit.msc. You can do it like this: open the Start menu - click on the "execute ..." button - register gpedit.msc there. After that, the window we need will open, in this window you will need the "Administrative Templates" section.

Click on "Windows Components", then you need to scroll down and find the "Windows Installer" folder. When it opens, under the line "State" there will be commands, we need "Disable Windows Installer". It is necessary to click on it 2 times, and when the window appears, then select the "Disable" function, which accordingly sets a ban on the installation of programs. The Enable function overrides this prohibition.

How to prevent a specific user from installing applications on Windows 7
Prohibiting the installation of software for a specific user on Windows 7 requires the creation of a corresponding snap-in. You need to enter the mmc console (start menu - "Run ..."), then in the console click on the "File" tab and click on "Add or remove snap-in ..."

The corresponding panel will open.

In this panel, select the "Group Policies" snap-in, and then click on the arrow. A window will appear, in it you need to click the "Browse" button, select the "Users" tab, then select the user you want to prohibit the installation of Windows 7 programs for. We confirm the transaction, and you're done.


Then you need to repeat all the steps that are described in the above (see "Prohibiting installation using the policy editor", but the prohibition to install software in Windows 7 will now only affect the specified selected user.
Prevent installation of programs using parental controls (Windows 7)
This method is much simpler, judging by the number of transactions, and it is applicable in cases where the person sitting at the PC installs too much garbage.
To prevent the installation of programs using parental controls, the following is required (works only on Windows 7):
Go to the Windows 7 Control Panel through the Start menu, and click on the "User Records Management" tab

Click on the "Parental Control" button

We select the user to whom we want to prohibit the installation of programs.

We need "Restrictions on running programs"

Just click on the tab, after which the console opens in front of us, where we put a checkmark:
Windows 7 automatically detects programs that can be blocked. If the required application is not found (ie it will not be in the list), then you can find them yourself through the "Browse" button and block.
Prevent installation of programs using the registry (Windows 7)
Here we need to click on the "Run ..." tab through the Start menu and enter the following command - regedit.exe. A window will open in front of us, in which it will be necessary to precisely follow this path in order to get to the goal:
HKEY_CURRENT_USER \ Software \ Microsoft \ Windows \ Current Version \ Policies \ Explorer \ DisallowRun
Then, in the "DisallowRun" item, create a text parameter called 1 and add the name of the application executable file with the extension.exe to it.
For example, if you need to block msiexec, then you just need to create a text parameter 1 and initialize it with the string "msiexec.exe" and then give them the names of the EXE files of the applications and you're done.
After that, you only need to restart your computer.
It is worth mentioning that depending on the version of Windows: "maximum", "basic", "professional", as well as on its build, some of the names of the names can be changed, and consistently slightly different - but not radically. But all commands will function on any version, as well as the work done.
Free software can be very useful and functional, some programs even claim to replace expensive paid counterparts. At the same time, some developers, to justify the costs, "sew" various additional software into their distributions. It can be completely harmless, and it can also be harmful. Each of us got into a situation when, along with the program, some unnecessary browsers, toolbars and other evil spirits were installed on the computer. Today we'll talk about how to once and for all prohibit their installation into your system.
In most cases, when installing free software, the creators warn us that something else will be installed and offer a choice, that is, remove the jackdaws next to the items with the words "Install"... But this is not always the case, and some careless developers “forget” to insert such a proposal. We will fight with them.
We will perform all actions to ban using the snap-in , which is present only in editions of the Pro and Enterprise operating systems (Windows 8 and) and in Windows 7 Ultimate (Ultimate). Unfortunately, this console is not available in Starter and Home.
Import policy
V "Local Security Policy" there is a section with the name AppLocker, in which you can create various rules for the behavior of programs. We need to get to him.

At this stage, we need a file that contains the executable rules. Below is a link by clicking on which you can find a text document with the code. It must be saved in XML format, without fail in the Notepad ++ editor. For the lazy, there is also a ready-made file and a description for it.

This document spells out the rules for prohibiting the installation of programs from publishers who have been seen "slipping" their products to users. It also specifies exceptions, that is, the actions that can be performed by allowed applications. A little later, we'll figure out how to add custom rules (publishers).

Now for any programs from these publishers access to your computer is closed.
Adding publishers
The list of the above publishers can be manually supplemented by yourself using one of the functions AppLocker... To do this, you need to get an executable file or an installer of the program that the developer "sewed" into the distribution kit. Sometimes you can do this only if you are in a situation where the application is already installed. In other cases, we just search through a search engine. Let's consider the process using Yandex Browser as an example.
- Right-click on the section "Executable Rules" and select the item "Create a new rule".

- In the next window, press the button "Further".

- We put the switch in position Deny and again "Further".

- Here we leave the value "Publisher"... Push "Further".

- Next, we need a link file that is generated when reading data from the installer. Push "Overview".

- Find the file you want and click "Open".

- Moving the slider up, we ensure that the information remains only in the field "Publisher"... This completes the setup, press the button "Create".

- A new rule has appeared on the list.

Using this technique, you can prevent the installation of any applications from any publishers, as well as, using the slider, a specific product or even its version.
Removing rules
Removing executable rules from the list is done as follows: right-click one of them (unnecessary) and select the item "Delete".

V AppLocker there is also a complete policy cleanup function. To do this, right-click on the section and select "Clear Policy"... In the dialog box that appears, click "Yes".

Export policy
This feature helps you transfer policies as an XML file to another computer. At the same time, all executable rules and parameters are saved.

Using this document, you can import rules into AppLocker on any computer with a console installed "Local Security Policy".
Conclusion
The information obtained from this article will help you permanently get rid of the need to remove various unnecessary programs and add-ons from your computer. Now you can safely use the free software. Another use is to prevent other users of your computer, who are not administrators, from installing programs.
The developers of the Windows operating system have created an option that limits what users can do on a computer. These restrictions are set independently by any user who has access to the administrator account on the computer..
Instructions
- To set any ban on the computer, you need administrator rights. To manage the bans, you need to open a special section "Local security settings", for this use the Win + R key combination and type secpol.msc, press the Enter key.
- Open the "Software Restriction Policy"
and in the Object Type group of commands, select the Assigned File Types command. The window will load a list of file formats that are related to the executable code.
- To prohibit the use of programs, the corresponding types must be excluded from this list. For example, to prohibit the use of Excel, select the appropriate item in the available list and execute the "Delete" command, also remove the program shortcut, it is in the LNK format. Save the changes by clicking on the OK button.

- Go to the "Enforced" section and in the "Apply Restricted Policies" drop-down list, check the "For all but local administrators" command.

Go to the "Security levels" directory and select the "Unlimited" section, select the "Default" value and save the settings with the OK button.
- Open the Security Levels category and select the Unlimited option. Select the Default option and click OK.
- After completing all the described steps, all users except administrators will be able to use only approved applications. All programs are installed in the Program Files or SystemRoot directory. If you yourself installed programs in other folders, then you need to add them to the allowed list.
- Open the Advanced Rules window and click on an empty spot in the Name section. Click the option "Create rule for path" and designate the path to the directory with programs.
- To prevent other users from adding additional software to the specified folders, you need to set an additional restriction. Call the context menu for the required folder and click "Sharing and Security", on the "Security" page, set the permission for the required users.
- Click "Advanced" and open the "Permissions" tab. Specify users and click "Change", in the loaded window, check the allowed actions for these users.
Video: How to prevent the installation of programs in windows 7
Feb 11 2012
Limiting application use in Windows 7
1. Disable or limit the use of Windows Installer using Group Policy.
Windows Installer(msiexec.exe), is a tool for installing, maintaining and removing software from Windows.
To prevent all users from installing applications, open the Group Policy editor (gpedit.msc) and open Computer Configuration - Administrative Templates - Windows Components - Windows Installer (Windows Installer On the right side of the Settings window, select the Disable Windows Installer line and double-click it. Meaning Disable- disables the ability to install programs, value Enable turns it on. Everything is simple here.
To prevent the installation of applications for a specific user (account), you can create the appropriate snap-in. To do this, open the console mmc(from the Start menu - Search) and from the File menu select Add Snap-in. A list of all available system components will open. Select Group Police, click the right arrow to add, and then click the Browse button. Select the Users tab, the desired account and click OK and then Finish.


After that, repeat the steps I described above, only now the prohibition on installing programs will apply only to the selected user.
2) Always perform an installation with elevated privileges.
In the Group Policy Editor, navigate to User Configuration - Administrative Templates - Windows Components. Scroll down the slider and select Windows Installer and Allwaus install with elevated privileges(Always install with elevated privileges).

This parameter instructs Windows Installer to use system permissions when installing any program on the system.
This setting applies to elevated privileges for all programs. These privileges are usually reserved for programs that have been assigned to a user (offered on the desktop), assigned to a computer (installed automatically), or available in Add or Remove Programs in Control Panel. This setting allows users to install programs that require access to directories that the user may not have permission to view or modify.
Note: if you disable this option or do not configure it, the system will apply the permissions of the current user (or administrator) when installing programs, i.e. with customary rights. This setting appears in the Group Policy Editor under both Computer Configuration and User Configuration. For this parameter to take effect, it must be set in both sections.
3) Do not run the specified Windows applications.
In the Group Policy Editor navigate to User Configuration - Administrative Templates - System.
Here in the sidebar on the right, double click Do not run specified Windows applications(Do not run specified Windows applications), and in the new window that opens, select Included... Now under Options select the command Show(Show). Click Add and in the new window enter the path that opens the application you want to block, in this case: msiexec.exe.

This will prevent the Windows Installer, which is located in C: \ Windows \ System32 \ msiexec.exe, from running.
When enabled, users cannot run programs that you add to the Blocked Applications list.
Note: if users have command line access (cmd.exe), this parameter does not prevent them from launching programs in a command prompt window.
Almost every setting in Windows, in addition to Group Policies, is duplicated in the Registry Editor. But not many people know that there is an online MSDN service on the network, which contains structured reference information on setting up a huge number of Windows functions through the system registry. It is convenient to use it, you just need to know English. In addition, there is also a similar reference in Excel document format that you can download.
First, make a backup of the following registry branch, or create a restore point.
Open Registry Editor ( regedit.exe) and go to the next section:
HKEY_CURRENT_USER \ Software \ Microsoft \ Windows \ Current Version \ Policies \ Explorer \ DisallowRun
Create in section DisallowRun string parameter named 1 and set its value to the name of the program's EXE file.

Note: if the section DisallowRun is missing, create it.
For example, if you want to limit msiexec, create string parameter 1 and set its value to msiexec.exe... If you want to restrict more programs, then just create more string parameters named 2, 3, and so on, and set their values in the EXE programs. Reboot your computer.
In the Control Panel, open the User Accounts - Manage Another Account applet. Select the required user account and set Parental Controls for it:

In the next window, enable Parental Control and Restriction on Launching Applications:

After building the list, select those programs that the user is allowed to run. If the required program is not in the list, you can add it manually by clicking the Browse button.

Click Ok.
Note: there are some conditions for allowing / disallowing the launch of applications using Parental Control. First, the user account for which you are entering restrictions must be with Conventional rights. Secondly, setting up Parental Controls must be carried out using an account that has the rights Administrator which is obvious. And thirdly, the Administrator account must be password protected.
OK it's all over Now. I wish you successful application of the tips I described in this article.