Today's release will tell you about how to make a transparent background in Photoshop.
Why do you need a transparent background?
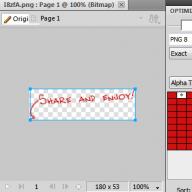
It happens that one picture needs to be superimposed, but when the image is lining remains a white background. See Example below:
In the article, we will analyze three ways to get rid of this background. The result should be like this:

I hope now everyone understands the essence. And we go to the case!
Under the example below we will insert the sun on the drawing of the clearing. Obviously, the current appearance of the image is not attractive. Therefore, we will try to adjust this moment. We do not delete a white background, but only make it invisible.

But first, of course, you must not insert a picture with a white background. Start with a picture without a sun.

Three ways to remove background in photoshop
1 way to make transparent background:

All, background disappeared. I hope everything was clear.
2 way, how to make the background transparent:

On a note! The two methods described above can be applied if the background has one color. In other cases, use the third way.
3 way to remove the background in photoshop
1. Remove the background in photoshop using the tool fast mask. The mask is located downstairs in the left vertical menu:

2. After clicking on a quick mask, select "Brush" and sketch object (not background), sun, in our case. At the same time do not affect the background. 
Use the various sizes of the brush for the core. To do this, use the second horizontal menu. Read more on screenshots:  3. After the sun is completely painted, click on the fast mask. Then the Delete button to remove everything around the object.
Everything was done on an ambulance hand as an example, therefore the boundaries are not very accurate. However, if you try, everything will be wonderful. The main thing is not to waste time and rationally use the brushes of all sizes.
Now you know how to make a transparent background in photoshop. Let us turn to solving another task. Namely to preserve a transparent background. Often, users successfully remove the background, but they cannot save the image in this form. Do you have the same problem? Then read further!
How to save an image with a transparent background
Immediately note an important point. Maybe only these words will be enough to solve your problem. If you save the image in the JepG format, the transparent background disappears, the previous white color will remain. It is required to save in PNG or GIF formats. Articles on the topic:


That's it. Now, if we insert the sun on the clearing, then the picture will accept an attractive appearance: 
When creating collages and other compositions in Photoshop, it is often necessary to remove the background from the image or transfer the object from one picture to another.
Today we will talk about how to make a picture without a background in Photoshop.
You can do this in several ways.
First - take advantage of the instrument "Magic wand". The method is applicable in the event that the background image is monophonic.
Open the image. Since pictures without a transparent background most often have an extension Jpg.then the layer called "Background" will be blocked for editing. It must be unlocked.
Double-click on the layer and in the Nuzhiam dialog box "OK".

Then choose the instrument "Magic wand" And click on a white background. There is a selection (marching ants).


Now press the key Del.. Ready, white background is removed.

Next way to remove the background with pictures in Photoshop - use the tool "Fast allocation". The method will work in the event that the image has about one tone and does not merge anywhere with the background.
Choose "Fast allocation" And "paint" our image.


Then invert the selection by the combination of keys Ctrl + SHIFT + I and click Del.. The result is the same.
The third method is the most difficult and applied in color images, where the desired area is merged with the background. In this case, only manual allocation of the object will help us.
For manual selection in Photoshop there are several tools.
1. Lasso. Use it only if you have a solid hand or there is a graphic tablet. Try yourself and realize what the author writes.
2. Straight lasso. This tool is advisable to apply on objects that have only straight lines.
3. Magnetic lasso. Used on monophonic images. The selection is "primed" to the border of the object. If the shades of the image and the background are identical, then the edges of the selection are obtained by ribbon.

4. Pen. The most flexible and convenient to highlight the tool. The pen can be drawing both straight lines and curves of any complexity.

So choose the tool "Pen" And we supply our image.
We put the first reference point as you as closely on the border of the object. Then we put the second point and, without releasing the mouse button, stretch up and right, achieving the desired radius.


Reference points can be moved by pressing the key Ctrl Right, and delete by selecting the appropriate tool in the menu.

Pen can be allocated several objects in the image at once.
At the end of the selection (the circuit must be closed, returning to the first reference point) Press inside the loop with the right mouse button and choose "Education dedicated area".


Now you need to remove the background in Photoshop by pressing the key Del.. If a sedentary object was removed, instead of the background, then click Ctrl + Z., invert the selection by combination Ctrl + SHIFT + I And remove again.
We reviewed the main techniques to remove the background with images. There are other ways, but they are ineffective and do not bring the desired result.
You will need
- - program "Photoshop"
- - An image that needs to make a translucent background.
- - know how to create a new layer
- - To be able to use the "Fill" tool, draw the figures in Photoshop
Instruction
Click twice by layer name with the picture and in the field that appears write any new name of this layer. It is necessary for the free movement of this layer and obtaining a transparent background when removing the pattern parts. If the image already has an opaque homogeneous background, then highlight it with the "Magic Wand" tool. To do this, select this tool on the toolbar and click the Background Color Mouse, after which the entire color you specify will be allocated (which mouse clicks) within the closed area. Remove the dedicated by pressing the Delete key.
If not ungenened, then select the picture itself by the "straight line" or "pen" by the instrument. In the case of the image is highlighted by the Pen tool, lay out the desired contour and, if necessary, edit it with the "Feather +" instrument. When editing this tool, you can add the reference points by clicking the mouse created by the circuit and, moving the point, change it. Then, without removing the cursor from the circuit, press the right mouse button and select "Education Selected Area". Rastyshevka Set the value of 0 pixels and check the "Smoothing" parameter. As a result of these actions, the contour will be transformed into the selection. Remove the dedicated by pressing the Delete key.

Create a new layer and place it below the layer with a picture. Having a cursor on it, press the left mouse button and without releasing the button, move the cursor below the layer with the image. In this way, you drag a new layer below the layer with a picture. Below the image itself, create an opaque background of the desired color and the desired figure.

When you work on site design, you often have to deal with the fact that the found image that would ideally approached your site has a different background that it would be desirable to remove.
And so, we open our picture in Photoshop.
1.
The first thing to be done is to create a workspace with a transparent background from the pictures. For this:
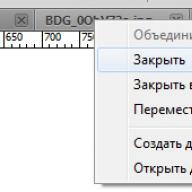
- In the layer window, click twice on our layer (with a lock)
- in an obeyed window click OK
The lock must disappear
If the background is monophonic:
Choose the tool " Magic wand"This is a very flexible tool for allocating the desired area. Our task is to highlight the entire background, except for the drawing. To do this, customize the settings of the magic wand (parameter tolerance) until we get the desired result. We also use the SHIFT key to highlight the area besides the already dedicated. Press DEL and the selected treat is removed.
If the background is multicolored:
Use the tool " Fast allocation". Here our task is not to highlight the background, but the object itself, which should remain. Click until the desired area is selected. If it is overwhelmed, clamp Alt and minus it treats. You can see the result of the Q key.
When the selection is ready, copy its Ctrl + c. Create a new document with a transparent background (Ctrl + N) and insert the Ctrl + V object there.
3 . If something is superfluous in the figure, we use the tool " Eraser"Just stand up excess background.
4 . We save the image for Web (Alt + Shift + Ctrl + S) Select the GIF format or PNG (in others, our transparent background will turn into white).
Useful video in the topic:
28.01.2015 27.01.2018
Make a transparent layer in photoshop in the image easier than simple. This short explanatory note contains comprehensive information on this issue. Therefore, I hope the difficulties you will not have.
Why do you need a transparent layer or background? To make one image can be imposed on another.
The transparent layer of default in photoshop is displayed as a chessboard. This is what the transparent layer looks like:
And the list of layers looks like
.jpg)
We can put another layer with the image above the transparent layer. This is what the apple looks like on the transparent layer in Photoshop.
.jpg)
.jpg)
.jpg)
Such an image will have a transparent background under the apple, so you can insert it on the site on any background.
You can create a new layer under the apple in the photoshop and pour it with any background. There will be the same result.
.jpg)
You can also adjust the transparency from layers. This may be needed for different purposes - for example, create a translucent background or make a transparent image.
.jpg)
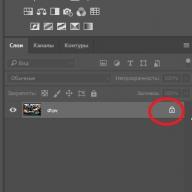
It is possible to reduce transparency for the layer on the layers panel. You activate the layer and reduce the percentage of transparency (OPACITY).
.jpg)
I hope the appointment of a transparent layer in Photoshop now you understand!
The only question that could be left is how to make a transparent background in your image. To do this, you need to highlight a portion of the image you want to leave, and remove the rest of the allocation area. How to do it right and how to highlight complex objects you can learn in my Free video course "How to allocate in Photoshop". To read it, fill in the data in the left pane on the site and the course will come to you by mail.