All you need to do is download and install the free program and make a few settings. As a result, you will get a virtual Android phone that runs on your computer.
To get a virtual Android phone, you will have to install and learn how to use the Android Software Development Kit (SDK), which developers work with when creating their programs and utilities for Android OS. Using the SDK may sound intimidating, but by knowing a few basics and following the instructions in this whitepaper, you'll find that it's quite easy to use.
But first, a few caveats. Firstly (and probably most importantly), you won't be able to use your virtual Android phone to make real calls. The project is focused only on providing the feel of Android OS, its user interface, and the ability to try some of its applications without purchasing anything.
Another limitation is that any application that works with the phone's camera or GPS module will find that these components are actually missing. Also, any app that uses location services (which provide sensitive information based on the physical location of the phone) will not be able to determine where you are (although the virtual Android device can be made to work with a connected camera or GPS, but that level of trickery is beyond the scope of this story) . You'll also find that your virtual device is slow—perhaps much slower than the real world of Android phones.
But there are still a lot of things that the Android virtual device can do - especially when starting to install applications (though, of course, even this causes some headaches, as we'll describe below). If you can tolerate the above limitations, then keep reading and you will learn how you can have a working Android virtual device on your Windows PC in just a few minutes.
A few words about Android applications
There are a few things you need to remember about Android apps. Unlike the highly demanding iPhone App Store, its version for Android OS - called Android Market - provides much more freedom. In fact, some consider the Android Market to be the wild west of applications: almost everything is allowed there, and dangerous (malicious) applications are often removed from it only after user complaints. As for the prevalence of malware on the Android Market, SMobile Systems, a company dedicated to the security of software on mobile phones, recently stated in a report that approximately “one in five programs requests permission to access private or sensitive information that an attacker could use.” for your own purposes."
It is unlikely that each of these applications requests this information in order to send it to cybercriminals. Apparently, most of these applications either use this information for legitimate purposes (for example, for Internet banking) or simply ask for it due to the weakness of the developer as a coder. But at least some of these apps may still be trying to steal your information from you and put it in the hands of people you don't want to give it to.
However, the Android Market is not the only place to download and install Android applications. There have been several independent Android app stores running for some time now (like Softonic, Handango, and GetJar), and new stores are also emerging (like AndSpot, SlideMe, and AndAppStore). But how they will treat hackers remains to be seen.
In general, you should be careful about what you install on Android - even virtual ones - especially if you've already entered any personal information, such as your Google account name/password. How do you know if an application is dangerous? Without installing some kind of security program, this can be difficult. For example, I installed the free program Lookout Mobile Security FREE (beta) on several of my virtual Android devices (and on my Android phone), and so far, in my opinion, it does what it is supposed to do - protect against malware.
Once you start installing applications on your virtual Android device, you will, however, encounter difficulties. By default, any virtual device created using the Android SDK does not have access to the Android Market - Android OS images created using the SDK are quite simple. Therefore, you may be limited in terms of installing applications - you can only install applications that are available in independent Android application stores.
For example, the Lookout Mobile Security FREE version I installed was downloaded from GetJar. By the way, using Android OS 1.6 I was able to access the Android Market on my virtual device, although I will describe how I did it below.
Also below, I'll show you how to create and use an Android virtual device on a Windows computer, and how to download and install Android apps from independent stores. All this is done using the latest version of Android OS: 2.2, which is also known as Froyo (Froyo is short for "frozen yogurt" - frozen yogurt, because all Android OS code names come from desserts). Then I will show you how to create a virtual device with Android 1.6 and Android Market. But first…
Installing the Android SDK
All instructions presented here were performed on a Windows 7 system, but they should also apply to other 32-bit versions of Windows XP or 32-bit or 64-bit versions of Windows Vista. Moreover, there are versions of the Android SDK that work on Mac OS X 10.5.8 (and later) and even some versions of Linux. True, you will not find descriptions of installing the package for these operating systems here.
The first thing you need to do is make sure you have Java installed. The official Java website can help with this, which will tell you whether Java is installed or not. If you don't have Java installed or the version is too old, just follow the instructions on the site and you will get yourself the latest version of Java. The Android SDK documentation suggests that you install the JDK version of Java, but in reality, if you are not a developer, you will only need the standard version of Java, which is officially called the Java SE Runtime Environment. However, when using Internet Explorer, Java may be called "Java for Windows Internet Explorer."
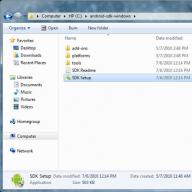
After checking that Java is installed, download Android SDK Starter Package, which will be packaged in zip. After unpacking the downloaded archive, you should get the android-sdk-windows folder. You can place it anywhere - everything you need is already there, you don't need to install the program the traditional way. Just remember where you put the folder, otherwise you will have a hard time creating icons to launch the application.
Go to the android-sdk-windows folder and run the SDK Setup.exe file, which is the Android SDK and AVD Manager application.

If Java is not installed correctly, you will see an error message pop up.

When you launch the Android SDK and AVD Manager for the first time, you may see a Refresh Sources window, which will inform you that the storage cannot be found.
If you encounter such a message, you will have to change the SDK settings to use HTTP rather than HTTPS. To do this, click Close. Next, you will see a window for selecting packages for installation - “Choose Packages to Install” - in which, however, nothing appears. Click on Cancel. Next you should see the Android SDK and AVD Manager window. Select the settings tab - Settings - and in the Misc section, enable the "Force https://... Sources to be fetched using http://..." option.

Then select the Available Packages tab. You should see a single site in the list: https://dl-ssl.google.com/android/repository/repository.xml. Select that site and a list of packages should appear below it. If you want to play around with different versions of Android OS, enable all packages.

If you want to use only Android 2.2, then you only need to download such packages as: "Documentation for Android SDK, API8, revision 1"; "SDK Platform Android 2.2, API8, revision 1"; "Samples for SDK API8, revision 1"; and Google APIs by Google Inc., Android API8, revision 1."
Having selected the packages, click on the “Install Selected” button. This will take you to the “Choose Packages to Install” window for selecting packages to install, where all previously selected packages should be listed (by the way, if you didn’t encounter an HTTPS error when you first launched the SDK, this will be the first window you see). Do not click on the Install button yet. You will notice that some packages have a question mark next to them. This means that for each such package, you must accept the license agreement before installing it. Select all the packages with the question one by one and click on the Accept button. Then, when you see checkmarks next to all the packages, click the Install button.

Once you have selected all the packages to install, you will have to wait for them to finish downloading, which may take several minutes. When everything is finished, you will see a window with a message like, “Done, 12 packages installed.” Click Close.
Creating an Android Virtual Device
You are now ready to create your first virtual device. In fact, the Android SDK calls them Android Virtual Device or AVD, as I will continue to do. Select the Virtual Devices tab and click the New button.

You will see a window for creating a new Android virtual device - Create new Android Virtual Device (AVD). There isn't much you need to do to create an AVD. All you need is:
- Give your AVD a name. Any alphanumeric name will do;
- Select a landmark – Target. Here you select the version of Android OS on which the AVD will be based. Select, for example, Android 2.2;
- Set the SD card size - SD Card Size. Here you can specify the size of your AVD's virtual SD card. The size cannot be less than 9MB. For my example I chose 1GB;
- Select skin – Skin. You can choose any preset (built-in) or your own resolution. However, it is not at all necessary that the selected screen resolution or aspect ratio matches the screen resolution of a real phone. For this example, select WVGA800 (800x480) - this is the screen resolution of some phones, like the HTC Incredible. If you wish, you can set a resolution that can simulate an Android tablet (for example - 1024x600);
- Equipment – Hardware. The elements of this item will be selected automatically. There is no need to make any additions or changes here (unless, of course, you are a developer who knows exactly what he is doing).
Now click on the Create AVD button.

The AVD will be created very quickly, at the end of which you will see a pop-up window with a corresponding message about the creation of the AVD. To close it, click OK.
Please note that once you create an AVD, you will not be able to change its settings. Therefore, if you want to change anything, you will have to create a new AVD. Otherwise, the AVD you created should appear in the list of virtual devices - Virtual Devices.

To launch the AVD, click on it and then click on the Start button. You will see a Launch Options window - which will allow you to Scale the screen and wipe user data. You'll probably be attracted to the ability to zoom the screen, but you shouldn't use it. Otherwise, the window will be the physical size of a phone screen (only three inches tall).
You should not use the ability to erase user data (although later, when installing Android 1.6 AVD from the Android Market, we will still use this opportunity). Just click the Launch button to start the AVD.

It may take a couple of minutes for the AVD to launch, so please be patient. Soon you will see on your screen - AVD. By the way, AVD is also called an “emulator” - emulator, because... it “emulates” an Android device.

Big fans of Windows, having spent many years on the operating system, are trying to teach modern smartphones to run programs and games written for the desktop OS. Some last for several days, while others make every effort to see the cherished greeting on the screen of their smartphone.
But is Windows and its software even needed on an Android device? Isn’t it easier to find an analogue of the required program, developed specifically for the “green robot”? Be that as it may, we will tell you about ways to run Windows on Android, but decide for yourself whether it is necessary.
How to Run Windows Programs on Android
Most often, this idea is asked by users who simply wanted to experiment with systems and software. Agree, it’s interesting to look at an old game for personal computers running on an Android smartphone. But these systems have different architectures, which prevents programs and games from running freely.
On Windows, as many people know, programs have the extension .exe, on Android it is completely different - .apk. However, special tools can still make .exe programs work on Android. These tools are called emulators, and today we will get acquainted with the most popular of them.
- Want to play around with the systems' capabilities a little? We will install an emulator that allows you to easily switch to the native system of your smartphone. Essentially, this is a simple program that will not affect Android in any way.
- Have you ever thought about turning your device into a full-fledged computer? You will have to study its characteristics (find out whether the processor supports the desired architecture), search through a bunch of forums, and perhaps you will be able to get the system to work more or less normally.
To completely replace one system with another, the device processor must have the appropriate architecture (for Windows - i386). You should also note that doing such manipulations is very risky - there is a high probability of simply disabling the device. If the tablet was originally developed on Android, then it is very difficult to make its hardware work at least somehow with Windows.
- Need a fullWindowsin your pocket that will work perfectly without errors. The best option would be to buy a compact DualBoot tablet that runs on two popular operating systems at once.
- I just like the lookWindows? There are users who, in principle, are satisfied with the capabilities of Android, but like the design of the Windows interface. If you are one of them, then go to Google Play, where there are a lot of free applications (launchers) that will turn your smartphone into a mini-PC.
Windows emulators for Android
The simplest and safest way to run Windows games and programs on Android is through emulators. They are special applications that have a minimal impact on the operating system - you can be sure that your smartphone or tablet will not turn into a “brick”.
Today there are many emulators, we have selected several of the most popular. Each has its own advantages and disadvantages, but there is a common feature - none of the emulators support internet connection.
We also need to make a small digression: Windows is a rather “gluttonous” system, so it is advisable to have a productive device. If you hope that you will be able to run GTA 5 or Photoshop using an emulator, then it is better to immediately discard the idea of installing it.
All you can run are standard Windows tools and a couple of prehistoric games, and only if the stars align correctly, since no one guarantees you absolute performance.
Now that you know about the nuances, let's move on to the emulators themselves.
QEMU
Of all the emulators that we will consider today, this one is the fastest in operation, but with an abundance of glitches. Due to its simplicity, it is suitable for beginners who do not want to get acquainted with all the nuances of emulators. More on the pros and cons later, but for now installation instructions:
- download the necessary files (you can take everything);
- unpack the downloaded archive;
- Install the SDLapp.apk application on Android - and there is an emulator;
- The SDL.zip archive must be unpacked into the root folder of the sdcard (use a file manager and any unzipping application);
- place the win_95_em system image (will also be in the archive) in the SDL folder;
QEMU supports emulation of Windows 95 and 98. We recommend using the first version as a basis - it is more stable, easier to install and use. If you wish, it will not be difficult to find Windows 98 on the Internet, only the image must have the .img extension.
- launch the SDLapp.apk application and enjoy loading Windows (though not everyone will be lucky).
Control occurs by dragging the mouse cursor with your finger, clicks are made using the volume buttons or double tap. You'll have to get used to it.
Now let’s talk about how to install your programs and games on Windows, which is also installed on Android. Here we will also need additional files and applications that can be downloaded. Let's move on to the instructions:
- download Qemu_HDD.rar (archive with images) and the WinImage program, which will help load your programs into the image of the required size;
- rename the resulting image with programs to “D.img” (without quotes), and then place it in the SDL folder, which is located in the root of the device’s memory;
- open (create if not) sdl.conf, into which you need to insert the following line: “/sdl -L . -m 128 -boot c -hda C.img -hdb D.img -usb -usbdevice tablet” (without quotes);
- restart Windows.
What we liked about this Windows emulator for Android:
- works quickly;
- easy to install and use.
What are its disadvantages:
- abundance of errors;
- poor technical support;
- it took a long time to get used to the controls;
- unable to connect to the Internet.
BOCHS
A popular emulator that has become famous due to its stable operation with a minimum of crashes and errors. The developer has improved the controls, which have become simpler and more understandable than in QEMU.
BOCHS is capable of emulating almost any system from the Windows family, but the performance of smartphones is not enough to quickly launch timely versions. However, there are distributions of the much-revered XP, which will already allow you to test the operation of many programs and games on an Android smartphone.
The installation instructions are similar to those we described just above for QEMU. So, we take all the necessary files and applications, after which:
- install the BOCHS.apk program on Android, having previously allowed installation from unknown sources;
- create the SDL folder in the root directory of the device, where we unpack the downloaded SDL_for_BOCHS.zip archive;
- We also put the system image into the SDL folder, the name of which should be “c.img”;
The image can be downloaded on the Internet or made yourself (you only need the installation distribution of the operating system). You can create an image directly on your smartphone using the DriveDroid program, which is available on Google Play.
- launch BOCHS.apk.
The system works stably for most users, but it is not too fast, which can be called the main disadvantage of this emulator. Control is carried out via touch screen and navigation buttons.
You can launch Windows games and programs using the method described for QEMU. Only in this case, changes are made to the bochsrc.txt file located in the SDL folder. Open it and find the line # ata0-slave: type=disk, path=”d.img” and remove the “#”. In addition, the BOCHS emulator supports another method that allows you to add the ability to run programs. In the same document (bochsrc.txt) you need to add one line - ata0-slave: type=disk, mode=vvfat, path=/sdcard/HDD, journal=vvfat.redolog.
What's good about the emulator:
- works stably;
- supports many systems;
- easy setup and operation;
- convenient control.
What are the disadvantages:
- slow;
- there is no way to connect to the Internet.

A rather interesting emulator, which, as you might understand from the name, is designed to run DOS games and programs on Android. First of all, fans of old-school games will be pleased. It works no worse than other emulators, although it has its drawbacks. In addition, enthusiasts have found a way to run Windows 95 and 98 with their programs using this emulator. We take the necessary files, then:
- install the aDosBox.apk application on your smartphone;
- from the config-adosbox.rar archive, take the dosbox-0.74.conf file and move it to the “\sdcard\app-data\org.hystudio.android.dosbox\.dosbox\” folder, which will appear after installing the application;
- download the image of Windows 95 or 98 (suitable from BOCHS) and move it to the root of the sdcard;
- launch aDosBox.apk, wait for installation.
What you liked about the emulator:
- fairly fast and stable operation;
- convenient control;
- high-quality image display on the screen.
Its disadvantages:
- failures occur periodically;
- there is no way to go online.
Analogues of Windows programs on Android
Whatever one may say, emulators are more of a way to have fun. These programs will not be able to fully provide the user with normal working conditions: regular lags, support for a minimum of peripheral devices, and few programs can be installed.
A more reasonable solution, if you need Windows programs on Android, are analogues of the necessary software. Google's system is developing rapidly; today it is full of programs that, in terms of functionality, can replace desktop options. Only you also get convenient control, stable operation and a minimum of fuss with installation.
The same goes for games. In recent years, many releases for Windows have been transferred to Android, and quite high-quality ones at that.
If you are an ardent Windows fan, then buy a small tablet on this system that will fit in your pocket, since the price tag on them today has dropped below $100. Windows tablets can handle running popular programs without any problems, and you can play all the old games without “dancing with a tambourine.”
Conclusion
What we have as a result: Windows programs can be run on Android, but only the simplest ones. Emulators are quite interesting tools that can keep you busy for an evening. But, be that as it may, it will not be possible to replace a personal computer with their help, and is it necessary?
Android today is ready to offer thousands of applications for every taste that can replace programs written for Windows. In addition, this system is well adapted to touch screens.
Despite the abundance of applications for Android devices, some users may be interested in running familiar Windows programs on their device. One of the most obvious ways to do this is to install an emulator of the desired operating system.
A QEMU
At the moment, there are three most stable WinOS emulators for Android. QEMU is the fastest, but also crash-prone choice. Among other things, it will allow you to run a shell similar to Windows 95 or 98, that is, no modern frills. To launch we will need the files SDLapp.apk (install), SDL.zip (unpack to sdcard), as well as an OS image in *.img format (for example Windows 95 or Windows 98). We put the latter in the “SDL” folder of the sdcard directory. We directly launch Windows via SDLapp.apk. Among other things, it is worth mentioning that the Win95 image works better and is more adapted to interact with touch screens, however, QEMU emulation does not have sound, network support, and work on further development of the project has been stopped.
Windows applications on Android – emulator BOCHS
Slow, clumsy, but reliable and stable emulator that supports running Windows XP (in theory, you can run any i386 OS). It is installed by analogy with the first point: download and run Bochs2_5_1.apk, unpack SDL_for_BOCHS.zip into the SDL folder on the sdcard, and put the operating system image in it (QEMU will not work). We launch through the application installed first. This emulator supports access directly to the data storage of your Android device, making it easy to launch games and programs for Windows. However, BOCHS still does not have a network connection. In addition, on weak devices the emulator can take several tens of minutes to load.
Windows applications on Android – emulator aDOSBox and others
In addition to Windows images, this emulator will help you run old games designed for DOS. To install on Android, take aDosBox-v0.2.5.apk, install, unpack
At the moment, unfortunately, most Windows emulators provide much less features than the original systems. They run old games perfectly, but other than that their functionality is very limited.
Greetings, dear reader. In today's article, I will tell you how you can run the Windows operating system on your gadget based on the Android mobile operating system. This can be done using special software, such tools are called emulators. Using these programs, we will run Windows on your gadget (phone or tablet with Android OS).
The practical benefits of this operation can be quite significant.. In addition to surprising your friends by running Windows on your device, very specific problems can be solved. For example, you need to run a program on your Android gadget that only works on Windows. You can also run some simple Windows games.
So, below you can find a list of emulator programs, as well as short descriptions and instructions for them. I would like to warn you right away, because... Windows is a fairly resource-intensive system, so your Android gadget should be relatively powerful.
QEMU

A good emulator that will allow you to run Windows 98 (95) on your device. Below you can find short instructions on how to use this software.:
- Download the QEMU emulator (sdlapp.apk) from our website and install it on your Android device;
- Download the file with BIOS firmware, drivers, etc. You can also download this file from our website via a direct link (sdl.zip). Unpack the archive to the root of the SDCard;
- Next, you need to download the Windows operating system image; this emulator only supports Windows 95 and Windows 98. Links – – ;
- Next, from the archive downloaded in the previous step, we take out the C.img file and “throw” it into the “SDL” folder in the root of your SDCard;
- We launch the program installed in the first stage. If everything is done correctly, Windows will start.
Running programs in the emulator
A short instruction on how to run programs in QEMU. So, let's begin:
- Download the archive with images (empty). Link from our website – qemu_hdd.rar;
- Download the WinImage program (winimage_8.10.8100.rar). Using this tool, you need to upload your files into an image of a suitable size;
- Next, you need to rename the image with your program files to “D.img” and transfer it to the SDL (folder) on your SDCard;
- In the sdl.conf file you need to add the line: “/sdl -L . -m 128 -boot c -hda C.img -hdb D.img -usb -usbdevice tablet”;
- Start Windows, install the necessary programs from drive “D”.
BOCHS

Another one for devices based on the Android operating system. Theoretically, this emulator will allow you to run any version of Windows operating system, but, relatively speaking, only two will work stably - 98 and 95. If you want to install XP or 7, then be prepared for the fact that they (XP, 7) will not work as well , as you would like. So, let's start setting up.
On Windows, you will need a special emulator program for this. This practice is especially useful for game and application developers who do not have smartphones with different versions of Android. You also need to customize emulators for yourself, if necessary. So, which one choose an Android emulator for Windows?
If you need to take advantage of the opportunity to download an Android emulator for Windows, then below you will find many tools for modern operating systems. Of course, besides emulators, there are other ways to run Android on Windows, but that’s a topic for another article. I’ll say right away that, if desired, the emulator can be run on a virtual machine, for example, .
Android Emulator - Remix OS Player
This is an almost full-fledged OS for a computer or tablet, built on Android x86. There is a Start menu, and the design is a bit similar to Windows. In general, it’s still the same Android, albeit an emulator, with version 6.0.1. True, it runs on Intel processors.
Android emulator for Windows - MEmu
The emulator is free, but the advantage is its Russian-language interface, it works quickly and without brakes. Supports downloading applications from Google Play. If you need an emulator to test your applications or just get acquainted with the program, then MEmu is perfect.
This tool is compatible with any of the old and new Windows operating systems. I think this is one of the best products that allows you to work with Android on some other system. The most interesting thing is that Nox App Player can be installed on any Windows device.
After installing the emulator, you will see the standard Android menu version 4.4.2 on the screen. The modification includes CyanogenMod and about 30 Gb of internal memory. The default interface may be English, but if desired, it can be changed to Russian. All this is done in the settings.
You can also change the screen resolution settings, since after installation it is 1280x720. If your computer is not very productive and is old, in the settings find the “Performance Setting” option, where we set the position to Low, but this indicator does not reduce the performance of this software.
If you installed Nox App Player, then you have almost full-fledged Android in your hands, as if on a phone. You can download a game or application to evaluate it. There is a Play Market, the keyboard, mouse and sound work.
On the right you can see the vertical options bar. There you can find various settings, which include:
- Changing the location, if you change these parameters, the GPS module in the emulator will perceive it exactly.
- Ability to install applications with APK extension.
- Moving data from your computer directly to the emulator window.
- Take screenshots from the emulator screen.
- Ability to launch multiple emulator windows, like on a virtual machine.
So, on this tool it is possible to run any application and work with Android fully, as if from a smartphone. You can launch and play games, but I can’t say how heavy they are.
If you decide to use Nox App Player, download from the official website: http://ru.bignox.com. By the way, a problem was noticed in which the program was not installed. This is usually due to the fact that the user's folder had Russian characters, so it needs to be renamed.
As you can see, there are a lot of emulators for Windows. BlueStacks is the same well-known tool as those discussed above. There is a high speed of the emulator, which can outperform others.
The BlueStacks screen is a little unusual, since you only see icons for applications that can be installed on the emulator. Naturally, you must have a Google account.
The Play Market has an application for smartphones, BlueStacks Cloud Connect, which allows you to synchronize with your PC and install the programs that are on your phone.
This emulator is somewhat similar to Nox App Player, but it also has good reviews, which is why it is on this list.
Simply put, here you will find all the same features as in other emulators. The only thing that can be said is that the utility runs without virtualization technology, has a Russian language and supports almost all applications from the Google store.
And again on the list is a free emulator that, like others, runs programs on a Windows PC, only from Android. What are its advantages?
- Fast operating speed on a weak configuration;
- Ability to set RAM values for the emulator;
- Availability of keyboard settings;
- Assigning gestures on the keyboard, as if you were pressing some areas of the phone screen.
Genymotion
This tool will be of particular interest to developers of games and applications for Android. Here you will find all the main parameters, which include:
- Availability of a modern version of Android 6.0 Marshmallow;
- Support for hardware graphics acceleration;
- Simulation of SMS, calls, battery discharge, etc.;
What other Android emulators are there?
- YouWave for Android;
- Virtual Device Manager;
- Windows Android (Windroy);
- Andy;
- Droid4X;
- DuOS;
All of them can be easily found on the Internet. Now you know which Android emulator to find for Windows and use all the features of the mobile system on your desktop.