Greetings to all readers of my blog! Today's post will be devoted mainly to beginners, since we will talk about things that are mundane for experienced webmasters. Namely, how to enter the control panel (admin panel) and configure all the functional options in such a way that in the future it would be comfortable to work with your website or blog.
Despite the fact that WordPress is the easiest to understand, nevertheless, at first, beginners may well have questions. Therefore, I would like to clarify some of the nuances so that in the future, if possible, there will be no dark spots.
Basically, what I will talk about today, you need to do immediately after installing WordPress on hosting (about the concept of hosting and the right choice of a hosting provider, and about buying space for a site from a provider). You can install WP both with the help that is most convenient for young webmasters and (for advanced users).
Login to the WordPress admin panel
I described the installation of the WP engine through the hosting admin panel using an example your provider, but in general, the procedure for different hosters is not much different. After installing WP and domain name to get the full URL of your project, the WordPress admin area will be at your service. The entrance to the site is on the page with the following address:
Http://vash-site.ru/wp-login.php
For example, to manage my blog, I enter the admin panel from a web page, the url of which looks like this:
/wp-login.php
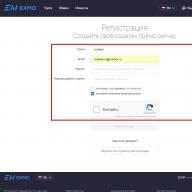
To enter the WordPress admin panel, you need to fill in the authorization data (), which usually come after installing WP to the email specified for contacts when registering a hosting. They can be provided in the final step of the unattended installation:

So, to enter the WordPress site admin panel, enter the received login with a password and click the "Login" button:

Here I want to draw your attention to the fact that the originally received username "Admin" (as a login) and a simple password must be changed immediately to more complex ones(they should look something like the above screenshot) to enhance the security of the resource. How to do it via phpMyAdmin is described.
How to set up WordPress for correct website operation
Now let's consider what needs to be done first of all in order to ensure the correct functioning of your site and its successful promotion in the future. It is not possible to consider absolutely all the nuances within the framework of one publication, but we will definitely analyze the main points.
After entering the admin area, you will be taken to main console, where on the left on a black background there is a menu with links to various sections, and at the top you will see a number of blocks in a drop-down tab "Screen settings", the visibility of which you can immediately configure by checking or unchecking the checkboxes opposite them:

These blocks allow you to track, so to speak, in "one bottle" information about the number of published entries and static pages, comments, including spam, that I identified and isolated (by the way, on some of my resources I still use this extension, although there are quite effective alternatives) included with the initial WordPress functionality:

Each of these blocks can also be closed and opened as you wish. In addition, there are blocks that display recently published materials, drafts (they are not yet published posts), recent comments and WordPress news.
If you are a beginner, be sure to check the checkbox opposite "Welcome", this block will provide you with valuable information by guiding you by the hand through a set of links to sections where you can do the initial important steps. You will also learn more about working with WP if you follow the corresponding link.
Next to "Screen Settings" is located Help tab, information in which will make it possible to understand in more detail certain terms or actions that can be carried out to ensure comfortable site management using the admin panel:

General settings
Now let's turn to the menu in the left column, where we select "Settings" - "General":

A separate page will open, where you must enter the name of your resource and its short description in the appropriate fields. It is desirable that it contains keywords from the semantic core (), according to which you will promote your resource:

After that, this is what the title and short description looks like in the header of my blog in the browser:

As you can see, everything is simple here. In the fields "Site address (URL)" and "WordPress address (URL)" in the vast majority of cases indicate the same address. There are exceptions, but we will not discuss them now, because, most likely, this information will be superfluous for you for now.
Further in the field "E-mail address" register your e-mail address, which will be used to manage the website (notification of new comments, subscribers, correspondence with potential partners, etc.).
I advise you to register a special email for these purposes, so as not to get confused and not mix up your correspondence. Many people use domain mail, but you can simply select one of the GMail mailboxes for this, especially since each of which is associated with a separate e-mail.
Against Membership fields it is better not to check the box, since attackers sometimes use the fact that this option is checked, this makes it easier for them to hack WordPress. For an ordinary resource, this is superfluous, unless, of course, you are going to introduce registration of visitors on your blog, so let's not weaken the protection.
Well, opposite the next field "Role of the new user" select the appropriate from the drop-down menu. This is usually a subscriber.
Feel free to experiment with date and time formats and find the one that works best for you. For more information on this issue, read the documentation by clicking on the link provided here. Well, the proper language for your site can be selected from the drop-down menu. Remember to save your changes at the end.
Writing settings
Now, in the same section "Settings", go to the "Writing" tab, where we already define the format and order of publishing the content () of the future pages of your resource:

Opposite the field "Formatting" check the box "Convert emoticons ..." so that visitors can express their mood using the codes of certain emoticons in the comments.
Further set the main heading, in which the articles of your blog will be published by default, if you do not specify another yourself. Usually, all publications are distributed according to the thematic sections you have created, so we leave "Uncategorized".
Of course, you can choose your default category if you still have content on your blog that does not fit into any category. In this case, it would be logical to give it a Russian-language name (say, "General" or "News").
However, for this, it will first need to be created, like any other. How to do this technically, I will tell you in the continuation of this publication, where I plan to narrate about the main aspects of the actual site management in the course of its development.
The next item is "Basic format of records"... For a standard blog, you can leave the standard one. If the content of your pages, by design, will differ from the usual content, then in each case you need to think separately.
For example, if you are the owner of a photo blog or any gallery where the main content is photographs and various kinds of pictures, then it is probably logical to select the "Image" item from the drop-down menu. In any case, the emphasis on this will not be superfluous.
Next - setting main heading for links, which is useful for those who wish to post links to important pages of other resources. The default name for this category is "Blogroll". If you want to add your own, then the actions will be similar to the creation of regular headings, which I will describe, as I said, in one of the following articles.
As you can see, adjustment is possible for remote publishing using a hidden email address. I cannot say anything intelligible and significant about this, since I do not use this option.
The last point "Update services" spelling settings, which is located at the very bottom, displays a list of ping services. These services will automatically send out notifications when new articles are released on your site.
It is believed that this helps in, which at this stage is not so important for already developed trust web resources, since recently the quality of indexing has improved significantly both on the part of Yandex and Google.
But for young websites and blogs taking their first steps, this can contribute to their further development. It certainly won't do any harm. If you decide to go to the material on the above link, then there you will find a list of ping services that I myself use.
Reading settings
Another subsection that I would like to draw your attention to is a set of options that help to configure reading parameters and which can also be accessed from the "Settings" section (see the fourth screenshot from here above):

Default on the WordPress homepage the latest posts from your blog will be displayed. Moreover, you can specify their number, as well as the number displayed in the elements. The most advanced service through which you can skip your news channel is considered to be owned by Google.
Here it is also necessary to note the following. In the main functionality of WP, it is possible to provide the display on the main page of incomplete articles, which are full-fledged duplicates, at which search engines look very askance, but with the help of their announcements.
That is, in this case, you cut off the beginning of the article in the right place using the more tag, which is present in the WordPress editor (this is the tool through which you will write and publish your articles on the blog).
But for the RSS feed, it is in this section of the settings that you can specify whether your articles will be displayed in the feed in full or only their cut fragments. On the one hand, full articles are more convenient for readers, on the other hand, announcements can not only reduce the number of full duplicates, but also minimize the danger of content theft.
You can see an example of announcements in the RSS feed at the link provided, by the way, at the same time, subscribe to updates on my blog so as not to miss useful materials.
The option of displaying the latest posts specifically for the blog seems to me the most successful. However, it is possible to choose the main static page.
This may be needed if you are creating a static website or you just want to make a home page with permanent content on your blog (check along the way, and is this question legitimate in principle):

After you check the option, the drop-down lists will become active and from them you will be able to choose which static page from among the ones you have created will be the main one, as well as on which the records of the latest posts will appear. We'll talk more about static web pages in the next article on site management that I have already mentioned.
Discussion settings
Well, the last very important block, where you can customize comments on your resource. In principle, everything here is intuitive and if you plan to create a blog in a regular format, you can check the boxes as follows:

The only really controversial point here is whether to allow tree comments? On the one hand, this is a very convenient invention of developers, which allows you to highlight a specific visitor with whom you are communicating on a specific issue:

But on the other hand, the use of such a format can unexpectedly lead to the emergence of a huge amount of duplicate content, which I mentioned above, which can cause sanctions from the search engines.
I would definitely try another form if there were no methods to counter this evil (). By the way, there is an article on the blog on how to install through the almighty functions.php file, with which you can customize your comments as your heart desires.
In the following group of WordPress settings, you can adjust the order of comment moderation and even create a blacklist of malicious spammers based on certain characters or phrases contained in the author's name, URL, email or IP address:


I suppose everything is clear here without further explanation. I will only note that you can customize the picture corresponding to you in, and there it is possible to select a separate image for each e-mail address.
How to adjust image (thumbnail) sizes in WP
There is another tab called "Media" located in the same settings section:

Here you can edit the dimensions of the images that will be used on your WordPress site:

Here we need to clarify. The fact is that in the general case, when loading each image (source), the WP system automatically creates several more copies of it of different sizes: a thumbnail ( thumbnail), middle picture ( medium), large ( large) size.
But only reduced versions of the image with the original dimensions ( full), each of which has its own purpose.
Let me explain with an example. On my blog, the first pictures for each article are 550 × 300 pixels in size. Therefore, WordPress automatically creates only two variations: a thumbnail and a medium-sized picture, since by default the maximum height and width (1024 × 1024) of a large image are larger than the original size.
Let's start with the thumbnails. For example, on my blog, when displaying links to publications from the same category, at the end of each article, thumbnails (150x150 pixels) are displayed, which duplicate the first pictures to the post:

Note that there is an option for thumbnails "Crop to fit"... What is it for? The fact is that when generating reduced copies, WordPress compresses the original image to the limit set in the settings.
Let's say you left the default thumbnail height and width (150x150). If the picture is square (for example, 400 × 400 pixels), then after compression it will not be distorted. However, if it is rectangular (for example, 600 × 400), distortion will occur on one side.
To prevent this from happening, just tick this option. Then WordPress will first shrink the thumbnail proportionally, and then crop it on the larger side (in our case, the width, which was 600 pixels in its original state).
You can, of course, calculate the size of the thumbnail yourself (in the event that the original images are not square), which will not be distorted when the main image is compressed. But for this, the first pictures of posts must be the same (since they are usually used as thumbnails), or at least proportional to each other (400 × 300, 600 × 450, 800 × 600, etc.). Let me give you a concrete example with more complex proportions.
As I noted on this blog, all of the first article images are 550x300. Let's say I would like keep the aspect ratio of the thumbnails without cropping it and at the same time the minimum of the sides (that is, the height) have 150 pixels. Then its width can be calculated. In order to avoid image distortion without circumcision, we first of all need to find out how many times it will be reduced in height:
300/150 = 2
Accordingly, the mini-picture should be reduced in width by the same number of times:
550/2 = 275
The obtained parameters are for thumbnails (275 × 150) and should be registered in the settings.
As for the copies of medium size, then in our example they will be generated based on the specified values for the width and height. Since the source has parameters 550 × 300, WP will take the largest size specified in the settings for the average image as a basis for compression (in our case, 300 px in width).
Thus, for the first pictures, for example, a 300 × 169 copy is automatically generated for me with all the proportions preserved (in this case, cropping is not needed). For other images used on the pages of the site, including articles, the situation is similar
To minimize the load on the server, you may need to change their sizes (then you just need to specify your values). Also, to save space on the disk where your site files are located, it is quite reasonable to disable the generation of any unnecessary image variants.
For example, very often a large image size is not used, because sometimes, depending on the conditions, it can also be generated (when the width or height parameters of the source are larger), if not for the first images, then for the rest, which can be used in the article. In this case, you need to set the width and height of the corresponding image, equal to 0:

Still, I recommend not prohibiting medium-sized images (medium) in this way, since they are used, for example, when adding images to a post in the WordPress admin panel.
I also advise you to allow uploaded images to be placed by sorting them into folders with dates showing the month and year of the upload (to do this, check the corresponding option with the same checkbox). This will help you find your lost images easier in the future.
In addition to the steps described above, it is simply necessary even before the publication of the first article, otherwise serious problems may arise with indexing and promoting the blog in search engines.
I think a high-quality video will be a good addition to the end of this part of the article:
WordPress users and profile
The functionality of WordPress allows you, as the owner, to add new users through the admin panel and define their role in the project (as a subscriber, member, editor, author, administrator). In addition, you can change their status at any time or delete them altogether. All these actions can be carried out in section "Users":

Here you can also view and edit information on your profile, including personal settings:

For example, you can disable the visual editor that is used when writing articles:

It raises, in my opinion, a lot of questions, since it often causes the information on the page to be displayed incorrectly. It is for this reason that at one time I completely switched to the HTML tab (Text) and do not regret it. Perhaps now the developers have eliminated all the flaws in the visual editor and you can safely use it.
If this is not the case, you can go at any time. to the "Text" tab and write posts immediately in -format. Of course, at first it will be somewhat uncomfortable, but it is common for a person to get used to everything. In the future, you can mark the checkbox and turn off the visual editor as unnecessary, so as not to be an eyesore.
Next, you can adjust the color scheme of the admin interface, start use hotkeys to check comments, disable the display of the top panel when browsing the site when you are logged in (in my opinion, this is not very convenient when working in the admin panel).
And here it is not possible to change the username through the WordPress admin area... This, coupled with editing the password, can only be done through phpMyAdmin, which I mentioned when I talked about how to enter the admin panel above. There is also a link to the relevant material.
Next, be sure to come up with a talking nickname, it will be displayed in the comments on the blog, corresponding to your posts. I do not accept nicknames in principle, so I indicated my first and last name, which is also possible.
I will not give the lower part of the form, everything is intuitively clear there. There it is possible to specify a link to your site, as well as to your profile in, links in AIM and Google Talk (instant messaging programs), Yahoo. I suspect this is still a dark forest for beginners, so they can leave the fields blank for now.
Below you can provide a piece of your biography by entering a few sentences in the text field under the paragraph "About me", which, depending on the installed WordPress theme, can be displayed on the site.
You can also install an avatar through the Gravatar service I have already mentioned in this article, create a new password and end all current sessions if you are authorized on several devices or in several browsers.
In conclusion, I note once again that the continuation of this publication will definitely follow, where we will consider all possible actions for managing a WordPress blog that may be needed in the further development of the resource.
In conclusion, I present a video from Evgeny Popov, in which he gave additional clarifications on some aspects, including the roles of users and the possibility of remote publishing in WordPress.
True, the video was recorded a little earlier than the last version of WP was released, so there are some inconsistencies with the current interface (for example, the "Options" section is now called "Settings"), but these small inconveniences are more than offset by the high quality of the material:
Interesting, of course. To favorites!
Good afternoon! I accidentally ended up on your blog. I really liked the way you write articles. I am a beginner, besides, as they say on the Internet, a teapot. I created my blog with great difficulty. The fact is that I did everything from materials that I got for free. And for free, it's hard. I also read Popov's lessons, yes, they are good. But he also says in his videos that you need to buy a lot for the site. I followed only one piece of advice, bought a domain and took on paid hosting. I have no money for the rest. And although my blog is already working, it is not very well organized yet. One good person helped me to install and configure the template. But I have to know everything myself, how to do it. And the main thing is how to conduct it correctly, to arrange it. Well, and then already and earn, if possible. In the meantime, it does not work, so there are no visitors, or rather there are, but they are few. My topic is such that many do not even know that it can be used, knowing the basics. But I have knowledge of this subject. But if I learned how to blog normally, then more people would know about my blog. But experienced bloggers often write not entirely clear for beginners. I have no money to buy paid courses. I want to ask you, should I do this if I don't know a lot? And what I already know, I cannot apply, since the blog is young, the first article was published at the end of February this year. Or is it better not to waste your time? Of course, I am very interested in studying all this, but I need to earn money. So I don't even know where it is for me and what code I need to enter.
Valentina, what can I say about this. Believe me, everyone, and not only a webmaster, has such a dilemma at the beginning of the journey: to give up everything, because it’s not enough, or to dig the earth with my nose, but achieve my goal, I am no exception. The lion's share, unfortunately, chooses the first option and gives up what they started. Although those who adhere to the second path sometimes reach the top. Of course, only a few achieve full-blooded, so to speak, success, here I will not dissemble, and this is quite logical. But the overwhelming majority of those who were not disappointed in continuing what they started.
So do not despair, Valentina, a person is a complex creature, sometimes one phrase correctly said at the right moment can move a person to incredible actions. I hope that this phrase to you, Valentina, will turn out to be this: I WISH YOU SUCCESS and GOOD LUCK!
Good time of the day. Thank you for learning, very, very informative. But I still have a question, since I just started learning WP. how can I attach publications, let's say news to different pages, and not to one - the main one, where they appear automatically. Let me explain: how, for example, to create two or more "news feeds" on different topics? so that the records appear and update not only on the main page, but where I want? Is this even possible on WP? because in the future I plan to create several (up to 4) regularly updated news feeds.
in the meantime, unfortunately, I have to regularly update the static page, which is extremely inconvenient.
Alexander, in a standard blog, entries appear not only on the main blog, but also on category pages, for example. If you want to divide news by topic, then just create several news headings (for example: General news, Commercial News, etc.). WordPress will categorize these posts.
I really liked the cry of Valentina's soul, because the same thing is happening to me now. I created a site for the sake of sports interest, and he took it and registered. Now I understand that something needs to be done about it. And this untranslatable play on words - plugins, widgets, tags, etc.? I sit in the evenings and figure it out. Thank you Igor for the comforting words. I will refer to your site, maybe I will understand something. Good luck to all.
Svetlana, perhaps this is your calling, so to speak, destiny. In any case, in life it is interesting to try different ways of realizing your interests.
In the course of work, I had a problem with the online store kladproraba.com, the top screen settings panel stopped working in the WordPress admin area and not only, blocks and widgets stopped working. I reinstalled the theme, deleted the plugins and activated it one by one, nothing helped, but I need to work. I followed all the advice and recommendations. Purely by chance I looked at a small icon in the browser in the form of a shield - it's an ad blocker. Once I installed this extension for the browser a long time ago. I looked at the green flap - it was turned on, well, I blundered it, turned it off, reloaded the page in the admin panel in a couple of minutes and everything works. I could not even think of such a course of events. I have not met such a recommendation when searching, I share, maybe someone will help. You just need to disable the ad blocker on the site you are working on.
Good afternoon friends. Today's article will be short, and I will not tell you anything particularly new and super complicated in it. Yes, many power users might laugh and say the article is first class. But all experienced users were once beginners, and sometimes tormented by the most simple questions. So, in this article, I will explain how go to admin panelWordPress, or in simple words - how to get to your home site.

Of course, you just need to type in the domain name of your site in the address bar of your browser, you say. But if you do this, you will simply be taken to your site as a visitor, and we need to get into the control panel of our own site in order to be able to make changes and manage the settings. Hard? Nothing like this!
What is a WordPress admin panel? In simple terms, the admin area is where you manage your site (change settings, create new categories and posts, install plugins, make changes, and much more). If you suddenly do not know how to enter it, do not be afraid - this is a matter of a few seconds.
So, in the address bar of our browser, we drive in the following:
Domain name/wp-admin or in our case saytostrojka. ru/ wp— admin
Or shorter saytostrojka.ru/admin
A login window will appear in front of you, where you must enter your login credentials. You entered this data when. Enter the data and click the "Login" button. Do not forget to check the "Remember me" checkbox so that you do not need to re-enter the password every time.

Well, that's all, you see how simple it is. You will go through this procedure regularly when you enter the site as a "host". After we enter the credentials, we will enter the admin panel of our site, which looks like this.

And what if suddenly you cannot remember the login and password for entering the admin panel? Don't be scared, take a look at your e-mail - during registration, these data were sent to you by mail. And even if you deleted the letter by an absurd accident, you can always use the “forgot password” function and ask to send it to you again.

By the way, after you have entered the admin panel of your site and will then simply send it to the site (this can be quickly done with a button with a house icon “ Go to the site"In the upper left corner), a quick access panel to the admin panel is added to the top of the site.

Leaving the admin area is even easier. In the upper right corner of the admin panel you will see the inscription "Hello," your name "". When you hover over this inscription, a drop-down box will appear, in which you just need to click on the "Exit" button.

Well, that's all for today, friends. In the following articles, we will learn how to install a new WordPress theme on your site and how to customize it. See you soon.
To log into your WordPress dashboard, in your browser's address bar, enter site_address / wp-admin /(in our case it is test1.ru/wp-admin/, and don't forget to run DENWER). First of all, you get to the main page of the console, it looks like this.
Collected here is what, in the opinion of WordPress developers, webmasters use most often, and the panel greets you Welcome, which offers to start getting to know the admin panel right now. In addition to the main panel, there are many other pages, which can be accessed through the admin panel menu located on the left.

Regardless of which part of the panel you are in, you will have access to several of its elements.
- Screen customization. Clicking on the button will open the settings panel. Its interface will change depending on the page on which you opened it.

For example, customizing the home page screen means enabling / disabling its elements.

The page Recordings a little more screen settings.

- Help... Provides links to the support forum and documentation for the current topic. The help, unfortunately, is opened in English, but the forum is in Russian.

- ... A kind of quick access bar. From it, as well as from the main page, you can quickly go to the most popular sections of the admin panel, as well as open the profile settings or go from the admin panel to the site itself.

The plus (and for some, the minus) of this panel is that it is displayed even when you are on the site, and not in the admin area. If necessary, you can turn off its display there. To do this, you need to open Users -> Your Profile, on the displayed page, uncheck the box Show top bar when browsing the site and press Update profile.

Now the top panel will be in the admin area, but not on the site.
- ... Located on the left. It can be minimized by clicking the button of the same name (its lowest point). Then it will be displayed as icons without labels, but it will not disappear completely (screenshot below).

There are no more important elements common to all pages of the control panel, and it's time to dwell on the main menu in more detail, describing each of its items, so that you can familiarize yourself with the administration capabilities of a site built on WordPress.
- Console... Consists of two tabs - the main and Updates... About The main we have already said that the user gets to it immediately after entering the admin panel. In the tab Updates contains information about the available new versions of both the engine itself and the plugins and themes installed on it. If there are updates, a number appears next to the name of the tab, indicating their number.

On the tab, you can not only find out the details of the available updates, but also apply them.

In our case, an update has been released for the Akismet plugin, which protects the blog from spam. After the update procedure, the number next to the tab name disappeared.
- Recordings... This item and its submenus allow you to manage your blog posts: add new, view, edit or delete existing ones. Also here you can customize categories and tags. Headings are categories by which posts can be categorized for easy search and navigation. Categories can be added to the site menu. Tags are tags - keywords that improve navigation on a resource and make it possible to find related articles.

- Media files... WordPress allows you to add not only text to your pages, but also pictures, music, videos, and other files. Paragraph Media files contains two sub-clauses: Library and Add new. Library makes it possible to manage all uploaded files directly from the admin panel. You can replenish the collection by looking at the page Add new.

- Pages... Obviously, paragraph tools provide the ability to create and edit pages, but it is not obvious how they differ from posts. Imagine a blog. Every day some interesting information is published there, and each new article belongs to one of the headings established on the site. These are records. But in addition to posts, almost every blog has "About us", "Contacts", "Advertising". These are pages. They do not belong to categories, do not appear in the blog feed, and are usually not commented on. It is for the management of such pages that the item in question is responsible.

- Comments (1)... Needless to say - here you are the moderator.

- Appearance... An important and functional tab, with the help of the elements of which you can almost completely change the design of the site. It allows you to select a theme, customize menus and widgets (these are movable information blocks, for example, a search block, recent comments, or a calendar), change the name of the site, add a logo and background, and also use an editor to manually edit the theme files. By default, WordPress has three themes, but you can add others - only from the described panel there are about four thousand of them available.

To change the look, hover over the theme you like and click Activate.

- Plugins... Plugins are add-ons that extend the functionality of WordPress. For example, they wanted the photos to open beautifully - installed a plugin, decided to integrate the site with social networks - installed a plugin, planned to add a forum to the blog - installed a plugin, etc. Like themes, there are thousands of extensions for WordPress. This submenu allows you to manage installed and add new plugins. You can also get into the editor from there to edit the add-on code, but this fun is only available to web developers, because most plugins are one or more PHP files.


- Tools... Allows you to use additional features of the engine. For example, here you can import posts and comments from another site to this one, export blog content to a file, quickly insert material from the Internet into your post, or convert headings to tags.

- Settings... Allows you to manage a large number of important blog parameters. For example, here you can configure the principle of link formation, the content of the main page, set the default image sizes, change the site address and blog location on it, set the date and time.

All these points taken together make up the functionality of the WordPress admin panel, and you will use them in the process of working on the site. After installing plugins, the menu can be replenished with new items.
The WordPress admin panel or the administrative part of the WordPress site is designed to manage the content of the site: editing articles, changing themes, placing widgets, managing media files, editing the site code, including the CSS appearance.
WordPress admin area - login
All WordPress user groups, except subscribers, can enter the site's admin panel. True, each user group has its own permissions for editing the content.
However, even an administrator cannot log into the WordPress admin area without a username and password. Administrator login and password, set when. In the same place, it is worth remembering.
WordPress admin login address
The URL for entering the unprotected admin area of the site is as follows:
- http: //your_site.ru/wp-login.php or
- http: //your_site.ru/wp-admin/
How to get to the admin panel from the site
To get to the administrative part of the site from its front, you need to place the Meta widget on the site. It has four links: Login, Register, RSS Entries, RSS Comments, WordPress Link. The last three links can be removed. To read: .
If you forgot your password and username for entering the WordPress admin area, it is unpleasant, but not “fatal”. There are several options to restore them.
How to recover the password for entering the admin panel
To recover the administrator password for entering the admin panel, you can use one of the three recommended methods. Read about them in the article:.
How to remember the administrator login
How to change your WordPress admin password
If you are logged into the admin area and want to change your administrator password, open the Users tab → Your profile. In the lines: "New password" and "Repeat new password", change the password to enter the admin panel. Delete the old password from the browser password cache.

Login to the WordPress admin area through your WordPress.com account
You can simplify the login to the admin panel of the site by syncing your account on the site with your WordPress.com accounts. For synchronization, you can use. The 33 features of the Jetpack plugin include an authorization module, via a WordPress.com account.
 WordPress admin Login
 How to keep your WordPress admin area from being hacked
WordPress security plugins
Install one of the wordpress security plugins on your system. Almost, in all plugins of this type, there is a module for protecting the admin panel from unauthorized entry. The admin area is protected in different ways: the number of incorrect login attempts is limited, the login address to the admin area is changed and / or encrypted, etc. Read more in the articles:
Let's take a look at the content of the WordPress admin area.
What's included in the WordPress admin area
Customizing the look of your WordPress admin
Settings for the appearance of the admin panel are located at the top of the page on the outgoing screen. It is called "Screen Settings" and is present on each tab of the admin panel, with its own settings elements.
Let's see how it changes the appearance of the admin panel using the example of the Console - the main page of the admin panel.
 WordPress admin area
 Open "Screen Settings" and put a checkmark in the required checkboxes. The flagged console modules appear on the console page. It's simple. The number of modules will increase as new plugins are installed.
Conclusion
WordPress admin design changes over time. Recently, new color schemes have been added (they are on the User - Your Profile tab), but fundamentally it remains unchanged. This is the left panel of the console and the top technical menu.
Did you know that 40% of users leave poorly designed sites? Why Lose Profits? Select and install one of the 44 thousand premium website templates. The perfect choice for your business!
WordPress has changed the way content is created. With built-in publishing features, he has helped startups and emerging companies build a solid foundation for content marketing. Finally, this system has helped millions of bloggers around the world and those who have long wanted to become one to create, publish, collaborate and spill a solid creative stream outward, changing the way online content is consumed once and for all. In many ways, users are helped by the WordPress admin panel, which I will talk about in more detail in this article.
WordPress is the # 1 content management system and blogging platform (although it is not at all limited to creating blogs), but above all it should be perceived as an easy site to manage, operate and optimize. Without WordPress, adding online content won't be the way it is now.
WordPress Admin - WordPress Benefits
For several years now, our team has been helping our readers in choosing the most stylish and high-quality WordPress templates and plugins for creating websites of various kinds: from blogs and magazines to corporate websites and online stores. Versatility is one of the most important features of WordPress, which means that you can easily create any kind of website based on it. It's no surprise that our site is also powered by WordPress. On our own experience, we talk about everything that concerns: from the choice of a solution and development to content management and promotion. We also publish a large amount of valuable and useful information related to other platforms and CMS, both for corporate and personal sites, and for the eCommerce industry. Magento, Drupal, Joomla, Shopify, PrestaShop - you will find a lot of interesting about all these solutions here, but today I would like to focus exclusively on WordPress.
WordPress is a system that provides users with extensive customization options and options in the form of themes and plugins. There are so many of them for her that in order to get a site with the same design, you need to try very hard. For example, Envato has two platforms, one for templates (ThemeForest) and one for plugins (CodeCanyon). So, only there are currently 10,261 templates and 5,769 plugins exclusively for WordPress. This is many times more than for other platforms and CMS (for example, there are only 1000+ templates for Joomla, and 500+ templates for Drupal). If you really don't want to feel constrained when building your website, trust WordPress and the opinion of the over 18 million users who work with it.
You will find nowhere else such a platform that provides so many options for customizing the look and feel of your site, including in-depth customization of its various components using the admin panel.
20 WordPress dashboard templates and plugins:
WordPress also allows you to customize the admin area itself, where all the magic happens. This can be done using special plugins and extensions for the admin panel. With them, you can change the admin panel beyond recognition, making it a more pleasant-looking and flexible fully-functional machine for work in customization. Moreover, you do not need to think about the opinions of users, because the admin panel is your personal working tool that you can customize the way you want it.
Together with my colleagues, I have selected for you the most popular and probably the best plugins for customizing the WordPress admin panel, which are very easy to install and configure. This process takes a matter of seconds. Many of the solutions provide solid opportunities for optimization, customization and enhancement of features and functionality, so that the WordPress admin site not only looks amazing, but also incredibly convenient to work with in everyday life.
Are you ready? Go!
Admin WordPres - Best WordPress Plugins & Templates Change Admin 2017
I decided to split the review into three parts. In the first, I will introduce premium plugins and templates for the admin area that will improve the look and functionality of your admin panel. The second part will be devoted to free admin themes with the best design, and the third - to free admin plugins to expand its capabilities. Admin themes have been around for a long time, and many of the plugins presented have managed to prove themselves from the very best side. While some of them are fairly new, they are still willing to provide bloggers, businessmen and store owners with the most flexible options to improve user experience and dashboard interface. If your favorite plugin or template is not on the list, we will definitely tell you about it - just let us know in the comments. Share your experience!
WordPress Admin - Premium Templates & Plugins
We try to convince our users that it is not worth saving on your business. When it comes to website development, I always advise you to use the optimal solution. It is not necessary to order a website from a developer, but you should not buy a free theme either. The ideal price-performance ratio would be buying a paid WordPress theme. The same goes for plugins.
How are premium plugins and themes different from free ones? Obviously, premium plugins / themes offer more benefits for their price. Of course, this does not mean that free plugins and themes are terrible, but in general, premium plugins and themes are safer and more reliable. They are hosted on specialized sites like CodeCanyon / ThemeForest or the fairly new YITH. Thanks to this, they are thoroughly checked by specialists and admins. As a result, upon purchase, it is less likely that the theme will be of poor quality, and the plugin will be severely buggy or will not work at all with other plugins. For free plugins, this situation is quite common, although not for everyone.
In the industry of developing paid templates and plugins, serious competition has formed, which raises the bar for developers. The market forces them to carefully test their products, so both the users and the developers themselves benefit. By investing in the purchase of a premium plugin, you are making a confident investment in your business, which will pay off very soon.
Enough words - I present to you eight of the best plugins and themes for those who are serious about branding and want their admin panel to bring more features.
WPShapere
WPShapere is a great WordPress theme for admin panel styling. It is very easy and quick to customize for any task and every taste. Included is a set of customizable widgets that you can show or hide as you like. The main purpose of WPShapere is to provide options for the admin menu at all user levels. It supports the concept of "White label branding", which involves the production of certain goods and services by one company and their use by another company under its own brand. For these purposes, it has a special section for uploading logos.
The theme also comes with creative layout features in the form of color customization from an unlimited palette and ready-made professional templates. WPShapere supports a variety of plugins, including Visual Composer, Contact Form 7, WooCommerce and many more. Thanks to this, you can customize the design of the admin area without programming skills, customize the operation of email systems and login systems, and work with stores.
Also, the plugin has a beautiful admin panel with the ability to add custom links. WPShapere has a beautiful minimalist concept that aims to expand your creativity and imagination. This is a cool WordPress admin theme that will provide an incredible user experience for you and your colleagues. It will also be intuitive to manage jobs, user priorities and access settings. You will get a large number of settings for managing the menu, including the ability to rename objects. You will even have access to personalized Dashicons and FontAwesome icons for customizing icons in the menu. On top of that, you will receive a complete set of operating instructions and highly qualified support. Looking for a top-notch admin area? Choose WP Shapere and don't hesitate anymore!
Material WP
Our entire team is very fond of material design and especially appreciates what developers are trying to do with it. The Material WP theme is a good example of this modern concept in the WordPress admin area. This design option will not only completely change the look of your admin panel, but also make the WordPress admin area incredibly convenient and enjoyable to work with. Particular attention was paid to the intricacies of the user interface. It also has modern features such as the ability to reorganize menu items using a drag-and-drop interface, responsiveness, and a parallax block, which is basically unique to Material Design themes. Your admin panel will be able to work with several sites at once and, besides the fact that you can change the WordPress admin panel beyond recognition in just a few seconds, you will also get several styles to change the entrance to the WordPress admin panel. This is a complete range of options for the most demanding user.
Forest
A theme called Forest should definitely be green! The way it is. This is a ready-made admin panel in a green color scheme, but that's not all. With this theme, you can customize colors, fonts, content appearance and logos using a dedicated menu. For more advanced users, customizable CSS styles and a dedicated "Quick Panel" will be available. And, of course, the premium WordPress admin area could not but be made in a modern flat style, optimized for Retina screens. This is one of the best themes for those who love and appreciate fashionable style!
Ultra
Want to get not just one, but 30 admin themes in one plugin? Choose Ultra, an incredibly powerful WordPress plugin that will transform your admin panel. Administrators will be able to rearrange the location of each object in the admin panel to make it as much as possible adapted to personal needs. All styles are made in a modern manner, so even the most demanding user will be happy with this plugin.
First
The First theme uses flat design. You can customize the admin panel and menus, as well as the login page and footer objects, just the way you want. At the moment, the theme has been downloaded by more than 500 users, which means that when you purchase it, you will have a high-quality WordPress admin panel, which occupies a leading position in the market for themes for admin panels.
Clientside
Clientside is a theme focused on the convenience of your clients with the admin panel. It removes all unnecessary objects and elements typical for the standard admin panel. With Clientside, you only get what you really need to work with to add and edit content in a productive environment.
Material
This is another theme that implements the White Label concept. Has one of the most elegant and advanced designs on the market. More than 100 unique design options and 20+ customizable widgets for managing statistics. This WordPress admin provides all the options for you to have a custom WordPress admin login page. Material also supports working with multiple sites, so it will become an indispensable assistant for those who need such a solution.
WP Admin Theme CD
This is one of the most recent admin themes with a clean and modern design. It has everything you need: custom colors, custom login page, WordPress memory usage statistics, and more. You will also have the ability to customize beautiful user profiles, allowing you to motivate your employees. The theme has been tested for compatibility with the main WordPress plugins: WooCommerce, Visual Composer, MailChimp and others.
Premium themes are better than free themes in all respects, although, as I said, there are some nice exceptions. We do not want to deprive you of the opportunity to choose and decided to prepare a selection of free alternatives for customizing the admin panel. Try the free ones, compare them with the paid ones, to decide for yourself whether it's worth investing in premium plugins so that you have your own professional WordPress admin area.
WordPress admin - free WordPress admin plugins and templates
Slate
The Slate dashboard theme makes the default dashboard more compact and provides an incredible user experience, with the main goal of adding content easily, rather than the hassle of setting up plugins and themes. Slate shifts the focus from a cluttered dashboard to an easy-to-use functionality for writing and editing content using the time-tested WordPress editor. At the moment, this plugin has already been downloaded by over 4,000 users. It comes with two color schemes.
Tamed
Tamed provides bloggers and other WordPress users with a modern dashboard that doesn't seem to be anything special at first glance. In fact, it has very nice color templates in the sidebar and all the standard WordPress admin elements. This greatly enhances the user experience by creating a cozy modern atmosphere instead of boring and technically overwhelming. This theme is available for free in the WordPress directory, although there is also a PRO version for those who want more options.
Material
Many people can argue for hours and argue that the standard WordPress admin design is made in a modern style. And although it is quite functional and provides a lot of possibilities, it may be lacking for those for whom design is not just an empty phrase. This is what prompted the developers to create their own Material theme, which, as you might guess, is based on Google's concept of Material Design. This incredibly beautiful theme is the perfect example of how flexible WordPress can be in terms of customization, including from the inside. ... You just need a little patience and experience to set up. The rest is not that important. Enjoy this theme to the fullest!
AG Custom Admin
Unlike other stylish admin panels, AG Custom Admin provides full-featured tools for developers who want to customize their admin panel for their own purposes or even for their brand identity. For example, if you have your own publisher, and you want to invite authors to your team, so that they get an incredible user experience and feel like a part of the team. While the standard WordPress admin area provides ample options for customizing colors, with the AG Custom Admin theme, you can achieve much more. You will be able to hide the WordPress admin panel, or rather its top panel. You can also edit all the objects in the admin area and remove all logos and elements related to WordPress by adding your company icons instead and using your corporate colors.
With the AG Custom Admin theme, you can also easily change the admin menu by removing or adding the items you want. I can't help but mention customizing colors, because this theme will allow you to customize the color of almost all pages in your admin area. You will have complete freedom of choice when setting up your site for work. Also, you will have a lot of other features to improve the user experience and interface - AND IT'S ALL TOTALLY FREE!
Changing your WordPress admin with this theme will be incredibly easy and fun.
Fancy Admin UI
More than 3 thousand users actively use the Fancy Admin UI theme to improve their user experience with the admin panel. And, despite the fact that this theme has only changed the color scheme and aligned the standard elements, this admin panel in a white and blue style will leave you only the most positive impressions. You will get a pleasant experience that no other theme or admin plugin can provide. Also, if you need additional functions or additions, you can contact and agree on this with the developer.
Blue Admin
Blue is the color of tranquility. It goes well with both dark and light designs. It is for this reason that so many plugin and theme developers have chosen this color as the default color scheme for their admin panel templates. The Blue Admin theme is no exception. The design is nice, clean and very simple. Plus, it's pretty modern, especially when compared to many of the other options. Perhaps such a WordPress admin area is exactly what you need to get some inspiration for new achievements. Think about it!
WP Admin Color Schemes
The developer set only one goal for WP Admin Color Schemes - to offer you a choice of several color schemes for your standard admin panel. Red, blue, green, black, orange - any of these colors will allow you to create an atmosphere in which you will feel more confident when working with your content. Just install and activate the theme and you're good to go!
Slash Admin
Slash Admin does a little more than the rest of the plugins and themes on this list. It is a complete tool that provides big and small features for your website that you only get by installing many third party plugins. The Slash Admin plugin has a large number of front-end features. For EU countries, it provides a pop-up for EU cookie compliance. So if you are targeting this market, this trick will come in handy for you. Also you will get a simple loading module for the pages that are loading. In addition, you can change the default font for the content to any of the available Google fonts and display a polite warning for visitors using outdated browsers (as this threatens both theirs and your safety).
As far as the functionality of the admin panel itself, Slash will allow you to use Google Analytics code to track statistics and set a limit on the number of automatically saved changes to records (this will save space occupied by the database, keeping it clean). You can also set a timer that will block the update of records and remove functions after a specified time. This is especially important for sites with a large number of authors and editors, where it is important to avoid situations where someone suddenly wants to change the content a couple of months after publication. Another great feature is the so-called "prevention mode", which is useful in cases where you need to make certain changes on the site. At the same time, the user sees only a page with a notification that preventive work is being carried out on the site. This kind of feature usually requires a separate plugin to be installed, but with Slash you don't have to worry about that.
This list of features is far from exhaustive. I recommend visiting the plugin page to learn more about it. To do this, just click on the button below.
WordPress admin area - Additional plugins to expand functionality
Based on the themes presented above, setting up a WordPress admin is pretty straightforward in terms of design. But what if you want to expand the capabilities of your admin area to better suit your needs? This is possible if you use special plugins, which we will talk about later.
Admin Guide Widget
The Admin Guide Dashboard Widget caters for more admin needs, especially for sites with multiple admins and editors who need notes and easy organization of post categories. With this plugin, you can quickly create widget blocks for all categories in your blog to display all available posts. This widget will allow you to edit content, leave notes and any other important information for the rest of the admin team.
Erident Custom Login and Dashboard
Agree, there is nothing more pleasant than opening your WordPress admin panel, which meets and pleases with a stylish design from the first seconds. Moreover, the one that you have created. Erident Custom Login and Dashboard allows admins to change the color scheme, background images, form styles, and many other customizations that seriously affect the perception of your brand by other admin users on your team. Take some time to explore Erident and you will see how it will help you out.
Admin Trim Interface
Although many bloggers are diligently looking for plugins to add more functions to their admin area, some, on the contrary, want to get rid of unnecessary and unnecessary jumbles that only spoil the work and load the system. Want to get a simpler admin area? The Admin Trim Interface makes sure you have everything you need by giving you a more simplified, cleaner and smoother admin area.
MainWP Dashboard
The MainWP Dashboard plugin has more than nine thousand active users, making it the most popular open-source WordPress site management plugin. It is an indispensable tool for multiple WordPress site administrators that will make your life much easier by providing instant management and customization benefits. The plugin is constantly updated, so don't worry about security.
Client dash
Would you like more options to customize your WordPress admin panel? If you know how to work with the built-in WordPress widget manager, Client Dash will be a real discovery for you. It will provide a powerful widget management feature in the admin area that works in a similar way to a regular widget manager. Only now the process of adding, removing, reorganizing and customizing widgets will become even easier. Your colleagues will be grateful to you, because now your WordPress admin area will give them even more pleasant emotions from their work.
I would like to end the review with an optimistic parting word. Whichever plugin or template you choose - free or premium - if you feel comfortable with it and do not experience any difficulties, then you made the right choice. Either way, your new WordPress admin area will allow you to get much more than the default one. You will see this for yourself soon. Good luck!
Artyom is the author of numerous reviews and articles on the website of the project "Web laboratory of success" dedicated to templates, plugins, courses and other topics of the site. An expert in the selection of templates and plugins for the WordPress platform, etc. Hobbies: reading interesting literature and outdoor activities.