Computer users who have a high-speed unlimited Internet, began to think about storing files not on their hard drive, but on the global network.
Yandex came to the rescue, which provides free space on its disks. Of course, Google and other well-known companies have the same opportunity, but we will show the principle of use on the example of a service from a Russian search engine, since it seemed to us the most convenient and with a pleasant design and features.
After all, in storing files on Yandex disk there is several significant pluses:
- we free up space on our computer from files that we rarely use and open, for example, photos, program archives, and more;
- we can share a link to a file and open access to file folders so that others can download them, if we do not mind;
- we can use Yandex disk not only from our computer, but also from any other - it is enough to have access to the Internet and a password from our mail, as well as using mobile phone or tablet.
Where to begin? Let's register a mailbox

AND we go through a simple registration, at which it will be necessary to enter:

How to enter your Yandex Disk
You can get there in several ways, but first you need to enter your mailbox using username and password.
Then there are several options:

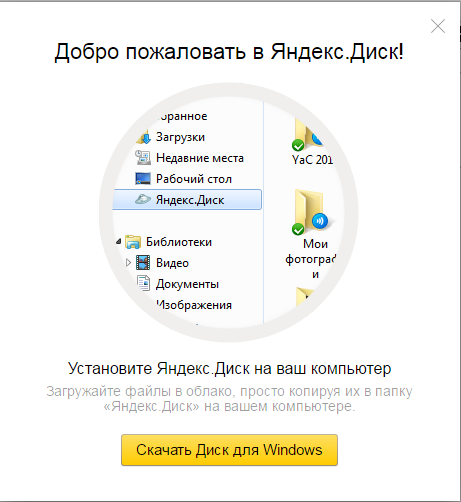
When we enter, we are usually offered to download a program for Windows on our computer in order to use the disk without logging into our account on the site. We will talk about this below, and for now, just close the window without downloading anything.
How to upload files to share links without installing the program
If we did not install the application on the phone, or the program on our computer, then, while in personal account Yandex disk, you can download files by clicking on one of the buttons:

You can also simply drag files from your computer to the window of your personal account:

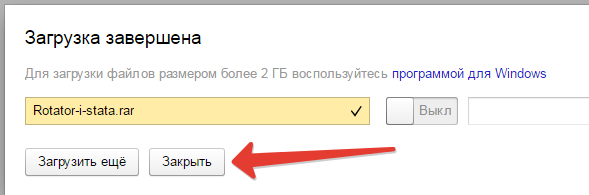
After uploading the file, we can close the window or upload more files:


How to upload files to Yandex disk using a program for Windows without going to the site
While in your personal account, you can observe the link "Download Disk for Windows". By downloading this program, you get the opportunity not to go to the Yandex website to upload files, but to do it using a special folder on your computer.
![]()
After installation, downloaded earlier setup file can be deleted.

After entering, you can finish at this, or additionally click on the link "Customize folder location and sync" and slightly tweak the settings for yourself:


After completing the settings, we will have a separate folder for storing files on the Yandex disk.

By default it is synchronized, i.e. when you copy some files to this folder, they are automatically uploaded to the Internet on your Yandex account disk, a green "bird" above the file signals this to us.
Also when you right-click on a file, you can get a public link, the same as we received on the site.

Nice bonus - a program for creating and editing screenshots
When downloading and installing the program for Yandex disk, we, as a pleasant bonus, install a program for conveniently creating screenshots.

It also has the necessary set of editing tools: various arrows, figures, writing text, cropping a picture to the desired size.

Yandex.Disk is a cloud file storage. Lets receive remote access to data from various devices, as well as transfer them to other users of the global network, provide download links.
After registering on Disk, the user is provided with 10GB. If desired, he can increase the storage capacity. Add another 10, 100 or 1024 GB for a fee.
Files on Yandex.Disk can be managed through the web interface, directly in the browser, and through a special system application. The data is stored in the cloud of the service for an unlimited time, downloaded via an encrypted Internet channel and checked by an antivirus.
Online (without downloading to a PC) in the cloud, you can play and view:
- video (AVI, MP4, WMV, MKV);
- audio (MP3, MKA, AAC);
- books (EPUB, FB2);
- documents (Word - DOC / DOCX, RTF, TXT);
- images (JPG, GIF, BMP, GIF);
- archives (RAR, TAR, ZIP).
1. To register in the cloud, open the page in your browser - https://disk.yandex.ru/.
2. Click the "Start your disc" button.
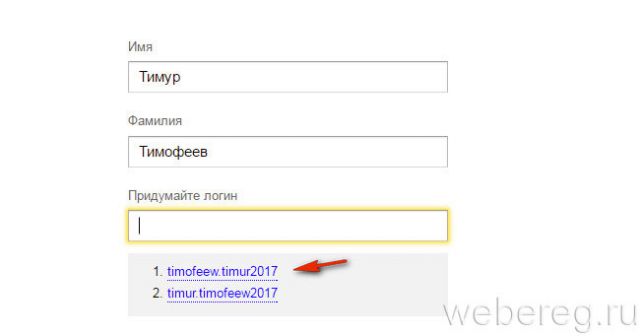
3. Enter your first and last name on the registration form.
4. Come up with your username or select one of the options generated by the service based on your data (click under the name field).
5. Make a password of 15-20 Latin letters and numbers (mixed) and enter it in the next two fields ("Think of a password", "Repeat ...").

6. Set up additional authentication, checking the rights to the profile (optionally - via phone or security question):
- Via mobile: enter mobile number with international code; click "Get Code"; in the drop-down field, enter the verification code received in the SMS.
- Without a phone: above the "Get code" button, click the link "I don't have a phone"; click to open the list in the line “ Security Question», Choose the appropriate question; v next line type your answer.

Installing and running the application
Upon completion of creating an account, the service will offer you to install an application for working with the storage. To use it, follow the instructions below:
1. When you first enter your profile, on the additional panel, click "Download Disk ...".

Note. If you have closed the panel with the link, on the profile page, at the top right, under the "Applications for all platforms" caption, click on the "Windows" icon (or another platform you are using).
2. Run the downloaded file.
3. If you do not want to install additional Yandex products (browser, manager, search engine on start page), uncheck the boxes next to their names in the installer window.

4. Click Finish. Wait for the installation to complete.
5. In the application window "Settings" click "Sign in".

6. To change the location of the Yandex.Disk folder, follow the "Configure location ..." link.

7. In the "Location" block, click the "Change" option. Specify a new path in the window that opens.

In order not to create another folder in the specified directory, uncheck the box in the "Create subfolder ..." setting by clicking. Click OK.
How to use the Yandex.Disk folder?
1. To open a folder, press "Win + E", click its shortcut in the window that appears. Or double click the application icon on the desktop.
2. Creating a new folder in a directory is carried out in the same way as in Windows:
- open the Yandex.Disk directory;
- click on the free space with the right button;
- in the drop-down context list, select: "New" → "Folder";
- name the folder according to the type of data that you intend to store in it (for example, bookmarks, music, books, etc.).

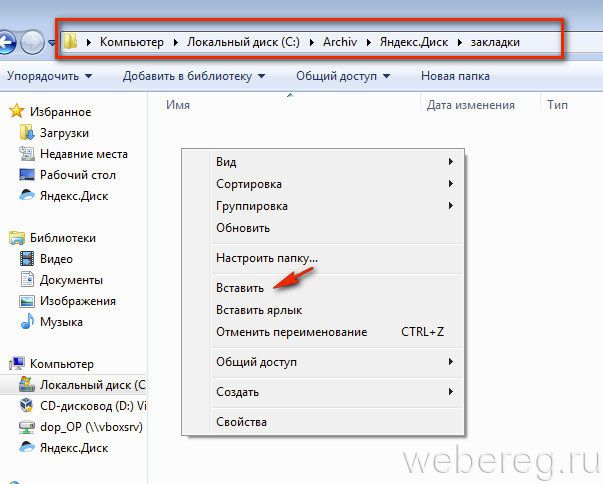
3. To copy a file from your computer to a cloud folder, do this:
- click on it once with the left button;
- press together the keys "Ctrl" + "C" (command "Copy");
- go to the cloud folder (see the previous instruction);
- right-click to open the context menu;
- click "Insert";
4. All data deleted from the cloud is placed in the recycle bin (do not confuse it with the Windows OS Recycle Bin!).
2. A setting panel will appear in the upper right part of the profile. Click in it "Open general access»To make the downloaded data available to other users.
Enjoy your work online!
Many of them have taken leading positions in their segment, and today's "patient" - Yandex Disk, was no exception.
Yandex Disk - what is it?
Yandex disk is cloud service allowing its users to store any files and create public access to them on Yandex servers.
Storing in the cloud means that the uploaded files are located not on the same server, as in the cases of file sharing, but on different ones. This design allows you not to fear data loss during hacking or physical destruction of servers.
Direct analogs are:
- Dropbox;
- Google cloud;
- Mile disk.
Key features
Files can be conveniently structured by creating your own hierarchy, because Yandex.Disk is almost a complete analogue of a hard disk.
By creating a folder or downloading a file, you can open to it full access and create a public link so other users can download it.
By the way about the "hard drive" - after installing the application, the computer will create system disk synced with cloud storage. Any changes made to this folder will be reflected in the data warehouse interface. In other words, a complete copy of this folder, with all its contents, will be created on Yandex servers.
Keeping zip and rar archives, pdf documents, Microsoft files Office from the Internet on your "Drive" - you can open them directly in your browser without downloading to your computer.
How to create and open Yandex Disk?
Get access to use the free cloud storage, any user can, just register at disk.yandex.ru or start mail. If you are already using other services and have account in Yandex - just log in using the same link.

At the time of this writing, all new users get 10GB disk space, absolutely free.
How to increase the volume?
If the space provided is not enough for you, you can increase the size by 10GB, 100GB and 1TB in two ways.
1. Pay for additional disk space, according to tariffs.

2. Take part in promotions from the company and its partners. For example, the offer "Gigabytes as a gift" has recently ended, which allowed to increase the volume by 32GB by installing the Yandex Disk application on the mobile.
How to use
Logging into your account, the question arises - what to do next? The main task of the service is to download and store files. As mentioned above, you can upload your files to Yandex Disk through the web interface and using the program installed on your computer.
Let's analyze each option in more detail.
Installing the application

During installation, pay attention to the additional suggestion to make Yandex your home page.

Select a folder on your hard drive to sync with your account.

Move any file to this folder and open the web version of the service, what do you see? That's right, the file has been uploaded to your cloud account.

For easier sharing, you can share the shared folder... This is done through the settings.
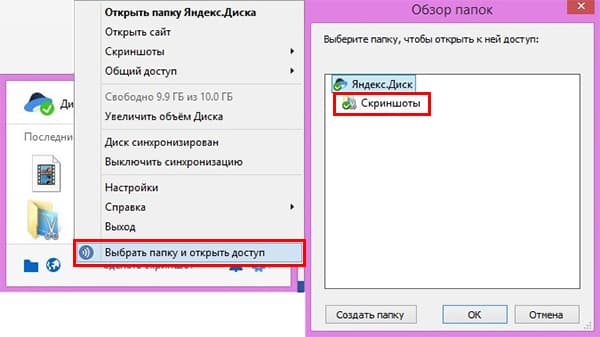
The browser will open new tab, where you will need to specify the users (their email) who are allowed access, i.e. make access settings.

Copying files from cloud storage on a computer's hard drive is the main disadvantage of the first version of the program and its name, the company tried to fix in the second version of the software.
Yandex Disk 2.0 beta
Yandex is constantly developing its services, the turn of the program in question has come. The Yandex Disk 2.0 beta application was released.
The main difference from the first version is that through the program, complete management of electronic documents located in the cloud is carried out. Keeping copies of them on your computer is no longer necessary.

During the installation process, you will also be prompted to install additional software, including the Yandex browser.
The program window completely copies the web interface, and the files are loaded by simply dragging and dropping them onto the program icon in the lower right corner of the screen.

Creating new folders, reading documents and merging them into one folder is carried out in the same way as in file system running Windows.
Data Warehouse Web
Do not want to install additional software on your pet - use the web version of the service. It completely repeats the functionality of the applications described above, with the exception of quickly saving files to storage.

All navigation takes place in the window, using the elements indicated in the figure above.
Viewing and editing in the browser interface is not available for files larger than 1GB.

To upload the actual file to the storage, drag it to the "Drop-zone".
Let's take a step-by-step example of how to upload a photo to Yandex Disk.
1. Open the folder on your computer where the photo is located.

2. Open your browser and enter your drive.

3. Drag the photo to the "Drop-zone" and wait until the download is complete.


How to remove Yandex Disk from computer
First of all, you need to figure out what exactly you want to remove - just the program or the account as a whole.
Everything is simple with the program, it is removed by standard Windows tools, but with the account will have to go to "drastic measures."
The first version of the application
1. On the taskbar, click on the disk icon and turn off synchronization.

2. Exit the application by clicking the "Exit" button.

3. Open "Control Panel" - "Programs and Features", find the desired program, right-click to bring up the context menu and click "Delete".

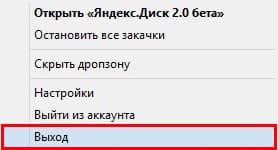
Version 2.0 beta
In the second version of the program, everything is a little simpler. Exit it by right-clicking on the icon in the taskbar.
Web version
It is worth making a reservation right away - to delete only Yandex Disk, you will not succeed, you will have to get rid of the entire Yandex account.
To do this, go to the account settings page, it is called "Passport". At the very bottom of the page, in the "Other settings" section, click "Delete account".

Read the information provided, enter the captcha and click the button indicated on the screen.

If you don't want to lose your entire account, you can limit yourself to deleting all files from Yandex.Disk.
Check all entries and on the right side of the screen, click Delete.

After erasing the software from your computer or laptop, do not forget to clean the OS from the remaining "tails".
Video review of the service
Hello! Surely many of you have already heard the news that Yandex has launched a new service - a cloud service for storing files. Today I will do a little review.
It's worth noting that Drive can be used from all devices with an Internet connection and will be a real competitor to the now popular Dropbox. I have already made a choice in favor of the new storage service for several reasons:
- 10 gigabytes free space on disk;
- user-friendly interface;
- access to files directly from Yandex mail (which I use as the main one);
- no need to create additional accounts, etc.
Personally, I like the current trends towards globalization of all kinds of services. With one single account, you can perform a whole range of work and at the same time the functionality is expanding every time, gaining more and more new users.
Registration on Yandex Disk
As I said, registration is not required if you already have one. In this case, it is enough to go to disk.yandex.ru, otherwise - to get a new mailbox.
Let's go to home page Yandex Disk and see what awaits us:
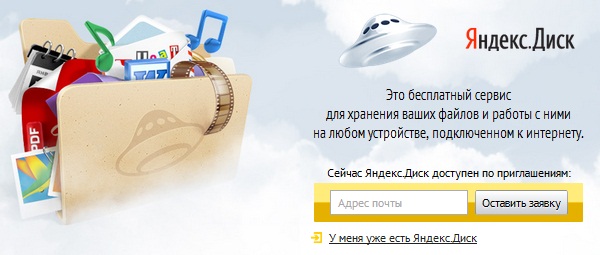
As you can see, at the time of my review, Yandex Disk is working in testing mode and accepts new users only by invitation.
 However, getting such an invitation is quite simple - just indicate the address Email and leave a request, as I did. The very next day I received a letter, quite original, on behalf of the Yandex Disk Captain 🙂 with an invitation to board:

After receiving the invitation, click on the link specified in the letter (and upon completion of testing the service, invitations will not be needed) and a window will open on the page with the mail and with a new Files tab:

You can upload files directly from the web interface, but it is more convenient to use a special application. Here we also see a link to download the application, which is available for various platforms, including operating system Windows, mobile devices and Apple Mac OS X:

Increase the volume of Yandex Disk up to 10 GB
Three easy steps will increase your storage space from an initial 3GB to 10GB! And you just need to perform the following actions:
![]()
- install the application (which was mentioned just above);
- upload to Yandex Disk a couple of files;
- and tell your friends - retweet, etc.

Here are three easy steps you can take to free up extra disk space for your cloud service.
Using the application when working with Yandex Disk
Now let's figure out how to use the application for working with Yandex Disk. After downloading, we launch the installation file and perform the necessary operations. Upon completion of the installation, select the necessary items as desired and click the Finish button to complete the installation:

Next, we configure the program to your taste, it is advisable to check the box next to the launch of the program at system startup, and also select the destination folder for the location of the files and other settings. There are only four tabs, I think you'll figure it out:

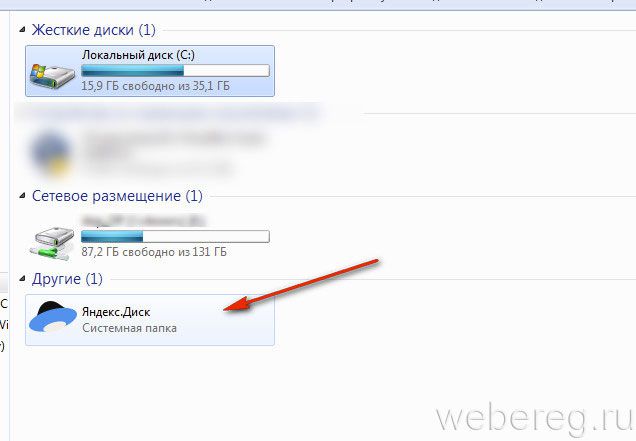
Access to the system folder for storing files can be obtained directly in the main explorer window, and of course, direct access to the folder that was assigned during the installation or settings of the application:

An icon will appear in the tray, right-clicking on which will open a pop-up menu with the main functions and settings:

This new file storage service is offered by its user, I really liked it, I will definitely use it and recommend it to you. By the way, and after all, the leader of the search market already has one service for storing files - Yandex People, do you think, against the background of such innovations, does it have a future?


