Free photo frames online - beautiful photo effects
You are always ready to install free photo frames at your fingertips, more than a dozen thematic sections. Style, beauty and quality are what distinguishes our photo effects. Over 5,000 photo effects, photo filters and framesPhoto frame flowers new
Interesting online photo frames in gold designs with decorative patterns and. Here you can insert a photo on the album page uncovered, and in the foreground is a sphere of a bouquet of pink magnolias. Complex and multifaceted models with small decorative elements. Vertical photo frame.Photo frame flowers
And then it's fun! In Funny.Pho.to services you will also find beautiful photo templates that "wear" your photos using special filters and put them in a beautiful vintage "plot".Photos frames new
Retro style gives tenderness and feminine images. Also, here, the perfect shot, the grandparents were young. Photo frame online decorative bright colors that you can insert a photo against the background of an open book among flowers and pearl necklaces.Beautiful flower photos free online
Very convenient collages for placing not only a photo, but also for writing it. Insert your photo into this delicate online decorative frame, decorated with floral leaves against the background of the water surface, and also shows burning candles in the background of the frame.A large number of photo frames to choose from
We all enjoy trying different options. This is why Fotor offers you a variety of digital photo frames with different shapes and styles to help you update your images. From classic, shaded, simple ... to polaroid frames, whether you want to add photo frames to your family photos and customize them, or frame your photos to even out the texture of your images, Fotor gives you full support.
Easily elevate your photos with frames
Fotor is a free online photo editor that provides many free photo frames like file frames, photo frames, retro picture frames, simple photo frames, lace frames ... Drag your photo or your design into the perfect digital photo frame, adjust frame color and change it to blue or other color beautiful photo frame. It will highlight your photo after a few clicks, no Photoshop skills required.
Get inspired and stimulate your unlimited potential
Photo frames are a unique photo effect and you can use a digital photo frame to add subtlety or contrast to your photo and improve its positioning. To fill the picture frame, Fotor online photo editor can give you some inspiration and create a beautiful perspective. You can adjust the outer size, inner size, round the corner of the picture in the Polaroid frame, and add a special perspective to the photo. Floral beautiful photo frame is perfect for your wedding photos. See what wonderful things you can create with square picture frames, vintage photo frames ... they all work for many occasions.
7 easy ways to create your own frames in Photoshop.
Greetings, dear reader of the site!
You don't need to know the program well to make a frame in Photoshop.
A minimal knowledge of Photoshop is enough.
So, we start from simple to more complex.
Method 1 – perform a stroke.
We open the image. Select either all or part of the image.
If you need to make a frame for the entire image, then it is best to use the CTRL + A keyboard shortcut, but if you need to select a part of the image, use the selection tools.
After the selection is ready, go to<Редактирование> –<выполнить обводку>
In the window that appears, select the thickness, color, location of the stroke - inside.


If the location of the stroke is selected - outside -, then the size of the image can be reduced using the command -Free transform - the keyboard shortcut CTRL + T, while holding down the Shift key to maintain the proportions.

Or, increase the canvas size to the required dimensions.

From the above it follows way 2:using an underlying layer:
The resulting empty space can be filled with any color, gradient or texture on a new layer.
In this case, the layer with the image must be above the color layer or the texture layer.
If your layer with the image is a background, then it should be transferred to a regular layer by double-clicking on it and clicking OK in the window that appears.

Method 3. We use styles.
Create a new layer above the image layer and fill it with any style. Styles for every taste can be downloaded on the Internet.
Select, say, an oval area, clean it up by pressing the Del key.

In this case, the lower layer with the image can be moved, adjusting it to the resulting frame.
You can add text by applying a style to it as well.

Method 4: Using Blending Options - Layer Styles.
Create a new document, let's say 10 cm x 15 cm.
Fill the layer with the pattern you like.
Select the area, clean up the content - Del key
Remove selection, Ctrl + D.
Double click on the layer, or call the blending parameters by clicking on the icon:

Select the overlay options, let's say: shadow, embossing, stroke.

Place the image under the resulting layer.

Method 5. in photoshop.
Open the image and add a new layer.

On a new layer create a quick mask - the Q key.
Then free transform - reduce the size of the mask.
Go to Filter - Strokes - Airbrush.

Set the dimensions to your liking

Exit the quick mask: press the Q key again
Got a selection:

Invert the selection

Fill the selection (layer 1) with color or gradient.
Remove selection.

Method 6. Using bitmap shapes.
Open the image and unlock the background layer.

In the toolbar, select the bitmap shape that suits the frame better. Figures can also be found on the Internet.
Select the desired fragment

Change the location of the layers, and by pressing the Alt key, move the mouse between the layers.
An icon will appear - click.
Then you can merge the layers Ctrl + E
Add a new layer below the image layer

Add blending effects on the image layer

Fill the bottom layer, and you can apply the filter<Эффекты освещения>.
Or any other, play around - which will be to your liking the most.

By changing the transparency of the layer, applying masks, you can achieve various effects.

Method 7. Make a transparent frame in Photoshop.
Open the image, duplicate the background layer three times - pressing the shortcut keys Ctrl + J three times
Turn off the top two layers by clicking on the eye icon opposite the layer. And immediately rename the layers so as not to get confused.

On layer 1, go to<Фильтр>-<Размытие>-<Размытие по Гауссу>.

Blurring the image

Let's add some noise. Go to<Фильтр>-<Шум>-<Добавить шум>
To do this, we need a graphic editor Adobe Photoshop. I assure you, it is very easy to insert a photo into a frame using Photoshop, even if you don't know how to work with it at all!
1. Open the image with the selected frame in Photoshop (File menu -> Open or by pressing Ctrl-O):
In the center of the picture with the frame there is a transparent area (it is denoted by gray and white cells), in which the photo will be located.
2. Open the photo you want to frame.

And now on the toolbar on the left, click the button, "grab" the photo with the mouse and drag it into the window with a frame. The photo will overlap the frame and we need to move it down. To do this, find the right panel (called the palette) Layers (Layers). Now you have 2 layers in your image: one with a frame, the other with a photograph. You need to move the photo layer down. This is done simply: click on the name of the layer and drag it "under" the name of the layer with the frame.

Attention! If the layer with the frame is the background in the Photoshop document, then you will not be able to place the layers under it. To do this, you must first convert it to a regular layer. Just double-click on the name of this background-layer and in the window that appears, click OK (you can give your name to this layer if you want).

Next, we need to resize the photo to fit the frame and, if necessary, shift and rotate it. First, make sure that the layer with the photo is currently active, and not with the frame (the active layer is indicated by the brush icon to the left of the name)

We start resizing the photo: use the Ctrl-T key combination or through the Edit -> Free Transform menu to select it and change it as needed. To reduce the photo without distortion, do it while holding down the Shift key. The result will look something like this:

It is better to save the finished photo for future use (printouts, creating wallpaper for the desktop, etc.) in the format jpg(Menu File -> Save As). And if you want to be able to edit it in the future, save the "source" as well - that is, save the version of the file in the format PSD.
Hello everyone, my dear friends. Let's return to my favorite graphic editor, and today, for beginners, I would like to tell and show how to make a frame in Photoshop around a photo, insert a ready-made one, or draw it myself in the form of a rectangle. I myself have witnessed how harsh and wrong people do it. They just put the photo on the frame and erase everything around. But this is terribly inconvenient and wrong, so we will do everything right.
Insert the photo into the finished frame
Even a full teapot, which only today learned about Photoshop, can handle this method. If we already have a certain frame or blank for a vignette, of which you can find a whole bunch of them on the Internet today, then there is no problem at all. Let's say we have two photos: Portrait of a girl and a blank with a transparent background in the right place.


But this can only be done in the most ideal layout, when our workpiece already contains a transparent background.

Insert a ready-made frame without a transparent background
The situation gets more complicated when the image is not meant to be a frame. Then you have to do it yourself. You can, of course, overlay images on top of the object, cutting off unnecessary ends, but this, as I said at the very beginning, is terrible. If you later want to change the photo, its size or position, then this can become problematic. Better to just make a hole and just insert our frame around the photo.
- Open the image with the intended frame and select the selection tool. In this case, you can take a rectangular selection, but I still prefer to use the Rectangular Lasso tool. After all, the picture may have errors.

- Next, we begin to allocate space within the frame around the perimeter. You should have dashed lines.

- After that check if you have a lock icon on the layer thumbnail. If yes. then click on it to make it disappear. Then press the key DELETE, after which the inside of the frame will become transparent. This is exactly what we wanted.

- Next, open the image of the girl (or whatever you have) in the same document.

- But again, we have it as the first layer, so we will need to move it. Go to the layers panel, and just like in the first version, move the thumbnail of the girl's layer below the frame layer.

- Further, it remains only to move and resize as needed by moving and transforming. You can also apply some layer style, like an inner shadow. It will look more realistic.
This is the final version we ended up with, and we didn't even have to crop the photo.

Clipping mask
A very cool method that has long been proven among designers is to create a clipping mask. I already considered this method when I wrote an article about that, but here I will consider this moment in more detail.
We make the framing ourselves
The easiest way to make a frame in Photoshop is to draw it yourself, for example, in the form of a colored rectangle. It will be simple but stylish.
- Go in and take "Rectangle"... After that, set the stroke color in the properties (whatever you want), and set the fill color to any color from the bulldozer, since then it will still be removed. I'll put yellow.

- Now, draw the rectangle we need on the canvas. You can pinch SHIFT to make it square. If the thickness does not suit you, then you can always change it in the properties. It is only important that at this moment the Shape tool is activated.

- If you want the outside of the stroke to be rounded or polygonal, you can select this option in the properties.

- You can also add some effects to your frame using. For example, I put the embossing and shadow. The rest of the properties are unlikely to have much effect on the stroke, as they will focus on the inner content.

- Now open the image with the girl (or whoever you have there). It, as you already understood, will appear as a new layer on top of the shape.

- Next, right-click on the girl's layer thumbnail and select Create Clipping Mask... Just before these, make sure that under the thumbnail with the girl is our rectangle with a stroke.

- As you can see, now the girl is inside, as if in the window of a house. It remains only to move it with "". You can also enlarge or reduce the image to fit your vision. The most important thing is that the picture is not cropped, but simply its edges are out of sight.

As you can see, everything is simple. You can add any more effects, well, or write text inside, so that it is clear who is depicted. Download some pretty font that looks great.
A little later, I will definitely post a video tutorial so that there are no problems.
Clipping mask for the finished frame
If the frame is located separately, that is, it is on its own layer and is just an element of some composition, then here you will need to do a little differently, since you simply cannot hide the image behind the layer.

Of course, you can try to do this, but the result is unlikely to suit you. In many cases, people come up with excess pruning. And I will not tire of repeating that this is wrong.
But there is a perfect way out - to make a clipping mask.
In principle, everything is very simple here.

Voila. Now the girl is in the frame and can be moved using the Move tool. The most important thing is that the movement will take place outside the frame and no edges will come out.

Online Photoshop
The most interesting thing is that you can insert a photo into a frame in Photoshop online, but forget about the method with a clipping mask. This thing, unfortunately, is not available in the online version of the graphics editor. Let's take a look at our actions from the second example.
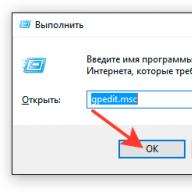
- Login to the service online-fotoshop and open the image from your computer, namely the very frame into which you then insert your photo.

- Next, be sure to remove the lock from the layer. To do this, double-click on it with the left mouse button. This will allow us to remove the unnecessary part from the picture.

- Now, select any selection tool. True, in online Photoshop you don't really have to choose, since there is only a rectangular selection and a regular lasso. Perhaps it will be convenient to use a rectangular selection here.
- And then, holding the left mouse button in one corner of the recess, stretch it to the opposite corner. Thus, you will have to select this very recess.

- After that, immediately press the button DELETE to remove the core. The part of the picture in the center should become transparent.

- Now, choose from the File menu - "Open Image" and find the photo you want to use inside. I'll take the same girl. But only the photo will open in another document. To drag it onto a document with a frame, hold down the left mouse button on the thumbnail of the girl's layer and simply drag it to the layer we need, where we have already worked.

- As you can see, the picture has moved too small. To enlarge it, select the item in the menu "Edit"- "Free Transform".

- Now, drag on the corner to enlarge the photo. Just be sure to hold down the key SHIFT to maintain all proportions after enlargement. Drag until you have enough or until the photo overlaps the frame.

- The final touch will be to move the girl's layer thumbnail under the frame layer so that it is in the back and no edges get in the way.
We got what we wanted. So, as you can see, even online photoshop can cope with this task. Of course, most of the functions here are castrated, but still, even the standard functionality can sometimes be enough.

Well, if you want to seriously study Photoshop, then be sure to check it out. cool video tutorials... They are perfectly structured according to methods from simple to complex, everything is told in simple and human language, so after studying you simply should not have any questions.
Well, that's all for me. Be sure to subscribe to all my publics and YouTube channel to always be aware of everything interesting. I look forward to seeing you again. Good luck to you. Bye Bye!
Best regards, Dmitry Kostin