We'll take a look at each example and see what their HTML structure and styles look like for different button states.
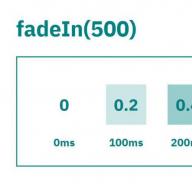
Please note that animations/transitions will only work in browsers that support these CSS3 properties.
In order not to litter the code in the lesson, I will not use prefixes for various browsers. You can see them in the archive with examples.
Example 1

In this example, we will create a large button with several elements on it. It will have an icon, body text, an arrow on the right side, and a price that will only appear when we hover over.
HTML markup
The structure is quite simple: the image icon and other elements in span tags:css
In the styles, we make sure the transitions are set correctly for the element we want to animate on hover. The price will be invisible, set its opacity to 0. Applying a lot of box-shadow will allow us to create realistic effects:.a-btn( background: linear-gradient(top, #a9db80 0%,#96c56f 100%); padding-left: 90px; padding-right: 105px; height: 90px; display: inline-block; position: relative; border: 1px solid #80ab5d; box-shadow: 0px 1px 1px rgba(255,255,255,0.8) inset, 1px 1px 3px rgba(0,0,0,0.2); border-radius: 4px; float: left; clear: both; margin: 10px 0px; overflow: hidden; transition: box-shadow 0.3s ease-in-out; ) .a-btn img( position: absolute; left: 15px; top: 13px; border: none; transition: all 0.3s ease-in-out; ) .a-btn .a-btn-slide-text( position: absolute; font-size: 36px; top: 18px; left: 18px; color: #6d954e; opacity: 0; text-shadow : 0px 1px 1px rgba(255,255,255,0.4); transition: opacity 0.2s ease-in-out; ) .a-btn-text( padding-top: 13px; display: block; font-size: 30px; text-shadow: 0px -1px 1px #80ab5d; ) .a-btn-text small( display: block; font-size: 11px; letter-spacing: 1px; ) .a-btn-icon-right( position: absolute; right: 0px; top: 0px; height: 100%; width: 80px border-left: 1px solid #80ab5d; box-shadow: 1px 0px 1px rgba(255,255,255,0.4) inset; ) .a-btn-icon-right span( width: 38px; height: 38px; opacity: 0.7; border-radius: 20px; position: absolute; left: 50%; top: 50%; margin: -20px 0px 0px - 20px; border: 1px solid rgba(0,0,0,0.5); background: #4e5c50 url(../images/arrow_down.png) no-repeat center center; box-shadow: 0px 1px 1px rgba(255,255,255,0.3 ) inset, 0px 1px 2px rgba(255,255,255,0.5); transition: all 0.3s ease-in-out; )
When you hover over the button, we will change the shadow, as well as show the price and hide the image:
.a-btn:hover( box-shadow: 0px 1px 1px rgba(255,255,255,0.8) inset, 1px 1px 5px rgba(0,0,0,0.4); ) .a-btn:hover img( transform: scale(10 ); opacity: 0; ) .a-btn:hover .a-btn-slide-text, .a-btn:hover .a-btn-icon-right span( opacity: 1; )
In the active state, we will make the button pressed by adding a shadow. The arrow icon on the right will be enlarged:
.a-btn:active ( position:relative; top:1px; background:#80ab5d; box-shadow:1px 1px 2px rgba(0,0,0,0.4) inset; border-color: #a9db80; ) .a- btn:active .a-btn-icon-right span( transform: scale(1.4); )
Example 2

The second example will be very similar to the first, only we will add some new effects.
HTML markup
The markup in this example will be the same as in the first example.css
The styles are almost the same as in the first example, we're just adapting the colors. But we will do a different hover effect. The price will increase to its original size and the icon will disappear. For the arrow, change the background color to red:.a-btn:hover( box-shadow: 0px 1px 1px rgba(255,255,255,0.8) inset, 1px 1px 5px rgba(0,0,0,0.4); ) .a-btn:hover img( opacity: 0; ) .a-btn:hover .a-btn-slide-text( opacity: 1; transform: scale(1); ) .a-btn:hover .a-btn-icon-right span( opacity: 1; background-color : #bc3532; )
The active state will be the same as in the previous example. We will only change colors. When we click the button, we will also rotate the arrow:
.a-btn:active ( position: relative; top: 1px; background: #5d81ab; box-shadow: 1px 1px 2px rgba(0,0,0,0.4) inset; border-color: #80a9da; ) .a- btn:active .a-btn-icon-right span( transform: rotate(360deg); )
Example 3

In this example, we will try to do something completely different. The button will expand down on hover and reveal another message. The arrow icon will rotate slightly.
HTML markup
The markup in example 3 will be slightly different than in the previous examples. The text that will slide down will be in a span tag with the class "a-btn-slide-text":Register now
css
In the normal state, the button will have a certain height, we will animate it on hover in order to display additional messages. The extra "a-btn-slide-text" message will be positioned absolutely and we will increase its height from 0px to 30px on hover..a-btn( background: linear-gradient(top, #feda71 0%,#febb4a 100%); border: 1px solid #f5b74e; border-color: #f5b74e #e5a73e #d6982f; box-shadow: 0 1px 1px # d3d3d3, inset 0 1px 0 #fee395; padding: 0px 80px 0px 10px; height: 38px; display: inline-block; position: relative; border-radius: 4px; float: left; margin: 10px; overflow: hidden; transition: all 0.3s linear; ) .a-btn-text( padding-top: 5px; display: block; font-size: 18px; white-space: nowrap; color: #996633; text-shadow: 0 1px 0 #fedd9b; transition: all 0.3s linear; ) ; font-size: 13px; white-space: nowrap; font-family: Georgia, serif; font-style: italic; text-indent: 15px; overflow: hidden; line-height: 30px; box-shadow: -1px 0px 1px rgba(255,255,255,0.4), 1px 1px 1px rgba(0,0,0,0.5) inset;transition: height 0.3s linear; ; right: 0px; top: 0px; height: 100%; width: 52px; border-left: 1px solid #f5b74e; box-shadow: 1px 0px 1px rgba(255,255,255,0.4) inset; ) .a-btn-icon-right span( width: 38px; height: 38px; opacity: 0.7; position: absolute; left: 50%; top: 50%; margin: -20px 0px 0px -20px; background: transparent url (../images/arrow_right.png) no-repeat 50% 55%; transition: all 0.3s linear; )
On hover, we will change the height of the button and additional text. We will also be rotating the arrow icon 45 degrees:
.a-btn:hover( height: 65px; box-shadow: 0px 1px 1px rgba(255,255,255,0.8) inset, 1px 1px 5px rgba(0,0,0,0.4); ) .a-btn:hover .a- btn-text( text-shadow: 0px 1px 1px rgba(0,0,0,0.2); color: #fff; ) .a-btn:hover .a-btn-slide-text( height: 30px; ) .a -btn:hover .a-btn-icon-right span( opacity: 1; transform: rotate(-45deg); )
When active, the button will move slightly and change color so that the button will appear to be pressed:
.a-btn:active ( position:relative; top:1px; background: linear-gradient(top, #fec354 0%,#fecd61 100%); /* W3C */ border-color: #d29a3a #cc9436 #c89133; text-shadow: 0 1px 0 #fee1a0; box-shadow: 0 1px 1px #d4d4d4, inset 0 1px 0 #fed17e; )
Example 4

In example 4, we will push an additional message, as in the previous example, but we will do it now on the right side. It will look like the button opens a message inside of itself.
HTML markup
The markup in this example is the same as in the previous one.css
The button styles will be similar to the previous example. We will only change the color and position of the additional text:.a-btn( background: linear-gradient(top, #80a9da 0%,#6f97c5 100%); padding-left: 20px; padding-right: 80px; height: 38px; display: inline-block; position: relative; border: 1px solid #5d81ab; box-shadow: 0px 1px 1px rgba(255,255,255,0.8) inset, 1px 1px 3px rgba(0,0,0,0.2), 0px 0px 0px 4px rgba(188,188,188,0.5); border-radius : 20px; float: left; clear: both; margin: 10px 0px; overflow: hidden; transition: all 0.3s linear; ) .a-btn-text( padding-top: 5px; display: block; font-size: 18px ; white-space: nowrap; text-shadow: 0px 1px 1px rgba(255,255,255,0.3); color: #446388; transition: all 0.2s linear; ) .a-btn-slide-text( position:absolute; height: 100 %; top: 0px; right: 52px; width: 0px; background: #63707e; text-shadow: 0px -1px 1px #363f49; color: #fff; font-size: 18px; white-space: nowrap; text-transform : uppercase; text-align: left; text-indent: 10px; overflow: hidden; line-height: 38px; box-shadow: -1px 0px 1px rgba(255,255,255,0.4), 1px 1px 2px rgba(0,0,0,0.2) inset; transition: width 0.3s linear; ) .a-btn-icon-right( position: absolute; right: 0px; top: 0px; height: 100%; width: 52px; border-left: 1px solid #5d81ab; box-shadow: 1px 0px 1px rgba(255,255,255 ,0.4) inset; ) .a-btn-icon-right span( width: 38px; height: 38px; opacity: 0.7; position: absolute; left: 50%; top: 50%; margin: -20px 0px 0px -20px ; background: transparent url(../images/arrow_right.png) no-repeat 50% 55%; transition: all 0.3s linear; )
On hover, we'll increase the button's padding on the right, as well as the width of the span tag with the class "a-btn-slide-text":
.a-btn:hover( padding-right: 180px; box-shadow: 0px 1px 1px rgba(255,255,255,0.8) inset, 1px 1px 3px rgba(0,0,0,0.2); ) .a-btn:hover . a-btn-text( text-shadow: 0px 1px 1px #5d81ab; color: #fff; ) .a-btn:hover .a-btn-slide-text( width: 100px; ) .a-btn:hover .a -btn-icon-right span( opacity: 1; )
In the active state, create a click effect using a shadow:
.a-btn:active ( position: relative; top: 1px; background: #5d81ab; box-shadow: 1px 1px 2px rgba(0,0,0,0.4) inset; border-color: #80a9da; )
Example 5

In this example, we will use a character font for the icons. The idea is to create the following effect: when you hover over the mouse, the icon disappears and a moving arrow appears.
HTML markup
The structure will consist of 4 span tags inside the link. The span with the class "a-btn-slide-icon" will animate the arrow, it will move from top to bottom.Z Download Now
css
Since we will be using a font to display the icon on the left side, we will need to include this font.We will hide the arrow by setting its top value to -30px.
@font-face ( font-family: "WebSymbolsRegular"; src: url("websymbols/websymbols-regular-webfont.eot"); src: url("websymbols/websymbols-regular-webfont.eot?#iefix") format ("embedded-opentype"), url("websymbols/websymbols-regular-webfont.woff") format("woff"), url("websymbols/websymbols-regular-webfont.ttf") format("truetype"), url("websymbols/websymbols-regular-webfont.svg#WebSymbolsRegular") format("svg"); font-weight: normal; font-style: normal; ) .a-btn( border-radius: 50px; padding: 10px 30px 10px 70px; position: relative; float:left; display: block; overflow: hidden; margin: 10px; background: linear-gradient(top, rgba(255,255,255,1) 0%,rgba(246,246,246,1) 74%, rgba(237,237,237,1) 100%); box-shadow: 0px 0px 7px rgba(0,0,0,0.2), 0px 0px 0px 1px rgba(188,188,188,0.1); transition: box-shadow 0.3s ease-in- out; ) .a-btn-symbol( font-family: "WebSymbolsRegular", cursive; color: #555; font-size: 20px; text-shadow: 1px 1px 2px rgba(255,255,255,0.5); position:absolute; left: 20px; line-height: 32px; transition: opacity 0.3s ease-in-out; ) .a-btn-text( font-size: 20px; color: #d7565b; line-height: 16px; font-weight: bold; font-family: "Myriad Pro", "Trebuchet MS", sans-serif; text -shadow: 1px 1px 2px rgba(255,255,255,0.5); display: block; ) .a-btn-slide-text( font-family: Arial, sans-serif; font-size: 10px; letter-spacing: 1px; text -transform: uppercase;color: #555;text-shadow: 0px 1px 1px rgba(255,255,255,0.9); ) .a-btn-slide-icon( position:absolute; top:-30px; width: 22px; height: 22px ; background: transparent url(../images/arrow_down_black.png) no-repeat top left; left:20px; opacity: 0.4; )
On hover, we will hide the icon on the left and play the animation for the arrow indefinitely:
.a-btn:hover( background: #fff; box-shadow: 0px 0px 9px rgba(0,0,0,0.4), 0px 0px 0px 1px rgba(188,188,188,0.1); ) .a-btn:hover .a -btn-symbol( opacity: 0; ) .a-btn:hover .a-btn-slide-icon( -webkit-animation: slideDown 0.9s linear infinite; )
When the button is clicked, we will make it red and create a click effect by adding a shadow:
.a-btn:active( background: #d7565b; box-shadow: 0px 2px 2px rgba(0,0,0,0.6) inset, 0px 0px 0px 1px rgba(188,188,188,0.1); ) .a-btn:active . a-btn-text( color: #fff; text-shadow: 0px 1px 1px rgba(0,0,0,0.3); ) .a-btn:active .a-btn-slide-text( color: rgba(0 ,0,0,0.4); text-shadow: none; )
And finally, a simple animation to move the arrow from top to bottom:
@keyframes slideDown ( 0% ( top: -30px; ) 100% ( top: 80px;) )
Example 6

In this example, we will create a round button with an asterisk in it. We'll make the star rotate on hover (with a little momentum) and make some extra text appear.
HTML markup
We will have three span tags in our link button. The latter will have hidden text that is shown on hover.Sign up It's free!
css
We'll play around with nth-child a bit in this example. Since we have 3 span tags, we will refer to them like this: .a-btn span:nth-child(1), .a-btn span:nth-child(2) and .a-btn span:nth- child(3).We will make the buttons round and add fancy shadows to them. In order to center the body text vertically, we'll set display to table-cell. Stars and hidden text will be positioned absolutely.
.a-btn( width: 120px; height: 120px; border-radius: 50%; display: block; margin: 20px; float: left; background: #f0ad4e; position: relative; box-shadow: 0px 0px 5px 0px rgba (246, 212, 163, 0.5) inset, 0px -1px 5px 4px rgba(170, 77, 27, 0.2) 0px 0px 0px 9px #fff; transition: all 0.3s linear; ) .a-btn span( display: table-cell; width: 80px; height: 80px; padding: 20px; text-align: center; vertical-align: middle ; font-size: 26px; color: #fff; text-shadow: 0px 1px 1px #A03F16; font-family: "Arvo", "Myriad Pro", "Trebuchet MS", sans-serif; transition: all 0.3s linear ; ) .a-btn span:nth-child(1), .a-btn span:nth-child(3)( position: absolute; top: 0px; left: 0px; font-size: 40px; line-height: 36px; opacity: 0; ) .a-btn span:nth-child(1)( background: transparent url(../images/star.png) no-repeat center center; opacity: 0.2; )
On hover, we will change the button's shadow so that it appears raised. The hidden text will be revealed and we will animate the initial text. We will also apply a rotation animation for the star:
.a-btn:hover( background: rgba(170, 77, 27, 0.6); box-shadow: 0px 0px 5px 0px rgba(246, 212, 163, 0.5) inset, 0px -1px 5px 4px rgba(170, 77 , 27, 0.2) inset, 0px 0px 0px 7px #fff, 1px 4px 5px 8px rgba(188, 188, 188, 0.6), 0px 0px 0px 9px #fff; ) .a-btn:hover span:nth-child(3 )( opacity: 1; ) .a-btn:hover span:nth-child(2)( transform: scale(0); opacity: 0; ) .a-btn:hover span:nth-child(1)( animation : rotate 1s linear; )
Now let's make the button appear to be pressed when you click on it:
.a-btn:active( box-shadow: 0px 0px 5px 0px rgba(246, 212, 163, 0.5) inset, 0px -1px 5px 4px rgba(170, 77, 27, 0.2) inset, 0px 0px 0px 7px #fff , 0px -1px 0px 8px rgba(188, 188, 188, 0.3), 0px 0px 0px 10px #fff; ) .a-btn:active span:nth-child(2)( color: rgba(170, 77, 27, 0.8); text-shadow: 0px 1px 1px rgba(255, 255, 255, 0.6); )
The rotation/ripple animation looks like this:
@-webkit-keyframes rotate( 0% ( transform: scale(1) rotate(0);) 50% ( transform: scale(0.5) rotate(180deg);) 100% ( transform: scale(1) rotate(360deg) ;) )
Example 7

In the last example, we'll create a pseudo 3D button using some cool shadows.
HTML markup
The structure will be the same as in the fifth examplecss
The style will also be very similar to example 5, we will just change some colors and shadows:.a-btn( border-radius: 10px; padding: 10px 30px 10px 70px; position: relative; float:left; display: block; overflow: hidden; margin: 10px; background: linear-gradient(top, #b7f2f4 0% ,#7ce7ea 100%); border: 1px solid #90c6c8; border-color: #90c6c8 #78bdc0 #65b6ba; box-shadow: 0px -5px 0px 0px #458a8c, 0 1px 1px #d5d5d5, 0 1px 0 rgba(255,255,255, 0.8) inset; transition: all 0.2s linear; ) .a-btn-symbol( font-family: "WebSymbolsRegular", cursive; color: #437b7d; text-shadow: 0 1px 0 #bef3f5; font-size: 20px; position:absolute; left: 20px; width: 20px; text-align: center; line-height: 32px; transition: all 0.3s ease-in-out; ) .a-btn-text( font-size: 20px; color : #437b7d; text-shadow: 0 1px 0 #bef3f5; line-height: 16px; font-weight: bold; font-family: "Myriad Pro", "Trebuchet MS", sans-serif; display: block; ) . a-btn-slide-text( font-family: Arial, sans-serif; font-size: 10px; letter-spacing: 1px; text-transform: uppercase; color: #555; text-shadow: 0px 1px 1px rgba(255,255,255,0.9); )
On hover, we will enlarge the button and rotate the small icon: buttons Add labels
Good day, dear readers. On this day we will create a set of beautiful icons for the site using CSS3 and animation. Thanks to this button, you can turn any link on the page into an animated button with a simple assignment of a class name. In general, there is nothing complicated here as at first glance.
As a reminder, these buttons are free and you can free download. Go.
Animated CSS3 buttons for your website
Now a few words about the size and rounded corners of the buttons:
/* Three button sizes */ .button.big ( font-size:30px;) .button.medium ( font-size:18px;) .button.small ( font-size:13px;) /* Rounded button corners */ .button.rounded( -moz-border-radius:4em; -webkit-border-radius:4em; border-radius:4em; )
In the code above, there are three classes - these are big, medium and small. Accordingly, we set different values in pixels for each class. Everything is clearly visible in the code above.
And now the most interesting part is the colors. Here, in principle, there is nothing complicated either.
/* Blue button */ .blue.button( color:#0f4b6d !important; border:1px solid #84acc3 !important; /* Fallback background color */ background-color: #48b5f2; background-image: url("button_bg. png"), url("button_bg.png"), -moz-radial-gradient(center bottom, circle, rgba(89,208,244,1) 0,rgba(89,208,244,0) 100px), -moz-linear-gradient(# 4fbbf7, #3faeeb); background-image: url("button_bg.png"), url("button_bg.png"), -webkit-gradient(radial, 50% 100%, 0, 50% 100%, 100, from (rgba(89,208,244,1)), to(rgba(89,208,244,0))), -webkit-gradient(linear, 0% 0%, 0% 100%, from(#4fbbf7), to(#3faeeb)); ) .blue.button:hover( background-color:#63c7fe; background-image: url("button_bg.png"), url("button_bg.png"), -moz-radial-gradient(center bottom, circle, rgba -moz-linear-gradient(#63c7fe, #58bef7); background-image: url("button_bg.png"), url("button_bg.png" ), -webkit-gradient(radial, 50% 100%, 0, 50% 100%, 100, from(rgba(109,217,250,1)), to(rgba(109,21 7,250,0))), -webkit-gradient(linear, 0% 0%, 0% 100%, from(#63c7fe), to(#58bef7)); )
That's all for now. I want to warn you in advance that currently, buttons may not work in some browsers, because, as yet, not all of them support CSS3. But it seems to me that this problem will be solved soon.
Hello dear friends. Today I will tell you about two ways that will help you create an animated button for your sites. You have probably seen many of these buttons and clicked on them. So, on my blog, I periodically recommend partner courses and trainings, only those that I have tried myself. And of course I'm interested in statistics, and statistics say that people click on attractive buttons 48% more often than ordinary links.
The principle of creating animated buttons in CSS is as follows, there are three provisions. 1 - Initial, 2 - when hovering the cursor and 3 - when pressing the mouse button. Some services have all three positions, while others only have two. But the main thing is that you are satisfied with the end result.
Video tutorial on the second way to create animated buttons:
As an example, consider the CSS3 ButtonGenerator service, which has just two positions. But the effects look very good. Who is confused by the lack of the Russian language, use the last generator given in the list.
So let's start.
Open the main page of the service. Initially, you will have a preview of the button and tools that allow you to make all kinds of settings.

The first section Text&Font is responsible for the text, font size, font color, font shadow. This is where you write the label on the button, set its size, color, and shadow.

The next section, Background, refers to the background. Here you can specify the button color, button gradient, button size, and background blending.

The Border section is responsible for setting the shadow and borders of the button. You can easily adjust the thickness of the border, the rounding of the corners, and the shadow of the button.

The next section, Transform, is responsible for the transformation of the button, these are rotations, offsets, and distortion.
![]()
The next section, Transition, is responsible for the smoothness of the animation. You set these settings according to your button. Actions can be applied to the entire button or to individual layers.
![]()
After trying a few times, experiment with the settings and you will understand what's what.
After the initial appearance of the button is configured, you can proceed to the next step. This is a modification of the button when hovering the mouse cursor. To do this, click on the checkbox indicated in the screenshot.

Mouse hover options
Now all the changes in the settings you make are for the button that will be displayed when you hover over the mouse. And these settings depend individually on each button. As an example, I've changed the rotation, gradient, and shadow color settings.

When the button is ready, you can proceed to installing the button in the article. To do this, in the right place of the article, install the code:
Here is our example:

Well, now you know how easy and fast enough to make an animated button for a website or blog. Try and implement, it's worth it. If you have any questions, write in the comments, I will try to help.
That's all for today, I wish you good luck. And I'm always glad to see on the pages of my blog.
P.S. And here is an example of an animated button for Denis Gerasimov's training "Setting up cold traffic to promote affiliate links." I went through this training and recommend it to everyone - this is, without much exaggeration, a real way to make money on affiliate programs. What I basically do.
I threw a sketch here as I see the Demo button. The idea here is the following, to make the button as if from two parts, it should be animated, when hovering, the second part will open, pulling out the inner block where the inscription is located, and at the moment the cursor is removed, everything should return to its original position.
- In the lesson, we will use the main styles as:
- pseudo-elements :before , :after ;
- using position with position blocks
- pseudo-classes :hover , :activ define styles on hover and mouse click
- and make smooth animation with transition, transform

Button HTML Structure
With a sketch in front of your eyes, you can already imagine how to implement this in CSS. We need the main block where all the elements of the button will be placed, this will be its wrapper. Then the button will have an inner part that will move out when the mouse is not moved, inside we will place the text “View example”. Then comes the left and right parts of the button, between them we place pseudo-elements of a triangular shape. And I almost forgot, the picture is in the form of arrows. We will need to animate all this, and give the buttons a certain texture.

We open our development environment, in my case I use phpstorm, create index.html in it, write the name " Button DEMO animation CSS". We create
Div.dws-button>a>div.b-demo+div.b-text+div.b-img
Click apply and the structure is formed.
In the link, put a hash mark (# ) so that it is active. Let's write the name of the button " Demo" , in the middle block we indicate the text " See example", and in the bottom insert the path to the image.
We create a directory in which I will copy the pictures, you can paste your pictures or download an archive with ready-made code.
Write the path to the image src="img/icon.png" , specify alt="(!LANG:button"
, на этом у нас каркас готов самой кнопки и можно переходить к оформлению стилей.!}
Describing the CSS Styles for the Button
Next step, let's create css style.css file and connect it to the index page. We immediately connect the popular Cuprum font, and we don’t need an index file anymore.
Go to style.css , add an image to the background, and reset the padding of all elements in the .dws-button block.
Body( background-image: url("img/ep_naturalwhite.png"); ) .dws-button *( margin: 0; padding: 0; )
We set the text style for the button itself, set its width to 250 pixels. and a height of 70 pic., centered in the middle of the screen and indented from the top by 250 pic. Then we assign it a border of 1 peak. so that we can see the borders of the button when it is animated when it is stretched.
Dws-button( font-family: Cuprum, Arial, Verdana, sans-serif; width: 250px; height: 70px; margin: 250px auto; outline: 1px solid #faa21a; )
We remove the underlining from the links and assign them a gray color.
Dws-button a( text-decoration: none; color: #2e2e30; )
Then immediately select the blocks and give them a single white color.
B-demo, .b-img( background: #ffffff; )
Next, we describe each block separately, select the .b-demo class and set the width of the block to 105 pixels. Set the height using line-height: 70px; , center the text and increase the font to 30 pt.. Make it all caps, and padding the left and right padding.
B-demo( width:105px; line-height: 70px; text-align: center; font-size: 30px; text-transform: uppercase; padding: 0 10px 0 15px; )
Select the next .b-text block, give it a dark color, make the text light, set its size to 24px, and set its width to 150px. and with the help of indents we will reduce the height of the block. Center the text and set the padding.
B-text( background: #3e3f3e; color: #ffffff; font-size: 24px; width: 150px; line-height: 20px; text-align: center; padding: 10px 0 10px 10px; )
Select the right block, set the width to 45 peaks. height is also 45 peaks. .padding will center the image element slightly shifting it to the right.
B-img( width:45px; line-height: 45px; padding: 20px 0 0 20px; )

Then we position these elements in relation to the block with the .dws-button class. To do this, assign the class position: relative; and nested all blocks position: absolute; .
The blocks have all been adjusted to the parent, and now let's go over them and center them.
For the .b-demo class, we specify the initial positions by zeros from the left and top and add z-index:10; so that this block is higher than the rest.
.b-demo( width:105px; line-height: 70px; text-align: center; font-size: 30px; text-transform: uppercase; padding: 0 10px 0 15px; left: 0; top: 0; z-index: 10; )The block with the text will be indented from the left and from the top by 5 peaks.
And the block with the .b-img image is indented on the left side by 140 peaks. , and set it to 0 from above. Immediately round the corners on the right side into 10 spades.
.b-img( width:45px; line-height: 45px; padding: 20px 0 0 20px; left: 140px; top: 0; border-radius: 0 10px 10px 0; )And we will do the same with the left block.
.b-demo( width:105px; line-height: 70px; text-align: center; font-size: 30px; text-transform: uppercase; padding: 0 10px 0 15px; left: 0; top: 0; z- index: 10; border-radius: 10px 0 0 10px; )Then we need to make two pseudo-elements, these are the very corners that are located on their connection.
Select the right block and give it a :before pseudo-element, set the width and height to zero, and draw a triangle using border. Next, we need to position it, for this it adds it to our set.
And align it in such a way that it would stand at the end of the block.
B-demo:before( content: ""; width: 0; height: 0; border-top: 35px solid transparent; border-left: 10px solid #ffffff; border-bottom: 35px solid transparent; top: 0; left: 129px; )
Please note that we align all the blocks to the left, and not to the right, since the animation will go from left to right and this is a key point.
Then we select the next block with the image and assign it the :after pseudo-element. We write the content, then set the width and height to zero and draw a triangle using border. Absolutely position it, and align it to the left.
.b-demo, .b-text, .b-img, .b-demo:before,.b-img:after( position: absolute; ) .b-img:after( content: ""; width: 0; height: 0; border-top: 35px solid transparent; border-left: 10px solid #3e3f3e; border -bottom: 35px solid transparent; top: 0; left: 0; )We have the main frame of the button ready, it remains to animate it and give it a beautiful design.
Button Animation in CSS
Basically, the button is ready and let's start animating it, I'll write a comment, from where we will write styles. First of all, we describe the actions when hovering over the button.
/* Animation:hover */ .dws-button a:hover .b-demo( width: 50px; padding: 0 10px 0 10px; font-size: 20px; )
We will immediately write the animation of smooth movement to all blocks, for this we select them all and set the transition for all properties to 0.5 seconds.
Dws-button a:hover .b-demo, .dws-button a:hover .b-demo:before, .dws-button a:hover .b-text, .dws-button a:hover .b-img, . dws-button a:hover .b-img:after( transition:all 0.5s; )
We prescribe the movement with this block to the :before pseudo-element to 69 peak. to the left.
Dws-button a:hover .b-demo:before( left: 69px; )
We move the second part of the button to the right side, indicate that when hovering, shift the block by 185 peaks.
Dws-button a:hover .b-img( left: 185px; )
Then the block with the text will be at 50 spades. push, select and prescribe the movement of the block.
Dws-button a:hover .b-text( left: 50px; )
In order for the button not to immediately collapse after we remove the cursor, we need to set transition for the block elements at rest, we will make the button shrink in 1.5 seconds more slowly.
.b-demo, .b-text, .b-img, .b-demo:before, .b-img:after( position: absolute; transition:all 1.5s; )Then we animate the effect of rotation of the icon using transform by 360 degrees, select the image and write transform: rotate(360deg) ; and also set opacity: 0.5; to make the picture a little more transparent.
Dws-button a:hover img( transform: rotate(360deg); opacity: 0.5; )
If we hover over the button now, we will not see the rotation effect, since we need to set the transition to the image itself. We select and prescribe this property to it.
B-img img( transition:all 1.5s; )
The button with the animated extension effect is ready, you can hide the outline, you won't need it anymore, and start decorating it.
Dws-button( font-family: Cuprum, Arial, Verdana, sans-serif; width: 250px; height: 70px; margin: 250px auto; /*outline: 1px solid #faa21a;*/ position: relative; )

We have made a full-fledged animated button and now you can give it a more beautiful look.
Button styling in CSS
After we have done all the work on its properties, positioning and animation, we will proceed to its design. Let's change the general style of the button, add a background to the blocks, make a shadow for the text and add a :active pseudo-class that will fire when the mouse is clicked.
We go to the additional service where I have already prepared presets and I just copy the style for the button, then I replace my previous one with it.
B-demo, .b-img( /* Permalink - use to edit and share this gradient: http://colorzilla.com/gradient-editor/#f22404+13,8e0b00+65,6d0019+100 */ background: # f22404; /* Old browsers */ background: -moz-linear-gradient(-45deg, #f22404 13%, #8e0b00 65%, #6d0019 100%); /* FF3.6-15 */ background: -webkit- linear-gradient(-45deg, #f22404 13%,#8e0b00 65%,#6d0019 100%); /* Chrome10-25,Safari5.1-6 */ background: linear-gradient(135deg, #f22404 13%,# 8e0b00 65%,#6d0019 100%); /* W3C, IE10+, FF16+, Chrome26+, Opera12+, Safari7+ */ filter: progid:DXImageTransform.Microsoft.gradient(startColorstr="#f22404", endColorstr="#6d0019",GradientType =1); /* IE6-9 fallback on horizontal gradient */ )
For the pseudo-element, add a red color to the background of the button ingredient.
.b-demo:before( content: ""; width: 0; height: 0; border-top: 35px solid transparent; border-left: 10px solid#7B040E; border-bottom: 35px solid transparent; top: 0; left: 129px; )Let's change the color of the links from dark to white.
Dws-button a( text-decoration: none; color: #ffffff; )
Let's give the text a shadow, for this we will add in the class .b-demo text-shadow: -1px -1px 1px #000000;
.b-demo( width:105px; line-height: 70px; text-align: center; font-size: 30px; text-transform: uppercase; padding: 0 10px 0 15px; left: 0; top: 0; z- index: 10; border-radius: 10px 0 0 10px; text-shadow: -1px -1px 1px #000000; )I will make the inner block in a bluish color.
.b-text( /* Permalink - use to edit and share this gradient: http://colorzilla.com/gradient-editor/#b3dced+0,29b8e5+50;Custom+2 */ background: #b3dced; /* Old browsers */ background: -moz-linear-gradient(45deg, #b3dced 0%, #29b8e5 50%); /* FF3.6-15 */ background: -webkit-linear-gradient(45deg, #b3dced 0% ,#29b8e5 50%); /* Chrome10-25,Safari5.1-6 */ background: linear-gradient(45deg, #b3dced 0%,#29b8e5 50%); /* W3C, IE10+, FF16+, Chrome26+, Opera12+ , Safari7+ */ filter: progid:DXImageTransform.Microsoft.gradient(startColorstr="#b3dced", endColorstr="#29b8e5",GradientType=1); /* IE6-9 fallback on horizontal gradient */ color: #ffffff; font-size: 24px; width: 150px line-height: 20px; text-align: center; padding: 10px 0 10px 10px; left: 5px; top: 5px; )Immediately change the color of the :after pseudo-element
Let's replace the picture, set the white instead of the black one, at the beginning of the lesson I uploaded two of them, we prescribe the second icon.
And the final stage, we will describe the styles when the mouse is clicked
I’ll write the corresponding comment here, then under it we select two blocks with the pseudo-class :active , we set the ingredient only inverted.
/* Animation:active */ .dws-button a:active .b-demo, .dws-button a:active .b-img( /* Permalink - use to edit and share this gradient: http://colorzilla.com /gradient-editor/#f22404+13,8e0b00+49,6d0019+70 */ background: #f22404; /* Old browsers */ background: -moz-linear-gradient(45deg, #f22404 13%, #8e0b00 49% , #6d0019 70%); /* FF3.6-15 */ background: -webkit-linear-gradient(45deg, #f22404 13%,#8e0b00 49%,#6d0019 70%); /* Chrome10-25,Safari5 .1-6 */ background: linear-gradient(45deg, #f22404 13%,#8e0b00 49%,#6d0019 70%); /* W3C, IE10+, FF16+, Chrome26+, Opera12+, Safari7+ */ filter: progid:DXImageTransform .Microsoft.gradient(startColorstr="#f22404", endColorstr="#6d0019",GradientType=1); /* IE6-9 fallback on horizontal gradient */ )
For the block in the background, we will make the gradient in this style only mirrored and add a shadow effect.
Dws-button a:active .b-text( /* Permalink - use to edit and share this gradient: http://colorzilla.com/gradient-editor/#b3dced+0,29b8e5+50 */ background: #b3dced; /* Old browsers */ background: -moz-linear-gradient(-45deg, #b3dced 0%, #29b8e5 50%); /* FF3.6-15 */ background: -webkit-linear-gradient(-45deg, #b3dced 0%,#29b8e5 50%); /* Chrome10-25,Safari5.1-6 */ background: linear-gradient(135deg, #b3dced 0%,#29b8e5 50%); /* W3C, IE10+, FF16+ , Chrome26+, Opera12+, Safari7+ */ filter: progid:DXImageTransform.Microsoft.gradient(startColorstr="#b3dced", endColorstr="#29b8e5",GradientType=1); /* IE6-9 fallback on horizontal gradient */ box- shadow: 0 0 3px 1px #82DCFF; )
As the final style, when clicking, we will write the rotation of the icon in the opposite direction with its full manifestation.
Dws-button a:active img( transform: rotate(0deg); opacity: 1; )

It turned out to be a rather effective button, which can be easily modified and designed to suit your tasks. I recommend replacing its general design, make your own presets, experiment with different gradient options, perhaps you will come up with more original animation methods and be sure to share them in the comments.
Anyone who liked the material, be sure to share it with your friends.
- Translation
Hello, dear habradrug! Today we will learn how to create CSS3 3D buttons! They are based on the popular freebie PSD by Orman Clark for his Premium Pixels website. We will try to create a copy of these buttons using CSS with a minimum amount of HTML code.
Step 1: Creating an HTML Document
We'll start by creating a new HTML document. It will be based on the HTML5 boilerplate so that we have a good starting point. Now we will add a list with links. That's basically all, thanks to CSS3 for the fact that we do not have to use additional divs and spans.We will assign the class 'buttons' to each list item. And since Orman used different colors, we will assign each button its own color as a class.
That's all we need at this stage.
Step 2: Basic CSS rules
Before you get into gradients, rounded corners, etc., you need to take care of the basic rules. Nothing special, plain CSS2:Ul ( list-style: none; ) a.button ( display: block; float: left; position: relative; height: 25px; width: 80px; margin: 0 10px 18px 0; text-decoration: none; font: 12px " Helvetica Neue", Helvetica, Arial, sans-serif; font-weight: bold; line-height: 25px; text-align: center; )
Now apply the rules for different colors. For example, for gray. All other colors can be seen in the demo.
/* GRAY */ .gray, .gray:hover ( color: #555; border-bottom: 4px solid #b2b1b1; background: #eee; .gray:hover ( background: #e2e2e2; ) )
You should end up with something like this. It looks pretty solid, if it's 2008 in the yard. 
Step 3: Double frames!
If you look closely at the final result, you will see that there is a thin line around the perimeter of the entire button. To achieve this effect, we will use pseudo-elements :before and :after.a.button ( display: block; float: left; position: relative; height: 25px; width: 80px; margin: 0 10px 18px 0; text-decoration: none; font: 12px "Helvetica Neue", Helvetica, Arial, sans -serif; font-weight: bold; line-height: 25px; text-align: center; ) a.button:before, a.button:after ( content: ""; position: absolute; left: -1px; height: 25px; width: 80px; bottom: -1px; ) a.button:before ( height: 23px; bottom: -4px; border-top: 0; )
Adding color makes the buttons look much better.
/* GRAY */ .gray, .gray:hover ( color: #555; border-bottom: 4px solid #b2b1b1; background: #eee; ) .gray:before, .gray:after ( border: 1px solid #cbcbcb; border-bottom: 1px solid #a5a5a5; ) .gray:hover ( background: #e2e2e2; )

Step 4: A bit of CSS3 magic
Now let's get down to the immediate part of CSS3. Let's start with rounded corners:a.button ( display: block; float: left; position: relative; height: 25px; width: 80px; margin: 0 10px 18px 0; text-decoration: none; font: 12px "Helvetica Neue", Helvetica, Arial, sans -serif; font-weight: bold; line-height: 25px; text-align: center; -webkit-border-radius: 3px; -moz-border-radius: 3px; border-radius: 3px; )
natural elements :before and :after also need rounded corners.
a.button:before, a.button:after ( content: ""; position: absolute; left: -1px; height: 25px; width: 80px; bottom: -1px; -webkit-border-radius: 3px; -moz -border-radius: 3px; border-radius: 3px; ) a.button:before ( height: 23px; bottom: -4px; border-top: 0; -webkit-border-radius: 0 0 3px 3px; -moz- border-radius: 0 0 3px 3px; border-radius: 0 0 3px 3px; -webkit-box-shadow: 0 1px 1px 0px #bfbfbf; -moz-box-shadow: 0 1px 1px 0px #bfbfbf; box-shadow: 0 1px 1px 0px #bfbfbf; )
Lastly, we'll apply gradients, an inner shadow, and a shadow to the text. To avoid bugs in IE6, add state:visited.
/* GRAY */ a.gray, a.gray:hover, a.gray:visited ( color: #555; border-bottom: 4px solid #b2b1b1; text-shadow: 0px 1px 0px #fafafa; background: #eee; background: -webkit-gradient(linear, left top, left bottom, from(#eee), to(#e2e2e2)); background: -moz-linear-gradient(top, #eee, #e2e2e2); box-shadow: inset 1px 1px 0 #f5f5f5; ) .gray:before, .gray:after ( border: 1px solid #cbcbcb; border-bottom: 1px solid #a5a5a5; ) .gray:hover ( background: #e2e2e2; background: -webkit- gradient(linear, left top, left bottom, from(#e2e2e2), to(#eee)); background: -moz-linear-gradient(top, #e2e2e2, #eee); )
Our end result, not so bad!

Step 5: Have we forgotten anything?
In his design, Orman also provided for the state: active. Therefore, we simply must add it to our code.We will place this part of the code under the rules for different colors.
/* ACTIVE STATE */ a.button:active ( border: none; bottom: -4px; margin-bottom: 22px; -webkit-box-shadow: 0 1px 1px #fff; -moz-box-shadow: 0 1px 1px #fff; box-shadow: 1px 1px 0 #fff, inset 0 1px 1px rgba(0, 0, 0, 0.3); ) a.button:active:before, a.button:active:after ( border: none; - webkit-box-shadow: none; -moz-box-shadow: none; box-shadow: none; )
Here's what we'll get:

Step 6 (optional): Old browsers
So we've created nice CSS3 buttons that work in all modern browsers. But what about Internet Explorer 8 and below. These browsers do not support text shadows or gradients.To solve this problem, we can use the Modernizr javascript library, which can detect if your browser supports CSS3 and HTML5. The library does not fix problems, it only offers an alternative style.
First, we'll create our own version of Modernizr so we don't have to carry a huge amount of javascript around with us. This can be done on their website. Once we've inserted the javascript into our document, we need to define the different class rules for the alternate style. We will use images for those browsers that do not support border-radius and gradients.
/* MODERNIZR FALLBACK */ .no-cssgradients a.button, .no-cssgradients a.button:visited, .no-borderradius a.button, .no-borderradius a.button:visited, .no-generatedcontent a.button, .no-generatedcontent a.button:visited ( background: url(images/sprite.png) no-repeat 0 0px; height: 32px; width: 82px; ) .no-cssgradients a.button:hover, .no-borderradius a .button:hover, .no-generatedcontent a.button:hover ( background: url(images/sprite.png) no-repeat 0 -32px; ) .no-cssgradients a.button:active, .no-borderradius a.button :active, .no-generatedcontent a.button:active ( background: url(images/sprite.png) no-repeat 0 -64px; bottom: 0; line-height: 35px; ) .no-cssgradients a.gray, . no-cssgradients a.gray:visited, .no-cssgradients a.gray:hover ( background-position-x: 0; ) .no-cssgradients a.pink, .no-cssgradients a.pink:visited, .no-cssgradients a.pink:hover ( background-position-x: -82px; ) .no-cssgradients a.blue, .no-cssgradients a.blue:visited, .no-cssgradients a.blue:hover ( backgroun d-position-x: -164px ) .no-cssgradients a.green, .no-cssgradients a.green:visited, .no-cssgradients a.green:hover ( background-position-x: -246px; ) .no-cssgradients a.turquoise, .no- cssgradients a.turquoise:visited, .no-cssgradients a.turquoise:hover ( background-position-x: -328px; ) .no-cssgradients a.black, .no-cssgradients a.black:visited, .no-cssgradients a .black:hover ( background-position-x: -410px; ) .no-cssgradients a.darkgray, .no-cssgradients a.darkgray:visited, .no-cssgradients a.darkgray:hover ( background-position-x: - 492px; ) .no-cssgradients a.yellow, .no-cssgradients a.yellow:visited, .no-cssgradients a.yellow:hover ( background-position-x: -574px; ) .no-cssgradients a.purple, . no-cssgradients a.purple:visited, .no-cssgradients a.purple:hover ( background-position-x: -656px; ) .no-cssgradients a.darkblue, .no-cssgradients a.darkblue:visited, .no- cssgradients a.darkblue:hover ( background-position-x: -738px; ) .no-cssgradients a.button, .no-cssgradients a.button:visited, .no-cssgradients a .button:hover, .no-cssgradients a.button:before, .no-cssgradients a.button:after, .no-borderradius a.button, .no-borderradius a.button:visited, .no-borderradius a.button :hover, .no-borderradius a.button:before, .no-borderradius a.button:after, .no-generatedcontent a.button, .no-generatedcontent a.button:visited, .no-generatedcontent a.button:hover , .no-generatedcontent a.button:before, .no-generatedcontent a.button:after ( border: 0; )