A sufficient level of PC performance for many novice users is something ephemeral. Because each user has their own ideas about how fast their computer should be efficient. However, at some point (for example, when installing some resource-intensive program), the user observes a strange and, let's say the truth, inconvenient in terms of the properties of its manifestation, the behavior of the computer - the computer starts to slow down mercilessly. At such moments, the implemented process can help the user - overclocking the processor through the BIOS. About how this is done correctly in practice, what should be considered at the time of such an overclocking operation and how to avoid irreparable errors when overclocking the CPU - read here and now!

Introduction to Thermal Security
Any increase in the clock frequency of the central processor inevitably leads to one thing - an increase in temperature indicators. In simple words, an overclocked processor will heat up more than a CPU operating in normal mode (stable default settings).

Exclusively in view of the latter factor, it is necessary to increase the performance characteristics of the CPU with extreme caution. Moreover, the correctness and reliability of the overclocking process can only be guaranteed by your own accuracy and consistency in actions. And finally, before proceeding with the practical overclocking of the CPU, you should carefully study a number of technical issues, namely:
- Familiarize yourself with the characteristics of the installed processor (the manual and other kinds of reference information can be easily downloaded from official sources - the manufacturer's website).
- Research the overclocking potential of a particular CPU modification (unfortunately, manufacturers do not like to share secret overclocking data, so valuable information on CPU overclocking can only be found on specialized sites and forums).
- Carefully study the characteristics of the motherboard - update bios to latest version.
After you have complete information about the processor, have an idea of what the reserve potential of a separate PC component means, and your mind and heart are filled with confidence in the success of the upcoming event, start acting!
How to overclock my processor: a step by step algorithm of actions
First of all, you need to download several specialized programs:
- Download the CPU-Z utility (after installing the application, carefully read the table of CPU operating parameters - more details about the process of interaction with the program will be written a little later).
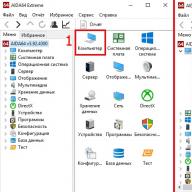
- Download this software to your computer - AIDA64 (you can download this software Here ).
This is the reference software minimum. Using this software arsenal will allow you, dear readers, to visually control changes in the system and, in simple terms, not to make trouble.
Monitoring of operating parameters after software upgrade operations of the CPU (also relevant for other system components) is a mandatory and undeniably useful process, in view of the criticality of overclocking computer components.
Step # 1: We enter the basic BIOS settings menu
Depending on the version of the microsystem used, the section in which you, dear friends, have to make changes, may have a name different from that indicated in the example described below. However, it is not difficult to grasp the meaning of the correctness of the selected item in view of the specifics of the applied standardization in the names of BSVV options.
In our case, the new BIOS / UEFI interface version 2603 from the company is used as an example. American Megatrends Inc. . (the most common option in modern computers).
We will focus on the traditional option - when turning on the PC, press the service key "F2" or "Delete" several times.
Step #2: Which Overclocking Script to Apply?
So, after you have entered the BIOS, activate the "F7" key, after which you will find yourself in the advanced settings menu of the base microsystem.
- Click the "Ai Tweaker" tab to the section you need.
Here you should choose a specific scenario for overclocking, the implementation of which should be argued by your own "discretion" regarding the question of how much you will drive the processor. The most painless way to tighten the screws of speed optimization is the "Ai Overclock Tuner" option with the "Auto" option active.
- We set the value to automatic mode, save the changes in the BIOS setting (F10) and reboot the system.
This option has a number of advantages, the BIOS system will automatically set the values \u200b\u200bof increased performance, reserving the right to allocate system resources according to the conditions laid down by the manufacturer. In other words, by activating the mentioned mode, you will protect yourself and the system as much as possible from unexpected errors that can be made during the manual overclocking process, which is described in more detail below.
Manual method of overclocking the CPU through the BIOS

What are the benefits of this CPU upgrade method:
- Increasing multiplier values implemented in an arbitrary way.
- You can increase the operating frequency of the CPU core at your own discretion.
- The use of a manual method for correcting the voltage parameters of the specified PC component to achieve stability in the operation of the CPU is also permissible in the "Manual overclocking" mode.
The last example is the most dangerous and is associated with a possible probability of damage to the functional part of the CPU. As you understand, dear readers, in the event that you want to achieve the maximum effect in terms of a software upgrade of the CPU, there is nothing to do here without confidence and a firm conviction that the settings used are correct.
Otherwise, you just simply “fry the flint”. In other words - burn the processor. However, as a rule, the BIOS will not give way to obviously harmful settings, your system simply will not start.
To eliminate the "last trouble" it will be necessary to return the BIOS settings to their original state.
Step #3: Checking the hardware after the applied overclocking scenario
So, after you have used the overclocking potential of your processor, you need to conduct a comprehensive analysis of the performance of the CPU. In other words, it is necessary to examine the "patient" for his healthy condition:
- We open the previously installed CPU-Z utility and carefully review the list of parameters involved.

- Go to the "Test" tabinto the working check window and run the service utility with the "Stress CPU" key.

The process of the subsequent test, to determine the proper level of stability, is carried out through another program - AIDA64.
- Run the previously downloaded software.
- Go to the sensors section, make sure that the temperature values are normal.
Attention: it should be taken into account that such characteristics as the heat capacity of the processor and the effective ability of the cooling cooler to remove the heat generated by the CPU are inseparable concepts. Because without proper cooling, the whole idea of overclocking is simply doomed to failure. Make sure the cooling system matches the applied CPU overclocking scheme.
- Next, you should conduct a series of tests for the stability of the overclocked component - go to the "Service" section,and activate the item "Test for system stability" from the drop-down menu of the program.
If the procedure for checking for "survivability" went in a positive way, then you can be congratulated. However, it should be understood that the life of the component, which operates at the maximum allowable speeds, is reduced. Therefore, before you rejoice at the fantastic performance of an overclocked CPU, consider how expedient it is to "fly quickly into the abyss of digital death."
CPU software overclocking
There is an alternative overclocking method: you can optimize the performance of the CPU using special utilities.
For AMD CPU, this is the AMD OverDrive program (you can download it from the official website - http://www.amd.com/ru-ru/innovations/software-technologies/technologies-gaming/over-drive ).
Intel processors are chased by this program - SetFSB (to download the software, click on this link - http://www13.plala.or.jp/setfsb ).
Both in the first and in the second case, the desired effect is achieved only if the processor's multiplier corresponds to the "Unlocked" standard. Unfortunately, there is no other way.
As an example, let's see how AMD's processor overclocks...
We have such a CPU with a promising addition "Black Edition".
Overclocking is the forced increase in the clock frequency of the processor above the nominal. Let us immediately explain what these concepts mean.
A clock cycle is a conditional, very short time period during which the processor executes a certain number of program code instructions.
And the clock frequency is the number of cycles in 1 second.
The increase in clock frequency is directly proportional to the speed of program execution, that is, it works faster than not overclocked.
In a word, overclocking allows you to extend the "active life" of the processor when its standard performance no longer meets the user's requirements.
It allows you to increase the speed of your computer without spending on the purchase of new equipment.
Important! The negative aspects of overclocking are an increase in computer power consumption, sometimes quite noticeable, an increase in heat generation and accelerated wear of devices due to abnormal operation. You should also be aware that by overclocking the processor, you overclock the RAM along with it.
What should be done before overclocking?
Each processor has its own overclocking potential - the clock frequency limit, the excess of which leads to the inoperability of the device.
Most processors, such as intel core i3, i5, i7, can only be safely overclocked by 5-15% of the original level, and some even less.
The desire to squeeze the maximum clock frequency out of the possible one does not always justify itself, because when a certain heating threshold is reached, the processor starts skipping cycles in order to reduce the temperature.
From this it follows that for the stable operation of the overclocked system, good cooling is necessary.
In addition, given the increased power consumption, it may be necessary to replace the power supply with a more powerful one.
Just before overclocking, you need to do three things:
- Update your computer to the latest version.
- Make sure that the installation is correct and secure.
- Find out the original clock speed of your processor (look in the BIOS or through special utilities, for example).

Also useful before overclocking test the processor stability under maximum load. For example, using the S&M utility.

After that, it's time to start the "sacrament".
Overview of programs for overclocking Intel processors
SetFSB
An easy-to-use utility that allows you to overclock your processor on the fly by simply moving the slider.
After making changes, it does not require restarting the computer.

The program is suitable for overclocking both old models of processors like Intel Core 2 duo and modern ones.
However, it does not support all motherboards, and this is an absolute necessity, since overclocking is carried out by increasing the reference frequency of the system bus.
That is, it affects the clock generator (PLL chip or, as it is called, clocker) located on the motherboard.
You can find out if your board is included in the list of supported ones on the program website.

Advice! To avoid damaging the processor, only experienced users who understand what they are doing and are aware of the possible consequences are recommended to work with SetFSB. In addition, an unprepared user is unlikely to be able to correctly determine the model of his clock generator, which must be specified manually.
So, to overclock the processor using SetFSB, you need:
- Select the model of the clocker installed on your motherboard from the "Clock Generator" list.
- Click the "Get FSB" button. After that, the SetFSB window will display the current frequency of the system bus (FSB) and the processor.
- Carefully, in small steps, move the slider in the center of the window. After each movement of the slider, it is necessary to monitor the temperature of the processor. For example, using the program
- Having chosen the optimal position of the slider, you need to press the Set FSB button.
The plus (and for some minus) of the SetFSB utility is that the settings made in it will be valid only until the computer is restarted. After a restart, they will have to be reinstalled.
If there is no desire to do this every time, the utility can be placed at startup.
CPUFSB
CPUFSB is the next program in our review for overclocking Intel core i5, i7 and other processors, which can be downloaded from the developer's website.
If you are familiar with the CPUCool utility - a comprehensive monitoring and overclocking tool for the processor, then you should know that CPUFSB is an overclocking module extracted from it.
Supports many motherboards based on Intel, VIA, AMD, ALI and SIS chipsets.

Unlike SetFSB, CPUFSB has a Russian translation, so it's much easier to understand how to use it.
The principle of operation for these two programs is the same: increasing the reference frequency of the system bus.
Operating procedure:
- Select the manufacturer and type of your motherboard from the list.
- Select the make and model of the PLL (clock generator) chip.
- Click "Get frequency" to display the current frequency of the system bus and processor in the program.
- It is also necessary to increase the frequency in small steps, while controlling the temperature of the processor. After choosing the optimal setting, click "Set Frequency".
CPUFSB allows you to set the frequency of the FSB bus at the subsequent start of the program and at exit. The current settings are also saved until the computer is restarted.
SoftFSB
Our review is completed by the SoftFSB utility - another tool for overclocking the processor on the fly. It is no more difficult to handle than previous programs.
Just like them, it supports many models of motherboards, various models of clock generators and any processors.
Unlike paid SetFSB and CPUFSB, you can use SoftFSB for free.
However, there is no guarantee that it will run on your computer as it is no longer supported by the author.

To overclock a processor with SoftFSB, you also need to know the model of the motherboard, PLL chip, and be a fairly experienced user.
Procedure:
- In the "FSB select" section, specify the model of the board and the clock generator.
- Press the "GET FSB" button to capture the processor and bus frequency.
- While monitoring the processor temperature, find the optimal frequency by moving the slider in the middle of the window.
- After selecting the appropriate value, press the "SET FSB" button.
As you can see, everything is the same here. A lot of other programs for overclocking processors under Windows work according to a similar algorithm.
In addition to universal ones, there are overclocking utilities that are released by motherboard manufacturers themselves.
They are somewhat easier and safer to use, since they are designed for a simple user and obviously cannot harm the system.
Important! All the programs considered allow you to overclock both on laptops and on stationary PCs. But if you have a laptop, you should be very careful not to raise the system bus frequency to high values.
Before you start overclocking the processor, you need to have a clear idea of \u200b\u200bhow it works and why you should do it. To overclock, you need to increase the frequency of the chip. As the frequency increases, it will run faster. The logic is simple...
However, do not forget that ill-conceived overclocking can lead to unpredictable consequences (computer instability, shutdown, and worse). Therefore, you take risks. This must be understood.
Overclocking leads not only to an increase in frequency, but also to an increase in heat dissipation. All modern processors use a two-level overheating protection system. If a certain temperature threshold is exceeded, the processor will forcibly lower its frequency, as well as the supply voltage. Therefore, its heat dissipation will decrease. When the temperature rises further, the computer simply turns off. In practice, it often turns out that it doesn’t come to this and the computer just freezes. Then you need to turn it off and on again with the button.
Don't be intimidated by the negative repercussions and intimidation associated with overclocking. With a balanced approach to the overclocking procedure, as in any other issue, timely temperature control, the risk of damaging the elements is minimal. At the same time, it is necessary to understand that when using the processor on the verge of an acceptable temperature and voltage, it can burn out. Therefore, in your appetites, you need to look for a compromise between performance and the permissible mode of operation of the elements. It is convenient to control temperature, voltage and frequencies using the OCCT program. The program is free for personal use.
Let's start with a little theory. To represent all this, consider the process of formation of these frequencies. For the normal operation of a computer, laptop or netbook, synchronism or in-phase operation of individual microcircuits and their nodes is necessary. Since different devices operate at different frequencies, the method of dividing / multiplying some reference frequency is used for this. The frequency is generated by the PLL chip, which is a clock generator. It generates clock frequencies for the operation of the processor and other chips. It looks something like this:

As you can see, this microcircuit is quite large, with a large number of legs. Many may have a question: how does the microcircuit set the desired frequency? In fact, everything is simple. The frequency is set by a combination of voltages at the desired pins of the microcircuit. All these combinations of voltages are read from the registers. It is installed by the BIOS when you turn on your computer or laptop. Register values can also be changed from the operating system using special utilities. Another option is to set the voltages directly: that is, by soldering the wires to the desired pins of the PLL chip and applying the necessary voltages to them. All this information is indicated in the documentation (datasheet). Such documentation can be found on the Internet by the name of the chip and the word datasheet in Google. These chips are manufactured by ICS, Realtek, Silego and others. For ICS release PLLs, the chip model is written in the last line, while Realtek and Silego are in the first line.
There are three ways to overclock the processor:
- using BIOS settings;
- using special utilities;
- soldering at the point of the microcircuit pins and applying the necessary voltages to the pins of the PLL chip.
Let's consider each of these methods separately.
First way well known to owners of desktop PCs, in which the BIOS contains many settings necessary for overclocking. This method is the easiest
Conversely, many laptops and netbooks have very limited BIOS settings. Because there are no settings for overclocking.
Second way often used for laptops and netbooks. One of the most popular overclocking utilities is SetFSB. It supports a large number of different PLLs.
Third way is not suitable for everyone and is the most time-consuming and dangerous. It requires certain knowledge and experience, and such interference voids the warranty. It is an output if the laptop is blocked from changing the frequency. This lock is set so that the operating frequency is set only once when the laptop is turned on. It is not possible to change it, for example, using the same SetFSB.
CPU overclocking with BIOS
Basically, processors, motherboard chipsets, and memory chips operate at average performance levels. From this we can conclude that there is still a sufficient margin of potential. There are many video tutorials and guides on how to overclock a processor. You can, for example, see:
First you need to study the description of your motherboard: look at what is related to the BIOS, find the sections that are responsible for the FSB frequency, RAM, multiplier, memory timings, PCI / AGP frequency dividers, voltages. It is possible that the BIOS will not have such parameters, in which case overclocking will have to be done by switching the jumpers (jumpers) installed on the motherboard. The instructions describe the purpose of each, and in addition, such information is already affixed to the board itself next to the jumpers. For some motherboards, the BIOS settings are hidden by the manufacturer and you need to press a certain key combination to unlock it (for example, motherboards manufactured by Gigabyte). In any case, all the necessary information is in the instructions or on the manufacturer's website.
Step-by-step instruction
You need to go into the BIOS (for this you need to press the Del key when the first data appears on the screen after restarting / turning on the computer). For fidelity, you can press this key several times. Try to read the inscriptions that you see on the monitor when you start the computer, because sometimes you need a different combination or keys to enter the BIOS - for example, F2. In Gigabyte, after entering the BIOS, to access all the functions on motherboards, you need to press the Ctrl-F1 combination.
We need to find a menu that contains data for changing the frequencies of the memory bus, system bus and timing control (as a rule, all this is located in one menu). Many BIOSes for modern motherboards have sections for overclocking the system. This item may be called: M.I.B, MB Intelligent Tweaker, Quantum BIOS, etc. There are many options.
On the screen we will see something like this:

In older versions, these settings for processor and memory frequencies can be found in the Frequency / Voltage Control sections, Advanced (JumperFree Configuration) menu tab. In any configuration, we need a section containing the frequency and voltage control of the processor.

There is no need to be afraid of the abundance of unfamiliar information, depending on the different BIOS versions and the fact that all the necessary options may have a different name. It will not be difficult for you to find everything you need. In these sections, to improve performance, you just need to set one of the required values - colonel, Genera l in Dynamic Overclock. If the BIOS does not have these sections, you need to make preliminary preparations.

To overclock, we need to increase the frequency of the processor, which is the product of the multiplier and the bus frequency. For example, let's take the nominal frequency of the processor equal to 2.4 GHz, its multiplier is x18, and the bus frequency is 133 MHz (133x18=2400 MHz). So we can increase the multiplier, the bus frequency (FSB), or both. In many Intel processors it is impossible to change the multiplier, in some models it can be reduced to x14 using power saving technology. Therefore, consider the universal case - overclocking by increasing the bus frequency. In addition, this method can improve the overall performance of the system to a greater extent.
Why? Because all the work of the computer is synchronized. And if we increase the frequency of the processor bus, we will correspondingly increase the frequency of the memory, increase the speed of data exchange and, as a result, an additional increase in performance. Although there are some difficulties here. With simultaneous overclocking of the processor and memory, it becomes possible to stop ahead of time. It may turn out that the processor still has a margin for overclocking, and the memory is already at the limit. For example, in motherboards based on NVIDIA nForce4 SLI Intel Edition, it is possible to overclock the processor without depending on the memory. In any case, it is advisable to think about not being limited by memory or other devices.
We are looking for an option in the BIOS that is responsible for the frequency of the memory. Different names are possible and it is advisable to read the instructions for the motherboard. This option can be found in two sections: related to overclocking and timings, or overclocking the processor. The first section may be called Advanced Chipset Features (Advanced). Here we are looking for the Memclock index value parameter, which is measured in megahertz.

Or it can be found in the POWER BIOS Features tab and the System Memory Frequency or Memory Frequency parameter with the memory frequency designation as DDR333, DDR400 or DDR266, and possibly PC100 or PC133.

When we find this parameter, we need to set it to the minimum value. There are different options to select the desired value, it depends on the BIOS version. You can, for example, by pressing Enter, select the required value from the list that opens using the keyboard arrows, and sometimes you need to scroll through the values using the “+” or “–”, Page Up, Page Down keys.
Why do we set the minimum memory frequency, it is most likely not so low? We were going to increase the FSB frequency when overclocking the processor, respectively, the memory frequency will also increase, but if we increase it from the smallest value, and not from the preset value, then it is more likely that it will be within the limits acceptable for our memory, without stopping the overclocking of the processor. It is also recommended to set memory timings higher than those set by default.

This approach will further push the limit of stable performance of our memory. And even during the initial setting of timings, a situation is possible when the motherboard by mistake sets too small, inoperable parameters, and so we can be sure that working timings are set for the memory. To make sure that everything is set correctly, you need to remember to save all changes in the BIOS and restart. Select the Save & Exit Setup option in the menu, or press F10 and confirm your agreement by pressing Enter or “Y” (Yes) for older BIOS versions.
Basically, setting the memory frequency to a small value is enough and you can start overclocking the processor itself, but we will not rush and make sure that nothing will interfere with us in the future.
As already mentioned, many things are interconnected in a computer, and with an increase in the frequency of the processor bus, not only one memory frequency increases, but also other frequencies (on SATA, PCI-E, PCI or AGP buses). In some limits, this is even beneficial, since it slightly improves system performance, but if there is a significant excess of frequencies over the nominal value, the computer may stop working. The nominal bus frequencies for SATA and PCI Express are 100 MHz, AGP - 66.6 MHz, PCI - 33.3 MHz. Almost all modern chipsets have frequency fixing. The AGP / PCI Clock parameter is responsible for this, for which the value 66/33 MHz is selected.

NVIDIA chipsets and AMD processors with Socket 754/939 are very demanding on the HyperTransport Frequency bus frequency. It is initially set to 1000 or 800 MHz, and before overclocking it must be reduced. Sometimes its real frequency is displayed, but it is mainly used with a x5 multiplier for 1000 MHz, and with a x4 multiplier for 800 MHz.

This parameter may also be called HT Frequency. You need to find it and lower the frequency by selecting 400 or 600 MHz (x2 or x3).

When we lowered the frequency of the memory and the HyperTransport bus, set the frequencies of the PCI and AGP buses at nominal, we can start overclocking the processor. Find the section Frequency / Voltage Control. (EPoX - POWER BIOS Features, ASUS - JumperFree Configuration, ABIT - μGuru Utility).


We need to find the item CPU Host Frequency, External Clock, or CPU/Clock Speed, which controls the FSB frequency. We will increase its value.
To what value can it be increased? For each case differently. It depends on your processor, cooling system, motherboard and power supply. To begin with, try increasing the frequency above the nominal by 10 MHz. Save the changed settings and boot Windows. By running the CPU-Z utility, make sure that the processor is actually overclocked.
Check the stability of the processor in some special program (S&M, Super PI) or game. Do not forget to control the temperature of the processor. It is undesirable to exceed 60 ° Celsius.
For Intel Pentium 4 and Celeron processors, you need to use the RightMark CPU Clock Utility, ThrottleWatch, etc. utilities. When overheated, these processors can throttling, and performance will be greatly reduced. We do not need “overclocking” with throttling, and in this case, we need to take measures to improve cooling or reduce the frequency of overclocking. If everything went well, then you can gradually increase the frequency further, until the system works stably. As soon as you notice the first signs of overclocking: program crashes, freezes, errors, blue screens, or exceeding the temperature limit, you need to lower the frequency and again make sure that the work is stable.
Is it possible to use a way to increase the voltage supplied to the processor? In some cases, this can really help, but it comes with a lot of risk. This will lead to an increase in heat dissipation, which will increase with overclocking anyway.
It is not recommended to increase the voltage on the processor by more than 15-20%, but it is safer if it is within 5-15%. The main thing when increasing the voltage is to control heat dissipation, and if it has increased too much, improve the cooling of the overclocked component. If it happens that your system is overclocked and the board does not even start or starts and immediately freezes, then you need to reboot and correct your error in the BIOS. It can help to start with the Insert clamped, while the board resets the parameters to nominal. In extreme cases, you can always find the Clear CMOS jumper on the motherboard and rearrange it to two adjacent contacts for four seconds and return it to its place. This can only be done when the power is off. Then automatically all parameters will be reset to nominal. There are models of motherboards where there is no Clear CMOS (the manufacturer operates an automatic BIOS reset system) - you need to remove the battery for a while and the BIOS settings will be reset. And you will return everything before the processor was overclocked.

Software overclocking method
If you are thinking about how to overclock the processor programmatically, then many different utilities have been developed for this. Before starting the description of software overclocking, it is advisable for us to install, if not already installed, an application for collecting system information. Let's dwell on two options: and GPU-Z. These small utilities allow you to get all the necessary information about the components of your system. In this case, CPU-Z reports information about the motherboard, processor and memory, and GPU-Z provides information about the video card.

CPU-Z allows you to get the necessary information about the installed processor, system bus frequencies, memory frequencies and delays. This utility has a function that can check the validity of the overclock values.
GPU-Z displays important information about the video card: name, type of GPU used, GPU, shader unit frequencies, memory, memory bus width, number of ROPs, etc.
To fine-tune memory delays, you can use the Memset utility, which will save you from having to make these settings in the BIOS.
Free program for overclocking the processor
SetFSB is the easiest way to overclock a processor. The program allows you to set the FSB frequency directly from Windows. The program supports a wide range of motherboards and you only need to know the PLL that your motherboard uses. You can easily find this by looking at the motherboard.

PLL chips are usually manufactured by ICS. You need to find the chip by name to find out the PLL version.

You must select the name of your PLL chip from the drop-down menu and click "Get FSB". The program will search for the current FSB frequency and you can easily change it to the desired value by simply moving the slider.
When working with the program, it is important to remember:
- do not get carried away with changing the frequency, the consequences can be disastrous.
- not all PLL chips provide the same frequency limits and some motherboards have limits on the frequencies available.
- If you want to access additional frequencies, then check the box in the “Ultra” mode. When you select a new frequency value, click on “Set FSB” to use this value. If the system crashes, reboot and try again.
With this method, the voltage does not change, so the hardware will not suffer.
SetFSB is updated frequently to keep up-to-date PLL chips. There are many other utilities besides SetFSB. Major motherboard manufacturers provide overclocking software as part of their motherboard software packages.
This article has described the main methods for overclocking. Overclocking the CPU allows you to improve performance in processor-intensive applications. Accordingly, the result is higher, the higher the processor frequency you managed to get.
How to overclock the processor - video instruction
To overclock a PC is to increase its performance with software, less often with hardware and means. But if earlier, only one processor was overclocked, now it is possible to increase the speed of the PC by overclocking the video adapter chip, proper selection of RAM and other computer components. For example, the power supply cannot be overclocked, but can directly participate in this process.
Such an improvement in CPU performance is always associated with an increase in its temperature. If your “machine” is already working with modern software, as they say, at the limit, and you decide to increase the speed of your PC to save a few dollars, then get ready to invest in an improved CPU cooling system. Otherwise, you may get instability in the PC, or the failure of expensive equipment. We should not forget that an increase in the frequency of the CPU entails an increase in the frequency of the PCI bus. If its frequency is increased above 41 MHz, there is a risk of PC instability, as well as data loss from hard drives that work with the PCI interface.
Ways to increase CPU performance
A different algorithm of actions should be applied to different chips: even a beginner understands this. There has been a long-standing debate among overclockers about which chip is best for overclocking. Among the favorites of the dispute are, of course, the products of INTEL, and their eternal Canadian competitor - AMD. In fact, when overclocking these devices using the same means, they show almost identical performance: + - 5%. Despite the numbers, AMD processor overclocking is considered more painless for PCs and a priority for specialists.
A bit of theory
The easiest way to increase the performance of a CPU is to change its clock frequency, which in turn is the product of the multiplier times the bus frequency. These two indicators are changed directly in the BIOS, which has its advantages and disadvantages. The advantages include:
- Ease of operation.
- Overclocking from the BIOS allows you to increase the speed of your PC immediately after the start. Specialized software does this after loading the operating system.
The main disadvantage of increasing CPU speed from Bios is considered to be CPU performance limitations due to some motherboard models.
Many PC users are interested in the question: are there specialized programs for overclocking the processor? The answer suggests itself - of course, there are quite a few. There are utilities with which you can increase the CPU frequency directly from the operating system. In addition, many motherboard manufacturers offer the user programs of this kind that come with the necessary drivers on the motherboard disk. Using them for overclocking will not be a problem even for a beginner, if he thoughtfully approaches each operation.
Preparing to Increase CPU Clock Speed
First of all, you need to carefully weigh the pros and cons and find out if all the ways to increase the speed of your computer have really been tried, except for overclocking, and how much is it necessary? If the answer to these questions is yes, then you should check the cooling system of your PC, if necessary, replace low-power fans with more efficient ones.
Instructions for improving the performance of AMD processors
 To overclock the CPU, consider using special software. According to advanced overclockers, the best amd processor overclocking program of all time is AMD OverDrive, which is universal and suitable for most Canadian processors. In addition to it, you will need a utility to measure the CPU temperature in real time. The most popular software of this kind among specialists is Speed Fan. Both utilities can be easily found on the Internet, but it is best to download from the manufacturer's website.
- Launch the OverDrive and Speed Fan programs.
- In the utility, open the Advanced tab.
- In the tab, select the Clock/Voltage option.
- Check the box next to Select All Cores.
After these “dancing with a tambourine”, you can begin to gradually raise the CPU frequency through a multiplier. Most IT experts unanimously claim that the AMD CPU can immediately be set to a multiplier equal to 16. After the processor runs at this frequency, measure its temperature with the Speed Fan utility. If the CPU temperature has increased slightly and does not exceed 70 ° C, the PC works without failures, then you can try increasing the multiplier by 1.
In this part of the article, you have learned how to overclock an AMD processor without making changes to your PC's BIOS. Next, step-by-step instructions for software overclocking of INTEL processors will be considered.
How to improve the performance of INTEL chips
 The steps taken by a PC user to increase the performance of an Intel-based computer are not much different from overclocking an AMD CPU. To complete the picture, our publication will offer the option of overclocking the CPU through the BIOS.
- When starting the system unit, after initializing the BIOS of the PC components, press the DEL button to enter the input / output system (BIOS).
- Enter the BIOS FEATURES option.
- Enter the Super Speed option.
- Enter the Overlock section and set the Optimal Referens option
- Set this section to Manual.
After the procedures done, you will see all the information about the processor: its multiplier, bus frequency. You will need exactly these BIOS items.
- In the BSLK frequency item, you need to gradually increase the frequency. The best result can only be obtained by experience. Then exit BIOS. Save the settings.
- Reboot your PC.
That's basically it. Changes in CPU frequency can be checked in the properties of the computer. If working in the BIOS is inconvenient for you, then use one of the special programs. According to most IT professionals, the best program for overclocking an intel processor is CPU-Z. It is Russian-language, informative, has a small distribution size and can be run without prior installation.
Much in the work of our personal computer depends on the central processor. It's no secret that you can optimize the operation of all computer devices as much as possible. This also applies to the CPU. Let's find out how you can overclock the CPU using BIOS in an affordable way.
How to overclock the processor through BIOS - a way
The first thing to do in order for the overclocking of the processor through the BIOS to end successfully is to get into the BIOS. After you are in the BIOS, you can begin to manipulate. Be aware that an inexperienced user can damage the computer when trying to change the operation of the processor. Therefore, if you are not confident in your abilities, then it is better to use special programs designed to improve the efficiency of the central processor. Examples of such programs include the ClockGen and EasyTune5 utilities.
Well, here's what you need to do in order to overclock the processor through the BIOS:
- Let's try by increasing the frequency of the bus. To do this, we need to make sure that the computer's memory does not get in the way of performance growth.
- Find the parameter in the BIOS that is responsible for the frequency of the memory and set it to the very minimum. It is also necessary to raise the memory timings - this is necessary for the stable operation of the system. Save the BIOS changes and restart your computer. With this, you can overclock the processor through the BIOS.
- Lower the HyperTransport bus frequency to 400 or 600 MHz.
- Now you can proceed to the direct overclocking of the processor. Find the parameter that controls the FSB frequency.
- You need to change this parameter upwards. Unfortunately, none of the programmers will give you the exact value of the increase in frequency, since a lot depends on your computer. Features of the cooling system, type and type of motherboard, chipset configuration - all this affects how much you can increase the FSB frequency. Try to start small. Increase the frequency by no more than 10 Hz. Check the stability of the processor by loading Windows. The main thing is not to allow the temperature of the processor to rise, since a large warm-up can lead to a complete breakdown of the computer. Do not allow the processor to heat up above 60 degrees. The colder the processor, the better it is for its stable operation. Here's how to overclock the processor through the BIOS.
We hope these recommendations have helped you. It must be recognized that the instructions in this article are superficial and are designed for people who are well versed in BIOS. That is why we offer you a link to an article that fully describes the process of overclocking the system. Here is the link.