It is time to talk about the correct operation of solid-state drives in Windows 10. According to Microsoft, the use of SSD on the "dozen" does not require any settings or preliminary training of the system to install such a numeric data carrier, and the independent change in the operating system parameters can only harm the disk based on the operating system Flash memory.
But, despite all the assurances of the developer of Windows 10, at some points should still be paid attention to, as well as explore that the "dozen" does to ensure maximum performance and saving SSD resource.
With Windows 10 output, the network appeared guides to properly configure the system to optimize solid-state disks. But in fact, all of them were copies of similar instructions for "seven" and "eight", because in the last OS, many actions are performed by the system automatically when connected to the SSD PC (disabling defragmentation, paging file).
What does the "dozen" do to extend the life of SSD without prejudice to performance?
Initially, Microsoft was configured to "dozen" so that when a solid-state data carrier is detected, it has already been ready to work, without the need to make any changes to the OS configuration. From official sources it is known that the list of settings when using the Flash-memory drives includes:
- deactivation of defragmentation;
- use SuperFetch;
- disable ReadyBoost;
- optimization SSD power scheme;
- activation of the Trim function for the drive.
Remembering the instructions for which other versions of Windows are configured, it is possible to note that indexing and caching of files are not disabled, as well as system protection (recovery points are created regularly, reducing the operation of the device). With folders for temporary files, the same thing - it does not even appear sentences to transfer them to a hard disk. Consider all this in order, starting with defragmentation.
The defragment of SSD in the "dozen" is disabled, but instead of it is activated by some option of optimization. Having learned about this, many users immediately turn off this function, some - study the mechanism of its functioning. And, as it turns out, cleaning blocks on TRIM technology is useful for solid-state digital data carriers. Function.

The SSD defragment in Windows 10 is carried out only when the system is enabled (the system protection is active) once a month, but for such drives it is a little different from the defragmentation of files on HDD. In some cases, the absence of file defragmentation is useful (for example, with a subsequent increase in its size).
What should be turned off manually and what not
Many users who read the old article on setting up Windows 10 to work with SSD prove that Superfetch, caching and indexing files should be disconnected. These tips are on life, their implementation will lead to loss of performance and convenience of work at the computer.
Next, consider all options for optimizing the operation of the solid-state disk in the "dozen", noting that at least 15% of space should be free to obtain high-speed advantages during its operation. And it is very important.
Deactivation of the paging file
If there are insufficient work and performing some RAM tasks, it is advisable to use the paging file.
In favor of this fact, the fact that the mechanism of its operation implies the minimum number of references to the Page File.sys file for recording, regardless of the volume of installed and free RAM. The number of reading operations exceeds the number of recording appeals is approximately 40 times.

When the paging file is disabled, even if there are 8 and more GB of RAM, some "heavy" applications refuse to start (for example, Adobe Premier) or regularly give a failure. Perhaps this price will have to pay for an increase in the SSD resource.

Disable hibernation
Another controversial function is deactivating the ability to go to hibernation. It is used to implement the quick start of Windows 10. To do this, the Hiberfil.sys file is created on the system volume. In it, the "dozen" records the contents of RAM (in case of hibernation) or the files needed for the quick start of the system. The file size takes as much space as RAM is installed on the computer, and the amount of data recorded in it does not exceed the current size of the RAM used.
If the computer is deactivating the system for translating the system into the hibernation mode is not critical, then for the owners of the laptop, it will be wrapped with an accelerated discharge of the battery and the need to wait for the device. The process can delay with a large number of programs placed in the autoload, especially on old devices. In the case of a PC, waiting for its full loading is relevant if you want to extend the service life of expensive SSD.
Also possible reduction in the volume of hiberfil.sys by turning off the hibernation, without turning off the fast loading.
System Restore
When the "History of Files" function is enabled and the automatic formation of the system rollback points before performing the operations that affect the operation system (install / delete software), the physical resource SSD decreases. In this regard, it is recommended to disable the file history and the creation of recovery points. But such a careful attitude to the drive can turn into a loss of data or the need to perform a reset of the system in the event of its serious failure and the inability to roll back to the previous state.
When operating a Korean solid-state disk from Samsung, this can be performed by the Samsung Magician brand application. Backup in the background can lead to a reduction in SSD performance when performing a plurality of other tasks in the case of working with a carrier file system. Therefore, data backing should be performed during computer downtime.

Intel The same as Microsoft is categorically recommended to disable the operating system protection function. With it, you can quickly return the computer to the working point without loss or with minimal loss of user data.
Transfer temporary and user files to hard drive
Another option to reduce the wear of the solid-state disk is to transfer temporary files and user data to sections that are physically located on the hard drive. Thus, multiple overwriting of working files and their regular change (for example, stored on the desktop or in my documents) slightly reduce the number of records of the SSD record.
Usually, solid-state drives are used as system disks, so the storage of the multimedia library or image catalog is not advisable (this does not concern the games). Indeed, in the process of optimization, many of the files for which the read speed does not matter are rapidly affected, their blocks are multiple times.
Superfetch, indexing files for accelerated search, record caching and other
Using or disabling these functions more problems than otherwise. Different manufacturers are placed on their resources contradictory data from each other. Which of them believe, to solve the user, but to get acquainted with the recommendations of the leading SSD developers should be necessary.
According to representatives of Microsoft, the prefetch and Superfetch functions are successfully operated on SSD, has undergone significant changes to Windows 10. Samsung also argue that solid-state discs should not be used with the Superfetch function.

As for the cleaning of the Kesha buffer, here information is also fundamentally different even within one SSD manufacturer without reliable information to one or another point of view. It is possible to use the Kesha buffer, on the service life of the Flash memory, this will not affect in any way.

Search and indexing
In Windows 10, the indexing service for instant search more actively performs indexing, but without it the search icon, which is always in a prominent place, will be useless, and instantly run the system tool or open the frequently used file will not work. Is it worth slightly extending the SSD work time to the detriment of convenience - decide for yourself.
As already mentioned, there should be about 15% or more free space for high-performance work SSD, which is associated with the characteristics of the storage of digital data on such supports. Many developers of solid-state drives supply branded utilities, the task of which is the redundancy of these ~ 15% of the space by creating a hidden volume.
The drive must operate in AHCI mode. This can be checked in the task manager (called via Win → x).

Connect solid-state drives, whoever their manufacturer is strongly recommended for high-speed SATA third-generation interface that does not use foreign manufacturers controllers. It happens that the motherboard has a chipset for the Intel or AMD processor and additional ports on the controllers of foreign developers.
SSD should be connected, naturally to the first. You can determine them as on the label on the motherboard and using the manual for the system board or laptop.
Periodically visit the manufacturer's website of your digital media or device support resource and check the availability of fresh firmware (Firmware). The software update in the positive manner is reflected on the performance of the equipment, it concerns that not only solid-state drives.
As a summary of the results, we can say the following: for beginners of Windows 10 is well configured, as for minimizing the commission of unnecessary information recording operations. It is no longer to interfere in its settings, but experienced users can transfer temporary files to a hard disk and deactivate several functions (indexation, hibernation) to extend the life of the SSD with damage to the convenience of working on the computer.
The SSD solid-state disk differs in its properties and method of working from a hard HDD disc, but the Windows 10 installation process will not differ on it, there is only a noticeable difference in the preparation of the computer.
Preparation of disk and computer to install
The owners of SSD disks know that in previous versions of the OS for the correct, durable and full disk operation, it was necessary to change the system settings manually: disable defragmentation, some functions, hibernation, embedded antiviruses, paging file and change some other other parameters. But in Windows 10, the developers took into account these shortcomings, all the disk settings system are now performed by itself.
It is especially necessary to stop at defragmentation: before it harmed the disk very much, but it works differently in the new OS, without damaging SSD, but optimizing it, so it is not necessary to disable automatic defragmentation. The same with the other functions - in Windows 10, you do not need to customize the operation of the disk system manually, everything is already done for you.
The only one, when breaking the disk to the sections, it is recommended to leave 10-15% of its total volume as an unallocated space. This will not increase its performance, the recording speed will remain the same, but the service life can extend a little. But remember, most likely, the disk and without additional settings will last longer than you need. You can free up free interest as during installation of Windows 10 (during the process in the instructions below, we will dwell on this) and after it using system utilities or third-party programs.
Preliminary configuration of PC
In order to install Windows on an SSD disk, you need to switch the computer to AHCI mode and make sure that the motherboard supports the SATA 3.0 interface. Information on whether SATA 3.0 is supported or not, can be found on the company's official website that has developed your motherboard, or through third-party programs, such as Hwinfo (http://www.hwinfo.com/download32.html).
Transition to SATA mode
- Turn off the computer.
- As soon as the power process starts, press the special key on the keyboard to go to the BIOS. DELETE, F2 or other hotkeys are usually used. Which one will be used in your case will be written in a special footnote during the inclusion process.
- The BIOS interface in different patterns of motherboards will be different, but the principle of transition to AHCI mode on each of them is almost identical. First go to the "Settings" section. To move on blocks and items, use the mouse or arrow with the ENTER button.
- Go to the optional BIOS settings.
- Go to the "Built-in Peripheral Devices" subparagraph.
- In the SATA Configuration unit, find the port to which your SSD disk is connected, and press ENTER on the keyboard.
- Select AHCI mode. Perhaps he will be selected by default, but it was necessary to make sure. Save the settings made to the BIOS and exit from it, download the computer to proceed to the preparation of the media with the installation file.
Preparation of installation media
If you have a ready-made installation disk, you can skip this step and immediately start installing the OS. If you do not have it, then you will need a USB flash drive, at least 4 GB of memory. The creation of the installation program will look like this:
- Insert the USB port flash drive and wait until the computer recognizes it. Open the conductor.
- First of all, it is important to format it. This is done for two reasons: the memory of the flash drive must be absolutely empty and divided into the format you need. Being on the main page of the conductor, click right-click on the flash drive and select "Format" in the menu that opens.
- Select NTFS formatting mode and start an operation that can last up to ten minutes. Note that all the data stored on the formatted carrier will be irretrievably erased.
- Go to the official page of Windows 10 (https://www.microsoft.com/ru-ru/software-download/windows10) and download the installers.
- We run the downloaded program. We read and accept the license agreement.
- Select the second item "Create an installation media", since this method of installing Windows is more reliable, because at any time you can start all over first, as well as in the future, use the created installation media for installing OS to other computers.
- Select the language of the system, its version and bit. The version must be taken by the one that suits you more. If you are an ordinary user, then you should not download the system with extra functions that you will never be useful to install home windows. The bit depends on how much kernels work your processor: in one (32) or two (64). Information about the processor can be found in the properties of the computer or on the official website of the company that has developed the processor.
- In selecting the media, mark the USB device variant.
- Select a USB flash drive from which the installation media will be created.
- We wait until the media creation process is over.
- Reboot your computer without removing the media.
- During inclusion, we enter the BIOS.
- Change the procedure for downloading a computer: In the first place should be your flash drive, and not a hard disk so that when you turn on the computer, it starts to load from it and, accordingly, launched the Windows installation process.
Windows 10 installation process on SSD
- The installation begins with a language selection, set the Russian language in all lines.
- Confirm what you want to start the installation.
- Read and accept the license agreement.
- You may be asked to enter the license key. If you have it, then enter it, if not, then so far skip this step, activate the system after it is installed.
- Go to manual installation, since this method will allow you to configure the disk partitions.
- The window opens with the setting of the disc partitions, click on the "Disk Settings" button.
- If you install the system for the first time, the entire SSD disk memory will not be distributed. Otherwise, you must select one of the sections for installation and format it. Retained memory or already existing discs. We follow as follows: to the main disk on which the OS will stand, take more than 40 GB so that in the future do not encounter the fact that it is clogged, 10-15% of the overall disk memory. Leave retained (if all Memory is already distributed, delete the sections and start forming them again), the rest of the memory is given under an additional partition (usually disk D) or partitions (wheels E, F, G ...). Do not forget to format the main section given under the OS.
- To start the installation, select the disk and click the Next button.
- Wait until the system is installed in automatic mode. The process can take more than ten minutes, in no case are not interrupting it. After the completion of the procedure, creating an account and setting the main system parameters will begin, follow the instructions on the screen and select the settings for yourself.
Video Tutorial: how to install windows 10 on SSD
Installing Windows 10 on SSD is no different from the same process with an HDD disk. The main thing, do not forget to enable the ACHI mode in the BIOS settings. After installing the system, you should not customize the disk, the system will do it for you.
The SSD solid-state disk differs in its properties and method of working from a hard HDD disc, but the Windows 10 installation process will not differ on it, there is only a noticeable difference in the preparation of the computer.
Preparation of disk and computer to install
The owners of SSD disks know that in previous versions of the OS for the correct, durable and full disk operation, it was necessary to change the system settings manually: disable defragmentation, some functions, hibernation, embedded antiviruses, paging file and change some other other parameters. But in Windows 10, the developers took into account these shortcomings, all the disk settings system are now performed by itself.
It is especially necessary to stop at defragmentation: before it harmed the disk very much, but it works differently in the new OS, without damaging SSD, but optimizing it, so it is not necessary to disable automatic defragmentation. The same with the other functions - in Windows 10, you do not need to customize the operation of the disk system manually, everything is already done for you.
The only one, when breaking the disk to the sections, it is recommended to leave 10-15% of its total volume as an unallocated space. This will not increase its performance, the recording speed will remain the same, but the service life can extend a little. But remember, most likely, the disk and without additional settings will last longer than you need. You can free up free interest as during installation of Windows 10 (during the process in the instructions below, we will dwell on this) and after it using system utilities or third-party programs.
Preliminary configuration of PC
In order to install Windows on an SSD disk, you need to switch the computer to the ACHI mode and make sure that the motherboard supports the SATA 3.0 interface. Information on whether SATA 3.0 is supported or not, can be found on the company's official website that has developed your motherboard, or through third-party programs, such as Hwinfo (http://www.hwinfo.com/download32.html).
Transition to SATA mode
- Turn off the computer.
- As soon as the power process starts, press the special key on the keyboard to go to the BIOS. DELETE, F2 or other hotkeys are usually used. Which one will be used in your case will be written in a special footnote during the inclusion process.
- The BIOS interface in different patterns of motherboards will be different, but the principle of transition to ACHI mode on each of them is almost identical. First go to the "Settings" section. To move on blocks and items, use the mouse or arrow with the ENTER button.
- Go to the optional BIOS settings.
- Go to the "Built-in Peripheral Devices" subparagraph.
- In the SATA Configuration unit, find the port to which your SSD disk is connected, and press ENTER on the keyboard.
- Select ACHI mode. Perhaps he will be selected by default, but it was necessary to make sure. Save the settings made to the BIOS and exit from it, download the computer to proceed to the preparation of the media with the installation file.
Preparation of installation media
If you have a ready-made installation disk, you can skip this step and immediately start installing the OS. If you do not have it, then you will need a USB flash drive, at least 4 GB of memory. The creation of the installation program will look like this:
- Insert the USB port flash drive and wait until the computer recognizes it. Open the conductor.
- First of all, it is important to format it. This is done for two reasons: the memory of the flash drive must be absolutely empty and divided into the format you need. Being on the main page of the conductor, click right-click on the flash drive and select "Format" in the menu that opens.
- Select NTFS formatting mode and start an operation that can last up to ten minutes. Note that all the data stored on the formatted carrier will be irretrievably erased.
- Go to the official page of Windows 10 (https://www.microsoft.com/ru-ru/software-download/windows10) and download the installers.
- We run the downloaded program. We read and accept the license agreement.
- Select the second item "Create an installation media", since this method of installing Windows is more reliable, because at any time you can start all over first, as well as in the future, use the created installation media for installing OS to other computers.
- Select the language of the system, its version and bit. The version must be taken by the one that suits you more. If you are an ordinary user, then you should not download the system with extra functions that you will never be useful to install home windows. The bit depends on how much kernels work your processor: in one (32) or two (64). Information about the processor can be found in the properties of the computer or on the official website of the company that has developed the processor.
- In selecting the media, mark the USB device variant.
- Select a USB flash drive from which the installation media will be created.
- We wait until the media creation process is over.
- Reboot your computer without removing the media.
- During inclusion, we enter the BIOS.
- Change the procedure for downloading a computer: In the first place should be your flash drive, and not a hard disk so that when you turn on the computer, it starts to load from it and, accordingly, launched the Windows installation process.
Windows 10 installation process on SSD
- The installation begins with a language selection, set the Russian language in all lines.
- Confirm what you want to start the installation.
- Read and accept the license agreement.
- You may be asked to enter the license key. If you have it, then enter it, if not, then so far skip this step, activate the system after it is installed.
- Go to manual installation, since this method will allow you to configure the disk partitions.
- The window opens with the setting of the disc partitions, click on the "Disk Settings" button.
- If you install the system for the first time, the entire SSD disk memory will not be distributed. Otherwise, you must select one of the sections for installation and format it. Retained memory or already existing discs. We follow as follows: to the main disk on which the OS will stand, take more than 40 GB so that in the future do not encounter the fact that it is clogged, 10-15% of the overall disk memory. Leave retained (if all Memory is already distributed, delete the sections and start forming them again), the rest of the memory is given under an additional partition (usually disk D) or partitions (wheels E, F, G ...). Do not forget to format the main section given under the OS.
- To start the installation, select the disk and click the Next button.
- Wait until the system is installed in automatic mode. The process can take more than ten minutes, in no case are not interrupting it. After the completion of the procedure, creating an account and setting the main system parameters will begin, follow the instructions on the screen and select the settings for yourself.
Video Tutorial: how to install windows 10 on SSD
Installing Windows 10 on SSD is no different from the same process with an HDD disk. The main thing, do not forget to enable the ACHI mode in the BIOS settings. After installing the system, you should not customize the disk, the system will do it for you.
Let's talk about how to configure SSD for Windows 10. I will start simply: in most cases, any configuration and optimization of solid-state drives for the new OS are not necessary. Moreover, with the words of Microsoft support staff, independent optimization attempts can harm both the operation of the system and the disc itself. Just in case, for randomly lighted :.
However, some nuances still should be taken into account, and at the same time clarify things related to how SSD discs work in Windows 10, and talk about them. In the last section of the article, there is also a more general information (but useful), which is related to the operation of solid-state drives at the hardware level and applied to other versions of the OS.
Many have noticed that by default automatic optimization (in previous versions - defragmentation) is included for SSD in Windows 10 and someone rushed to disconnect it, someone learned what is happening during the process.
In general terms, Windows 10 does not perform defragmenting SSD, and optimizes it by performing the cleaning of the blocks by Trim (or, or rather, RetRim), which is not harmful, and even useful for solid-state drives. Just in case, .

Some have written voluminous articles on how SSD optimization works in Windows 10. We will quote part of such an article (only the most important parts for understanding) from Scott Hanselman: SCOTT HANSELMAN:
I hit the dealer and talked to the team of developers working on the implementation of drives in Windows, and this post was written in full accordance with what they answered.
Optimization of drives (in Windows 10) produces SSD defragmentation once a month if shadow copying of the volume (system protection) is enabled. This is due to the effect of SSD fragmentation for performance. Here is the wrong idea that fragmentation is not a problem for SSD - if SSD is very fragmented, you can achieve maximum fragmentation when the metadata cannot represent more file fragments, which will result in errors when writing or increasing the file size. In addition, a larger number of file fragments means the need to process a greater number of metadata to read / write a file, which leads to loss of performance.
As for Retrim, this command is executed on a schedule and is necessary due to how the Trim command is running in file systems. The execution of the command occurs asynchronously in the file system. When the file is deleted or the location is released in a different way, the file system sets the query queue in the queue. Due to the restrictions on the peak load, this queue can achieve the maximum number of TRIM requests, as a result of which subsequent will be ignored. In the future, Windows storage optimization automatically performs Retrim to clean blocks.
Summarizing:
- Defragmentation is performed only if the system protection is enabled (recovery points, file history using VSS).
- Disk optimization is used to mark unused blocks on SSD, which were not marked when the Trim is working.
- Defragmentation for SSD can be needed and, if necessary, automatically applied. At the same time (this is already from another source) for solid-state drives, a different defragmentation algorithm is used compared to HDD.
However, if you want, you can.
What functions to disable for SSD and whether it is necessary
Anyone who wondered the SSD setup for Windows has met Tips associated with the Superfetch and Prefetch disconnecting, disconnecting the paging file or its transfer to another disk, disconnecting the system protection, hibernation and indexing the disk content, the transfer of folders, temporary files, and other disks , disconnecting caching recording to disk.
Some of these tips came from Windows XP and 7 and are not applicable to Windows 10 and Windows 8 and to the new SSD (Disable Superfetch, write caching). The larger part of these tips is really able to reduce the amount of data recorded on the disk (and SSD has a limit on the total number of data recorded for the entire service life), which in theory leads to the extension of its service life. But: by losing performance, amenities when working with the system, and in some cases to failures.
Here I will note that despite the fact that the service life of the SSD is considered to be less than that of the HDD, with a high probability of the currently bought the average price of the average price with normal use (games, work, Internet) in the modern OS and in the presence of a backup capacity (for lack of loss Performance and extension of service worth keeping 10-15 percent of SSD space free and this is one of the tips that is relevant and sure) will last longer than you need (i.e. will be replaced as a result of more modern and capacious). In the screenshot below - my SSD, time life. Pay attention to the Count "Total recorded", 300 TB warranty.

And now, according to the items on various ways to optimize SSD operation in Windows 10 and the expediency of their use. I will note again: these settings can only slightly increase the service life, but do not improve productivity.
Note: This optimization method like installing programs on the HDD in the presence of SSD I will not consider it, as it is not clear, why did the solid-state drive, not for the launch and work of these programs?
Turning off the paging file
The most frequent advice is to disable the paging file (virtual memory) of Windows or transfer it to another disk. The second option will cause a drop in performance, since instead of fast SSD and RAM will be used slow HDD.
The first option (disabling the paging file) is very controversial. Indeed, computers with 8 and more GB of RAM in many tasks can work with a swap file disabled (but some programs may not start or detect failures when working, for example, from Adobe products), thereby saved a solid-state drive reserve (less recording operations ).

At the same time, it must be borne in mind that in Windows, the paging file is used in such a way as to access it as little as possible, depending on the size of the available RAM. According to official information Microsoft, the recording ratio for recording for the paging file with normal use is 40: 1, i.e. A significant number of record operations does not occur.
It is also necessary to add that SSD manufacturers such as Intel, Samsung recommend to leave the paging file included. And one more note: Some tests (two years ago, truth) show that disabling the paging file for unproductive cheap SSDs can lead to an increase in their performance. See, if suddenly decide to try.
Disable hibernation
The following possible setup is to disable hibernation, which is also used for the quick launch function of Windows 10. The hiberfil.sys file, recorded on the disk when it is turned off (or translated into the hibernation mode) of the computer or laptop and used for the subsequent quick launch takes several gigabytes on the drive (approximately equal to the occupied amount of RAM on the computer).
For laptops Disabling hibernation, especially if it is used (for example, automatically turns on after a while after closing the laptop cover) may be inappropriate and lead to inconvenience (the need to turn it off and turn on the laptop) and reduce battery life (quick start and hibernation allow you to save the charge comparison with the usual inclusion).
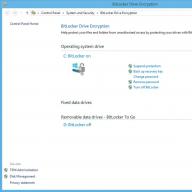
System protection
Automatically created Windows 10 recovery points, as well as the history of files when the corresponding function is turned on, of course, written to the disk. In the case of SSD, some recommend disable system protection.
Some - Samsung, recommending to do this in its Samsung Magician utility and in the official SSD manual. This indicates that backup can cause a large number of background processes and a decrease in performance, although in fact the system protection works only when making changes to the system and during computer downtime.

Intel does not recommend this for their SSD. Just like Microsoft does not recommend switching off system protection. And I would not: a significant number of readers of this site could correct problems with a computer at times faster if they had a Windows 10 defense.
Read more about enabling, turning off and checking the system protection status in the article.
Transfer files and folders to other HDD discs
Another of the SSD optimization options proposed options are transferring user folders and files, temporary files and other components to a regular hard disk. As in previous cases, this can reduce the number of recorded data with simultaneous performance reduction (when you transfer the time of storage of temporary files and cache) or convenience when used (for example, when creating a thumbnail of photos from user folders transferred to HDD).
However, in the presence of a separate capacious HDD in the system, it may make sense to store truly voluminous media files (movies, music, some resources, archives), which do not need frequent access to it, having released a place on SSD and extended Services.
Superfetch and Prefetch, indexing the contents of the disks, caching records and cleaning the buffer cache records
With these functions there are some ambiguities, different manufacturers give different recommendations with which I think should be found in the official websites.
According to Microsoft, Superfetch and Prefetch are successfully used for SSD, the functions themselves have undergone change and work otherwise in Windows 10 (and in Windows 8) when using solid-state drives. But Samsung believes that this function is not used by SSD drives. Cm. .

About the buffer of the cache record as a whole, the recommendations are reduced to "leave the included", but the cache buffer is cycling. Even within one manufacturer: SAMSUNG Magician is recommended to disable the write cache buffer, and on their own official website it is said that it is recommended to keep it on.

Well, about indexing the contents of the disks and the search service, I do not even know what to write. The search in Windows is a very efficient and useful thing for work, however, even in Windows 10, where the search button is in plain form, almost no one uses the habit of looking for the necessary items in the Start menu and multi-level folders. In the context of the optimization of SSD, disabling the indexing of the contents of the disk is not particularly effective - it is more reading operation than records.
General principles for optimizing SSD operation in Windows
Up to this point, it was mostly about the relative uselessness of manual SSD settings in Windows 10. However, there are some nuances, equally applicable to all stamps of solid-state drives and versions of OS:

Perhaps all. General Outcome Article: Doing anything with a solid-state drive in Windows 10 in general, it is not necessary without apparent about that. If you just purchased SSD, you may be interested in and useful for instructions. However, more relevant in this case, in my opinion, there will be a clean installation of the system.
With the advent of solid-state drives there are many questions, so they have become more with the output of Window's 10, and is the most discussed - is it necessary to configure SSD under the top ten? The fact is that Microsoft supports fully policies of the work of the above disks and therefore claim to independently make changes in the system settings can lead to a decrease in the service life of the SSD disk in Windows 10. Let's be able to rely on the authoritarian Developer solution.
What is given?
Before doing something, consider the settings of Windows 10 by default for SSD More.
Fully defragmentation is disabled
The fact is that defragmentation as such is not required for SSD drives is related to its architecture, so if in HDD - clusters that periodically require overwriting by offset of data from the cell to the cell, then the SSD disk needs only in the Trim command On Windows 10, it is necessary to check whether it works if not, then read how to enable.
- "Explorer" → "This_computer" → Right-click "C:" → "Properties"
- Tab "Service" → "Optimization__defragmentation_disk" → "Optimize"

We see that the system disk is solid-state, at the bottom of the window it is indicated that the SSD optimization occurs in Windows 10 on a schedule - it's about TRIM technology - if briefly, reports that in the file system of non-existent blocks that can be deleted. So, if the function is disabled, then go to "Edit_Amers" and set the schedule, follow further to optimize the settings for the SSD disk on Windows 10.


There are always reservations, so defragmentation is necessary and is performed automatically by the system in the case when the system protection is active - it is about creating recovery points, again Microsoft claims that the algorithm differs from conventional defragmentation for the usual HDD.
ReadyBoot, Superfetch / Prefetch and Food
To the most popular question - whether you need to configure SSD on Windows 10, we will tell about the functionality of a very familiar one of the previous versions, but causing hot spores in Windows 10.
Thus, the ReadyBoot is immediately disabled - a function that analyzes for the last 5 loads of ways and files, often requested and caches a place in RAM for faster access to them at the next operation.
A lot of debates call both SuperFetch / Prefetch - they are used, but it is not necessary to disable, so the manufacturers of Intel say, and Samsung considers otherwise. The question arises how then to optimize SSD-DISK in Window's 10, if opinions differ here, it should be noted here that with versions 7 and 8.1 - the above functions also evolved, but for tranquility - refer to the Iron Developer Soviets.
And an important aspect is that the operating system automatically optimizes the power of your SSD disk.
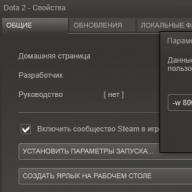
File Podchock
Speaking, the proper configuration of the Window's 10 system is under solid-state SSD disk, often it is about shutting down the paging file, but is it so? All forget for what it is necessary, so if we are talking about optimizing services in the background mode - then of course it is not required, but there is a software that can issue an error if the paging file is turned off - often used Adobe Photoshop for example, and others Products of this family, and by the way, so saved the reserves of our SCD. Therefore, it will be correct to enter the settings and set the checkboxes we need.
- "Control Panel" → "Additional_Amers_Systems" → "Advanced" → "Parameters" → The "Advanced" tab → "Change" → should stand the check mark "Automatically_Select_Obl" File_Clocked "→ OK.


We protect the battery or CDD?
As you already understood, we will talk about how it is related to the setting of the SSD - the disk for Windows 10, the process in general is obvious when we ship our laptop, all the data is saved and naturally, the data is recorded in memory and endlessly The process is that poorly affects the durability of the solid-state disk. It turns out that the laptop holders have a choice that we take a battery or screw? In fact, everything is not so bad! The hibernation is designed for equipment with HDD, since the speed of the OS load and appeal to files is much longer, and the users are easier to put the car and then awaken to work not to start the program and applications at this time. In a situation with SSD'Shniki, it is not required, since their main chicken is a speed - you paid attention to what number of seconds does your PC turn on? We draw conclusions that hibernation in the presence of SSD is not needed.
Indexing
Another tool can be sacrificed, we are talking about the indexation of Windows, the fact is that when performing the process, it saves information about the location of the files, thereby providing a quick search - which corresponds to the space and constant overwriting data accordingly - since you move them. The technology of solid-state disks provides independently quick access, so we boldly turn off the way below.
Right click on the disk, in this case, "C:"
- "Properties" → Tab "Common" → Remove the checkbox "Allow_intexing__name_File ..." → OK

- In the window that appears, select "to the C: \\ disk and to all nested files and folders" → OK


It remains only to wait for completion and close the window.
Optimization in a few clicks!
I am afraid that they are now looking by stones, as they previously did not say about the program to optimize SSD on Windows 10 - yes, it exists and, not only for the tens, worked and works on earlier versions. Meet SSD Mini Tweaker, which weighs a little more than 1.5 MB, absolute free and in Russian.
But this is not the only program for easy and fast SSD setup under the OS version of Window's 10, we offer a small list:
- "TWEAK-SSD" - in English, paid with an affordable demo version will help you configure and improve the disk performance.
- SSDLife Pro is paid, Russified, also an affordable demo version, keeps the "Health" of the screw and works in the background.
- SSD TWEAKER - FREE license, supports Russian, less than 1 MB, a good helper in optimization.
All of the above instructions will help if SSD works slowly in Windows 10, I would also like to answer other most frequent questions at once, so.
- What volume SSD is needed for a full-fledged work of Windows 10 - a rather double wording, but if short, for the Windows itself, at least 20 GB are needed, then based on the needs. Office / multimedia PC - from 120 to 128 GB; Games of the middle category - from 240 to 256 GB; For Profi and high-level games from 480 to 512 GB. In a situation with SCDs, the more free disk space, the better for the life of the disk and the speed of the company.
- After some time after installing a clean Windows, the system is loaded for a long time - it is necessary to analyze the download time and watch the event codes, so often the problem is related to updates - turn off the automatic and go to manual, there may still be a reason that you have not switched to IDE on Achi.
- Users are asked what type of partition Select MBR or GPT for Windows 10 with SSD - the answer is simple, it is necessary to check which version of the prefirm is installed: good old BIOS or modern UEFI. So, GPT works only with the UEFI interface, MBR supports both versions.
Answers to the most frequent questions with instructions, you can find in articles on our website.