Hello, friends
Finally, I have "reached" your hands, before turning the second management server smart home Domoticz - and in this review I will try to tell in detail about how I did.
Introduction
For those that I did not read, let's give a link to your review. Malinka works hard on the Niva task automation, but the system is growing - at the moment 61 device only Xiaomi and everything would be anything - but only 1 Xiaomi gateway can be connected to one server of the dotycase. And I have three of them - the truth is 1 - Aqara, without a developer's mode, but the other two are with the possibility of connecting.
As a second platform, I decided to stop at Orange PI PC 2.
Specifications
CPU - Allwinner H5, Arm Cortex-A53 Quad Core
GPU - Mali450mp, Hexa-Core
RAM - 1 GB
Storage - MicroSD, Nor Flash 2MB
Network Features - Ethernet 10/100/1000
Video output - HDMI
USB ports - 3
Wireless Features - Infrared Port
Audio Conclusion - 3.5 Jack, HDMI
GPIO - 40 Pins
Nutrition - 5V 2A
Box, delivery set
Mainepe comes in a cardboard box, with Orange Pi inscription
Inside - sprinkled in the antistatic package

Includes anything else does not go, so when buying you need to immediately order a power supply and a set of radiators - at a minimum.

Appearance, description
Almost all elements and ports are on the top of the board, on the bottom only the map receiver
If someone else did not pay attention - I will clarify - there is no Wi-Fi (and Bluetooth too).
I immediately installed a set of radiators - the CPU radiator exactly coincided in size, for memory chips - they are somewhat less. But running forward to say that a repeatedly measuring the temperature, in the process of installing the software - above 40 degrees there was never on average 37.

Dimensions -
 |  |
in scale with a matchbox

Installation of the operating system
To install OS - we need an SD card, preferably at least 8 GB, and it is desirable to have at least two identical cards - for backups. I did not buy an additionally, because I have a decent stock of the cards, for the orange, two microSD 16GB Samsung Class 10 cards
OS Dourstrobs for oranges are found to find our model and download - I took Debian Desktop - maybe there will be a hunt in the future to play with it, but with the same success you can take more compact Debian Server

Unpack the IMG system (there may be an archive in the archive - .xz V.RAR) - we need it is that IMG file, a debian desktop - 2 GB with a cap. Write on MicroSD with Win32 Diskimage - Link

After the flash drive is written - we insert it into the orange carte receiver and turn on the food. For a minute, we give the system to boot, go to the Customer DHCP list on the home router and looking for the address issued for OrangePi

Now you can go to it through SSH using any SSH client - I use the good old Putty.
By default, for Orange Debian, we use the following credentials -
user - root, Pass - Orangepi, but the routing access via SSH is closed, go to the OrangePi user, the password is the same. OrangePi user - enters the sudo group.
Immediately change the password to your team

and I change the password for root. After that, we leave the root account - everything is done under the user account.
If you want to add another user, use the team
Sudo AddUser [Name of the user]
And add it to the group sudo command
Sudo AddUser [Name of the user] sudo

Sudo Nano -wuc / etc / network / interfaces
And in the file we prescribe the address
#The Primary Network Interface Allow-Hotplug Eth0 IFACE ETH0 INET STATIC ADDRESS 192.168.0.98 - Our IP Netmask 255.255.255.0 - Gateway Mask 192.168.0.1 - Gateway

We overload to apply settings

Change the time zone using the team
Sudo Dpkg-Reconfigure Tzdata
And put NTP.
Sudo Apt-Get Install NTP NTPDATE

after installation, we prescribate your NTP servers in the settings file instead of default
Sudo Nano /etc/NTP.conf.
in my case - for Ukraine, you can find out more about the NTP server pool

Synchronized and rejoice in the exact time.

Preparing for the installation of Domoticz
Before installing - you need to update the system, for this, first start the command
Sudo Apt-Get Update
And after successful download -
Sudo Apt-Get Uprgade
Be a complete completion

Now install the Dotycsis - this is done by one command
Sudo Curl -l install.domoticz.com | Bash
Collecting and installs Stable version Domoticz

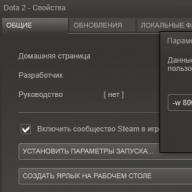
Basic settings - specify in the installer window, but you can leave everything by default

After a few minutes, the system is installed and accessible through the WEB interface on HTTP and HTTPS

At the moment, the stable version supports the work with the Xiaomi gateway

But I set Beta - for the compatibility of versions with Raspberry Pi. This is done by the start of the script from the home folder Domoticz
CD ~ / Domoticz sudo ./updatebeta
The domoticz system is fully installed.
Ryushes, which I added - type of localization, FTP installations and other things - I will not describe, I will not describe a lot of manuals - in this review I focus on the minimum necessary for the installation of Domoticz. As for the system interface and questions of adding devices - I will move you back to your review.
At this stage, I strongly recommend to make backup - clean, with needles, system of the Dotycsis, which will give the opportunity to torment it as if it is possible, after which a couple of minutes get the original, clean image. To create backup, I remove the disk image of the R-DRIVE program, found it on torrents, even a portable version is quite enough - how many times she helped me up - do not pass.

But in order to still tell something interesting, I will tell about the add-on, which I use to manage a smart home with a smartphone -
Imperihome.
The main installation page is located. This app is for smartphones / tablets, it looks like this - you can configure on your own.

First you need to install the server part, for the beginning we delete the current and set a new Node
Sudo Apt-Get Remove Node Curl -Sl https://deb.nodesource.com/setup_4.x | Sudo -e Bash - Sudo Apt-Get Install -Y Nodejs
After that set NPM
Sudo NPM Install -G [Email Protected]
And check the versions
Node -V // should be at least 4.4.x NPM -V // must be at least 2.2.x

Wget -qo - http://www.e-nef.com/domoticz/mdah/gpg.key | Sudo Apt-Key Add -
open a file with sources
Sudo Nano /etc/APT/sources.list.
and add a string -
DEB http://www.e-nef.com/domoticz/mdah/ /

Sudo Apt-Get Update
And launch the installation of the server part of MyDomoathome
Sudo Apt-Get Install MyDomoathome

After installation, we introduce data to the Domoticz server settings file - specify the address (instead of 127.0.0.1)
Sudo Nano /etc/Mydomoathome/config.json.

Now go to http: // Your_IP: 3002 - the start page of the system should be loaded, and check whether the data from the devices go to the Devices tab

If the picture is approximately so - then everything is ok
 |  |  |
All devices displayed in the Domoticz switches panel - will be shown in ImperiHome, here you can rename them (it does not affect the dotycsis) to be addressed to Favorites, etc.
 |  |  |
A client with a domoteism is to work - can only in the home network (if of course you do not have enough mind to light up the IP server of the Dotycase server to the public IP address), to work remotely - you will need a VPN server.
At the moment, I have a temporary solution in the form of Open VPN on Raspberry - I want to organize this, as a constant solution by the forces of the router. Since my current router does not allow it to do - I had to update it, solving another number of problems. But it will be the topic of the next review.
Who wants to see everything described in the review, can do it watching my video review
That's all, I hope the review was useful, thanks for your attention
Install (write) OS image for Orange PI PC using a Windows computer - very simple. To do this, we need a microSD memory card and the latest version, download, install and run this utility (the image of the desired OS has already been downloaded and unpacked from the archive, the final file must be with an extension.img).
In the Win32 Disk Imager window, select the image file located on your disk and the drive letter, which corresponds to the microSD memory card to which you want to write the operating system image and press Write.and then confirm the record on the memory card by pressing Yes In the confirmation window (be careful, this process will completely delete all data from the memory card).
The recording process is as follows, the duration depends on the speed of the memory card, on average this process lasts 5-7 minutes. At the end of the recording, you will receive the message "Write Successful".

Installing Linux image from Mac OS
Recording the image from Mac OS will be performed only with the help of embedded system utilities.
- Download and unpack the OS image and connect the memory card to your computer by means of a card reader.
- Determine the path in the system to the memory card using the command diskutil List., It is the path to the disk, and not his section (/ dev / disk2 but not / dev / disk2p1). On the test bench, it looks like the MacBook-Air: ~ username $ diskutil list / dev / disk0 (Internal, Physical): #: Type Name Size Identifier 0: Guid_Partition_Scheme * 256.1 GB Disk0 1: EFI 209.7 MB Disk0s1 2: Apple_HFS MacOS 255.8 GB Disk0s2 / Dev / Disk2 (External, Physical): #: Type Name Size Identifier 0: fdisk_partition_scheme * 7.7 GB Disk2 1: Linux 2.8 GB Disk2S1
- The path to the disk is defined, namely / Dev / disk2., now you need to unmount it with the team diskutil unmountdisk / dev / disk2. MacBook-Air: ~ USERNAME $ Diskutil UnmountDisk / Dev / Disk2 Unmount of All Volumes On Disk2 Was Successful
- We proceed directly to the image of the image on the microSD card. For security entry The path to the disk is slightly modified, with / dev / disk2 on / dev / r.disk2, which means "Removable", the utility will conduct an additional check on the fact that the recording occurs on the removable media, and not a local disk.
MacBook-Air: ~ Username $ sudo dd bs \u003d 1m if \u003d ~ / desktop / armbian_5.14_orangepipc.img of \u003d / dev / rdisk2 - The record will occur without output any notifications about 5-7 minutes, the duration depends on the speed of the memory card. In order to watch the current status during the recording process - you can use the CTRL + T key combination. At the end of the image recording, you will see the following message. The recording is made. You can try to run Orange PI with a memory card.
2676 + 0 Records in 2676 + 0 Records Out 2805989376 bytes Transferred in 216.560596 secs (12957063 bytes / sec)
Problems
- Error DD: Invalid Number "1m" - Replace BS \u003d 1M to BS \u003d 1M in the record command.
- If the recording command still returns an error - try to record directly in the memory card, without / dev / r.disk2, just in / dev / disk2
Installing Linux image from Linux
Before you start, download the preferred OS image and unpack it from the archive at a convenient place for you (in the example this file will be on the desktop), and also connect the MicroSD memory card to the computer card reader.
- You need to define the system path to the memory card, execute the command df -h.. In the left column, all discs are listed at the moment, the memory card will have a name similar to one of the following / dev / mmcblk0p1 or / dev / sdc1. P1 or 1 This is the partition number on the disk, and we need a disc itself, because we use / dev / mmcblk0 or / dev / sdc
- Unmouncent all sections of the memory card are automatically configured. In our case, only one section P1 sudo umount / dev / mmcblk0p1
- Getting started.
if \u003d - path with an OS image. That is, "what we will copy".
of \u003d - the path to the disk, destination. That is, "where we will copy."
BS \u003d 4M - the size of the data block (the more - the faster the record). When writing errors, lower this value up to 1m. USERNAME $ sudo dd bs \u003d 4m if \u003d ~ / desktop / armbian_5.14_orangepipc.img of \u003d / dev / mmcblk0 - Follow the command sync. So that all data from the cache is finally recorded on the disk.
Installing Linux Image in EMMC (NAND)
The Linux OS images for Orange PI are built in such a way that they cannot be written directly to the internal memory of the device (NAND), because to install the OS on the EMMC chip, you will have to first install on the memory card, run a card with a microSD card and built into the OS assembly To transfer the system to the internal memory of the board. This manual is applicable to Orange Pi Plus, Orange Pi Plus 2 and Orange PI PC Plus.
In different assemblies of the OS, their scripts to transfer OS into internal memory, here we will mention all the OS known to us and how to transfer them to NAND.
Armbian.
ARMBIAN has a built-in utility (script) NAND-SATA-INSTALL, when executing this command, the intuitive OS transfer wizard will start to the internal memory of the device or the connected SATA disk.
Assembling from loboris
- Install the OS on the memory card on the instructions above and run your Orange PI
- Run the Sudo Install_To_emmc command
- At the end of the process, turn off the power and remove the memory card from the board.
- Turn on the power. Loading will start from the internal memory of the board.
Note, if you download the memory card again on which the working OS is recorded, the download will be made from the memory card, as it has the highest priority over the built-in memory, format the memory card before using as an additional storage.
You can use the BTRFS file system with compression "compress \u003d lzo" that will help save up to 40% of the disk space. To do this - transfer OS such a command
Sudo install_to_emmc btrfs.
Transfer OS from built-in EMMC on a microSD card
- Run the board without a microSD card connected.
- After downloading, connect the memory card into the slot
- Run the Sudo Install_to_SDCard command
- Ready. Now you have 2 independent copies of the OS, in the internal memory and on the microSD card. MicroSD map you can run on any other Orange PI.
Installing USB USB
- To start the process, run the Sudo Install_To_USB / DEV / SDXN command |
/ dev / sdxn - path to usb flash drive, you can see the team df -h.
btrfs. - If you add this parameter (optional) flash drive will be formatted in BTRFS instead of EXT4
noformat. - When using this parameter - USB flash drive will not be formatted. Data will be combined. Used to update the backup system to USB disk. - At the end of the copy process - restart the board, the download will start with USB flash drives.
More detailed instructions on this process are described in the topic forum "
Hello, friends
Finally, I have "reached" your hands, before turning the second management server smart home Domoticz - and in this review I will try to tell in detail about how I did.
Introduction
For those that I did not read, let's give a link to your review. Malinka works hard on the Niva task automation, but the system is growing - at the moment 61 device only Xiaomi and everything would be anything - but only 1 Xiaomi gateway can be connected to one server of the dotycase. And I have three of them - the truth is 1 - Aqara, without a developer's mode, but the other two are with the possibility of connecting.As a second platform, I decided to stop at Orange PI PC 2.
I bought a set in the Banggood store, except for the same post-package - more
Specifications
CPU - Allwinner H5, Arm Cortex-A53 Quad CoreGPU - Mali450mp, Hexa-Core
RAM - 1 GB
Storage - MicroSD, Nor Flash 2MB
Network Features - Ethernet 10/100/1000
Video output - HDMI
USB ports - 3
Wireless Features - Infrared Port
Audio Conclusion - 3.5 Jack, HDMI
GPIO - 40 Pins
Nutrition - 5V 2A
Box, delivery set
Mainepe comes in a cardboard box, with Orange Pi inscription
Inside - sprinkled in the antistatic package

Includes anything else does not go, so when buying you need to immediately order a power supply and a set of radiators - at a minimum.

Appearance, description
Almost all elements and ports are on the top of the board, on the bottom only the map receiver
Description of all elements and ports:


If someone else did not pay attention - I will clarify - there is no Wi-Fi (and Bluetooth too).
I immediately installed a set of radiators - the CPU radiator exactly coincided in size, for memory chips - they are somewhat less. But running forward to say that a repeatedly measuring the temperature, in the process of installing the software - above 40 degrees there was never on average 37.

Dimensions -

In scale with a matchbox

Installation of the operating system
To install OS - we need an SD card, preferably at least 8 GB, and it is desirable to have at least two identical cards - for backups. I did not buy an additionally, since I have a decent stock of the cards, two cards used for the orangeOS Dourstrobs for oranges are found to find our model and download - I took Debian Desktop - maybe there will be a hunt in the future to play with it, but with the same success you can take more compact Debian Server 
Unpack the IMG system (there may be an archive in the archive - .xz V.RAR) - we need it is that IMG file, a debian desktop - 2 GB with a cap. We write on MicroSD using Win32 Diskimage - 
After the flash drive is written - we insert it into the orange carte receiver and turn on the food. For a minute, we give the system to boot, go to the Customer DHCP list on the home router and looking for the address issued for OrangePi

Now you can go to it through SSH using any SSH client - I use the good old Putty.
By default, for Orange Debian, we use the following credentials -
User - root., Pass - orangepi.? but the routing access via SSH is closed, go for the user orangepi., the password is the same. User orangepi. - Included in the Sudo group.
Immediately change the password to your team
Passwd. 
SU.
And I change the password for root. After that, we leave the root account - everything is done under the user account.
If you want to add another user, use the team
Sudo AddUser [Name of the user]
And add it to the group sudo command
Sudo AddUser [Name of the user] sudo

Sudo Nano -wuc / etc / network / interfaces
And in the file we prescribe the address
#The Primary Network Interface Allow-Hotplug Eth0 IFACE ETH0 INET STATIC ADDRESS 192.168.0.98 - Our IP Netmask 255.255.255.0 - Gateway Mask 192.168.0.1 - Gateway

We overload to apply settings 
Change the time zone using the team
Sudo Dpkg-Reconfigure Tzdata
And put NTP.
Sudo Apt-Get Install NTP NTPDATE

After installation, we prescribate your NTP servers in the settings file instead of default
Sudo Nano /etc/NTP.conf.
In my case - for Ukraine, you can find out more about the NTP server pool

Synchronized and rejoice in the exact time.

Preparing for the installation of Domoticz
Before installing - you need to update the system, for this, first start the commandSudo Apt-Get Update
And after successful download -
Sudo Apt-Get Uprgade
Be a complete completion 
Now install the Dotycsis - this is done by one command
Sudo Curl -l install.domoticz.com | Bash
Collecting and installs Stable version Domoticz 
Basic settings - specify in the installer window, but you can leave everything by default

After a few minutes, the system is installed and accessible through the WEB interface on HTTP and HTTPS

At the moment, the stable version supports the work with the Xiaomi gateway

But I set Beta - for the compatibility of versions with Raspberry Pi. This is done by the start of the script from the home folder Domoticz
CD ~ / Domoticz sudo ./updatebeta
The domoticz system is fully installed.
Ryushes, which I added - type of localization, FTP installations and other things - I will not describe, I will not describe a lot of manuals - in this review I focus on the minimum necessary for the installation of Domoticz. As for the system interface and questions of adding devices - I will move you again to your review
At this stage, I strongly recommend to make backup - clean, with needles, system of the Dotycsis, which will give the opportunity to torment it as if it is possible, after which a couple of minutes get the original, clean image. To create backup, I remove the disk image of the R-DRIVE program, found it on torrents, even a portable version is quite enough - how many times she helped me up - do not pass. 
But in order to still tell something interesting, I will tell about the add-on, which I use to manage a smart home with a smartphone -
Imperihome.
The main installation page is located. This app is for smartphones / tablets, it looks like this - you can configure on your own.
First you need to install the server part, for the beginning we delete the current and set a new Node
Sudo Apt-Get Remove Node Curl -Sl https://deb.nodesource.com/setup_4.x | Sudo -e Bash - Sudo Apt-Get Install -Y Nodejs
After that set NPM
Sudo NPM Install -G [Email Protected]
And check the versions
Node -V // should be at least 4.4.x NPM -V // must be at least 2.2.x

Wget -qo - http://www.e-nef.com/domoticz/mdah/gpg.key | Sudo Apt-Key Add -
Open a file with sources
Sudo Nano /etc/APT/sources.list.
and add a string -
DEB http://www.e-nef.com/domoticz/mdah/ /

Sudo Apt-Get Update
And launch the installation of the server part of MyDomoathome
Sudo Apt-Get Install MyDomoathome

After installation, we introduce data to the Domoticz server settings file - specify the address (instead of 127.0.0.1)
Sudo Nano /etc/Mydomoathome/config.json.

Now go to the address: 3002 - the starting page of the system must be loaded, and check whether the data from the devices go to the Devices tab

If the picture is approximately so - then everything is ok

All devices displayed in the Domoticz switches panel - will be shown in ImperiHome, here you can rename them (it does not affect the dotycsis) to be addressed to Favorites, etc.

A client with a domoteism is to work - can only in the home network (if of course you do not have enough mind to light up the IP server of the Dotycase server to the public IP address), to work remotely - you will need a VPN server.
At the moment, I have a temporary solution in the form of Open VPN on Raspberry - I want to organize this, as a constant solution by the forces of the router. Since my current router does not allow it to do - I had to update it, solving another number of problems. But it will be the topic of the next review.
Who wants to see everything described in the review, can do it watching my video review
That's all, I hope the review was useful, thanks for your attention
I plan to buy +97 Add to favourites I liked the review +72 +167Due to the fact that on my board OrangePi Plus there is a built-in EMMS memory, I decided to save on a flash drive and install the operation system on this flash memory. I will consider 2 options for installing the system on EMMS.
Option 1. Installing the official version of the OS.
Go to the OrangePi official website download on]]\u003e]]\u003e image Lubuntu_1404_for_orangepiplus_v0_9_0_img.xz.but on the link to google DISK opens Lubuntu_1404_for_orangepiplus_v0_8_0., And in order to download in Baidu, you need to put the client to the computer or the phone, then I post a link to the already downloaded distribution, download and pour on the USB flash drive like as instructions.">
After the fill, in the flash drive, you can see a list of files to download different versions of OranGepi:
script.bin.
script.bin.opi-2_1080p50.
script.bin.opi-2_1080p60.
script.bin.opi-2_720p50.
script.bin.opi-2_720p60.
script.bin.opi-pc_1080p50.
script.bin.opi-PC_1080P60.
script.bin.opi-pc_720p50.
script.bin.opi-PC_720P60.
script.bin_opi-plus_1080p50.
script.bin.opi-plus_1080p60.
script.bin.opi-plus_720p50.
script.bin.opi-plus_720p60.
uimage.
uIMAGE_OPI-2.
uimage_opi-plus.
We need to rename the example for my Orangrpi Plus fee:
it was: uimage_opi-plus
it became: uimage.
it was: script.bin_opi-plus_1080p50
it became: script.bin.
Screen resolution Choose your own, I chose as in my monitor. After that, remove the flash drive from the computer and insert into the fee, turn on, the red LED will turn around, and after a few seconds a network card link, if you have connected the network.
Look at the router. What aipi received a fee, go in a remote network using the Putty program entering the OrangePi login and OranGepi password
FS_Resize.
Overload a fee by running the command:
After downloading, connect back to the board, authorized as the root dsgjkybd command:
and run the installation of the system to the built-in EMMS memory by running the command:
to the script request that EMMS will be overwritten y.

After installing Debian on the Emms flash to the mini server OrangePi, go to the server using the PUTTY program, install the necessary programs and can install and run the HTOP program, see the download and number of nuclei, RAM and running processes:

If you use your fee like a mini server, it is enough to install the programs you need, configure and the fee will work quietly and unnoticed.
If you need to install a graphical system, to use as a media server, you need to install a graphical system. Loboris has prepared several scripts for installing different graphics tables, run the desired script to install the desktop you choose:
Install_lxde_desktop install_xfce_desktop install_mate_desktop
The only minus of the collected kernel from Lobioris is disconnected by MultiPort for iptables, which imposes a limit on using Fail2Ban if you use a board as a server. Solution of this problem I will lay out a little later.
Today we have installed Debian Jessie on a single-board mini computer OrangePi Plus with two options, which one to choose to solve you.
We will take a little break and see a small video:
Detailed instructions for installing Linux Ubuntu with an XFCE desktop on Orange PI PC2. Optional systems for Orange PI are installed on a Micro SD Flash card. Our instruction concerns the preparation of the SD memory card and installing the Linux Ubuntu XFCE operating system in it.
Perhaps it will be more convenient to download the Linux Ubuntu XFCE distribution for Orange PI PC2 from PiBoard.io. This site offers download Ubuntu with quick and affordable mirrors. Download and unzip the Ubuntu XFCE distribution for Orange PI PC2. As a result, you will receive a file with an IMG extension.
To prepare boot Micro SD. Maps We will need a computer running under Windows or Linux.
Preparing SD Flash Maps on Linux Computer.
Insert the target card into the computer's card reader. Run the disk utility. Disable all sections Micro SD. Cards and delete all sections on the map.
Create a new section.

Format this section.

Pull out and insert again SD. Card. Run the disk utility again and disconnect the section on SD. card.
In the Linux terminal, using the CD command, go to the Ubuntu XFCE Distribution folder for Orange PI PC 2 and run the following command:
Sudo dd if \u003d ubuntu_desktop_xenial_xfce4_pc2_v1_0_0.img of \u003d / dev / sdb
The process of writing an img file on SD. The card will take no time. Wait until the DD team fully work out.
Pull out and insert again SD. Card. Run the disk utility again and disconnect the rootfs section on SD. card. Close the disk utility and run the Gparted sections editor. In the Gparted section editor, increase the rootfs section.