Before you start working in Microsoft Word, you need to learn how to create new documents... The process is pretty straightforward. You will figure it out very quickly with our instructions.
Using hotkeys
As you know, hotkeys can significantly speed up computer work. So in Microsoft Word, basic operations can be performed by pressing the appropriate key combination.
If we need to create a clean document, without formatting, completely ready for work, we should click:
Ctrl + N
This must be done when the editor is running.
Using the editor menu
Start Microsoft Word. In the upper left corner, click the "File" button. Select "Create". A menu will open with all the available templates. You need the item "New Document". Select it and click the "Create" button.
The document will be created, you will see a blank sheet without formatting. Now you can work with him.
Windows context menu
If you have Microsoft Office installed on your computer, the functions for creating new documents are built into the Windows context menu.
Go to the folder where you want to place the future document. Call the context menu by right-clicking on any free space in the folder. In the menu that appears, select "Create", then " Microsoft Word Document". It will be created.

Let's now give him his name. Select and call the context menu again. Now click on the "Rename" item. Type in the desired value and click "Enter".
Now launch it and you can work.
Creating a document template
If you often work with documents that have a similar structure, then it makes sense to create a template for them.
Word template is the basic structure of a document, which includes the location of individual elements, text formatting settings. An example of a template is an official letter. Company logo in the top center, information on the director on the side, etc.
Every time you need to write a letter to your clients, it is enough to create a new document based on a ready-made template and add the required text.
So how can you create a new template in Word. Launch the editor and create a new document. Make it up accordingly. Add all the necessary elements and graphics. After this is done, go to the File menu and click the Save As button. In the window that opens, select the file type "Word Templates" and the location of the template. Click the "Save" button.

Now when you need to open it, just select a template from the list.

Video for the article:
Microsoft Word is the most important and essential tool for any office work. And the number of functions it possesses will shock any person. We have selected 20 tips to help you simplify your work with Word and automate some of the chores. you can check out similar material for Excel.
Insert date and time
You can quickly insert a date using the Shift + Alt + D key combination. The date will be inserted in the format DD.MM.YY. The same operation can be done over time using the Shift + Alt + T combination.
Fast case change

If you don't already know the blind typing method, then CAPS LOCK can play a cruel joke with you. By accidentally turning it on and not looking at the screen, you can type a mountain of text, which will have to be deleted and rewritten from scratch because of one pressed button. But by selecting the desired text and pressing Shift + F3, you change the case from uppercase to lowercase.
Cursor acceleration
Usually, if you move the cursor with the arrows, it moves one letter at a time. To speed up its movement, hold down the Ctrl key together with the arrow.
Select text fragments located in different places

A very useful feature that allows you to highlight inconsistent pieces of text. Hold Ctrl and select the pieces of text you want.
Clipboard

If you use copy and paste (and you probably do), then most likely you know about the enhanced clipboard in Word. If not, then it is called by clicking on the button of the same name and shows everything that you copied to the clipboard during the work.
Quick screenshots

If you are doing a manual, a review of a service, or you just need to paste a screenshot into Word, this can be done very simply using the appropriate tool. Click on the "Snapshot" button and Word will show all active windows. By clicking on any of them, you will get a screenshot of this window.
Hyphenation

Enabling hyphens can improve the readability of your text and also save you from long white space between words. You can arrange them yourself or entrust it to a computer. The button is in the "Page Layout" - "Hyphenation" menu.
Watermark

You can add a watermark to your document for added protection. To do this, go to the "Design" menu and select the "Underlay" item. There are four standard templates in Word, and you can also create your own.
Repeat previous command
A very useful feature that allows you to duplicate the last command. If you press F4, then Word will repeat the last command you made. This can be entering text, sequentially deleting several lines, applying styles to different sections of text, and much more.
Stress setting

It's easy to put stress in Word. To do this, place the cursor after the letter to be stressed and hold down the Alt + 769 key combination. Important: the numbers must be pressed on the numeric keypad to the right.
Customizing the Ribbon

The top ribbon with buttons can be customized very flexibly. To do this, go to the menu "File" - "Options" - "Customize the Ribbon". Here you can add features that were not there before and remove those that are not needed. Moreover, you can delete or create your own tabs with functions.
Quick selection of a large piece of text
To quickly select a large piece of text, place the cursor at its beginning and click with the mouse while holding down Shift at the end of the fragment. Saves time and nerves in situations where you have to select several sheets at once.
Move quickly through the document
There are several combinations that greatly speed up document navigation:
- Ctrl + Alt + Page Down - next page;
- Ctrl + Alt + Page Up - previous page;
- Ctrl + Home - move to the top of the document;
- Ctrl + End - guess yourself. :)
Insert a new page
How I hate myself for not knowing this combination before. Ctrl + Enter allows you to instantly create a new leaf, rather than holding Enter with one hand while brewing tea with the other.
Changing the default save folder

By default, Word saves all files to the Documents folder. In order to change this, go to the menu "File" - "Options" - "Save". In the "Default Local File Location" line, select the folder you need. In the same menu, you can configure the default document format, autosave and much more.
Original formatting

In order to return the text to its original formatting, press the Ctrl + Spacebar key combination.
Word as a task manager

If you are a big fan of Microsoft and Word in particular, you can even use it as a task manager. However, first you have to try a little. Right click on the Feature Ribbon at the top and select Customize Ribbon. In the right column, enable the only disabled tab "Developer".
Go to the "Developer" tab that appears and find the "Checkbox" element that has a check mark (why not). Now, by clicking on the checkbox, you can create task lists and mark them as completed.
Vertical text selection

If you accidentally mess up your list, you can select the text vertically. To do this, hold Alt and use the mouse cursor to select.
Password Protecting Document

Needless to say, why is it needed. In our age, when information has become the main weapon, it never hurts to have additional protection. To protect a document with a password, go to the "File" tab and select the "Protect document" option. Now feel free to create a password, but remember that if you forget it, you will not be able to recover it.
The fastest way to open Word

Rounding out our list is an incredible hacking trick. Previously, in order to open Word, you created a new document or looked for it in the Start menu, now this is in the past. Press the key combination Windows + R and type in the window that appears winword.If you do not use the command line for other commands, then the next time you press Windows + R, the command to start Word will automatically load and you just have to press Enter.
Do you have ways to make Word easier to use? I am sure there is. Share them in the comments!
We are studying the most popular text editor Microsoft Word. In this tutorial, you will learn how to create a new document, enter, edit and format text, create lists, apply styles, and much more.
With this article, we open a whole cycle of training materials with which you will learn how to create high-quality text documents in the most popular application in this field - Microsoft Word (Word). The presentation here will go in a rather primitive language, which may at first frighten off readers who are already partially familiar with this editor. But, believe me, you will most likely find useful information in this cycle.
Microsoft Word is a text editor (processor) used to create professional-looking documents. The name Word was not chosen by chance, because in translation from English it means “Word”.
Due to the fact that Word combines the most modern text formatting tools, you can easily create documents of any complexity and organize them using it. In addition, with powerful editing and editing tools, this application provides a convenient environment for multiple users to collaborate on the same document.
In the first part of a series of training materials on Word, you will learn how to create a new document, enter and edit text, get acquainted with some of the basic types of formatting. Here we will begin our acquaintance with the newfangled ribbon editor interface. We will also look at creating bulleted and unlabeled lists, changing document fields, and much more.
PROGRAM WINDOW
When you open Word, its two main parts are displayed in the program window: the ribbon located at the top (highlighted in red in the figure below) and a blank document that occupies almost the entire program window.
The Ribbon contains a set of buttons and commands that you can use to perform various actions on a document and its contents (for example, resizing text or printing it). The document window itself looks like an ordinary white sheet of paper and is designed to enter all kinds of test information.
Also above the ribbon on the left is the quick launch menu, in the middle is the name of the document, and in the upper right corner there are buttons for minimizing, resizing and closing the program window.
In the opened document, in the upper left corner of the page, you will see the cursor, that is, a small flashing vertical line. This line indicates that the characters you entered will appear from this point.
TEXT INPUT AND EDITING
After opening the program, just start typing, and the letters, words and sentences you entered will begin to appear on the document page. To start typing on the same page, but one line below, you must press the Enter key. The number of pressing Enter will correspond to the number of lines skipped. As you enter text, the cursor gradually moves to the right. When you reach the end of the line, just keep entering letters. The characters and insertion point will automatically wrap to the next line.
If you need to start a new paragraph, press Enter. As a result, the cursor will automatically appear at the beginning of a new line. If you need to make the spacing between paragraphs a little larger, press the Enter key again before starting a new paragraph.
If you need to correct a mistake in the typed text, just place the cursor to the right of the unnecessary letter and press the Backspace key. The cursor will delete the character to the left of it. If you want to erase the whole word, press the indicated key as many times until the word disappears. There is another option for deleting the error: place the cursor at the beginning of the word, that is, to the left of it and press the Del key the required number of times.
Practice your typing and text editing skills by typing a few free paragraphs, or type the variant we suggested.
.jpg)
ERROR CORRECTION
As you enter text, Word warns you about grammatical or spelling errors by underlining them with a wavy green or red line. A green underline indicates that you need to check the grammar, and a red one indicates possible spelling errors or that a word (for example, a proper name or place names) is not recognized, that is, it is not in the Word editor dictionary.
What to do with such underscores? To do this, move the mouse cursor over the underlined word and press its right button. As a result, a small window will appear with suggested corrections. Select the required word and left-click on it. The word will be replaced and the underline removed. If the word is not recognized, Word will not offer any suggestions. Please note that if you do not correct such underlines, they will not appear on the printed pages of the document.
You can do the same with green underlines. But keep in mind that Word is good at recognizing spelling mistakes, most of which are fairly easy to correct, while grammatical and word usage mistakes are much more difficult to find on your own. If you think you are right and Word suggests the wrong options, simply skip the fix by selecting the appropriate item from the right-click menu and the underline will be removed.
If you are uncomfortable focusing on each underscore, you can ignore them while typing, and after you finish typing, check spelling and grammar all over the document at once. To do this, open the tab Peer review at the top of the ribbon and select Spelling in Group Spelling.
If so far working with the tape raises questions, come back to this point later, as the description of working with it will go a little below.
ISOLATING FRAGMENTS OF TEXT
In order to perform any actions with the text in the document, you must select it, and then apply the desired command to the selected area. To select an entire word or a preposition, just double-click on it, after which the selected area will be highlighted in blue.
There are two ways to select an arbitrary piece of text. In the first case, place the blinking cursor at the beginning of the fragment you want to select. Then hold down the Shift key and, without releasing it, click at the end of the desired fragment. After that, the required text will be highlighted in blue to indicate that it is selected. Click anywhere in the document to deselect it.
In the second case, place the blinking cursor at the beginning of the fragment, but this time hold down the left mouse button and move its pointer to the end of the desired fragment. After achieving the desired result, the button must be released.
If you need to select several fragments in different parts of the text, use the Ctrl key. Select the first section of text in any way, then press Ctrl and, without releasing it, select the next section, after which the key can be released. If you need to select another fragment, press the Ctrl key again and continue.
TEXT FORMATTING
To draw attention to important information, for example, you can make the text bold, italic, or underlined. But these are trifles. You can change its size, style, color, background and apply animation elements to it. And even this is not the whole list of possibilities that Word provides to users when working with text.
Now is the time to remember the ribbon (ribbon interface), which was discussed at the very beginning of the article, and learn how to use it.
There are several tabs at the top of the working window. Each of them contains a specific set of actions. We need to select the second tab - home (if it is not selected, you must click on it with the left mouse button).
Each tab contains several groups with commands that combine several items. In the tab home find the group Font (group names are on the bottom line of the tape). This group contains several commands and buttons that allow you to make various changes to the text.
In our case, select an arbitrary piece of text or the whole word, then click on the corresponding buttons in the above-mentioned group to change its style.
.png)
As you can see from the figure, after pressing the button Bold, the selected text has changed its style. Now let's make it more oblique and underlined by clicking on the buttons Italics and Underlined.
In this case, the underline can be either regular solid or wavy, dotted, double, etc. Use the triangle button on the right to see the entire list of possible options.
.png)
As you can see from our example, you can apply several kinds of formatting to one selection.
As you've probably already noticed, the group Font contains quite a few different useful buttons that give the ability to change the type and color of the font, its size, strike out the font or convert it to superscript and subscript, add animation or background. Select some piece of text and try to apply all these formatting options to it yourself by clicking on the appropriate buttons.
STYLES
The method of making changes discussed in the previous section is useful only if you need to change the format of just a few characters, words, or sentences. To apply several types of formatting at once to the entire document styles.
Various kinds of styles are available in the tab home in Group Styles... It is enough to select a style to automatically change the font, text size, attributes and paragraph formatting. For example, you can change the font style, make the text larger, and add formatting to bold at the same time.
.png)
As you can see from the picture, after choosing a style called Heading 1, our first paragraph was converted to a heading (the font size increased, its color and weight changed).
To experiment, on the tab home in Group Styles hover the mouse cursor over the different styles one by one. Thus, you can see the changes that will happen to the document after you want to apply any option. To finally apply the selected style, just click on it with the left mouse button. To view other styles, you can open the collection by clicking the button in the lower right corner of the block with an arrow Others.
CREATING LISTS
If you need to create a list in a document, this can also be done on the tab home in Group Paragraph (which is to the right of the group Font).
Let's practice. First of all, separate the text that will be converted into a list in different paragraphs using the Enter key. At the same time, these can be either single words or whole sentences.
In our example, we decided to style the last paragraph with a list.
.png)
Now select the text you want to convert to a list. In the paragraph group, click the button Markers... The text will be converted to a bulleted list. Without deselecting the list, press the button Numbering to create a numbered list.
.png)
.png)
PAGE FIELDS
Page margins are white space around the edges of a page. The default margins at the top, bottom, left, and right of the page are 2 cm, 2 cm, 3 cm, and 1.5 cm, respectively. This is the most common margin width and is often used for most documents. But, if you need fields of a different size, you need to know how to change them. Fields of other sizes can be useful, for example, when creating short letters, recipes, invitations or poems.
The ribbon is also used to resize the fields. Only this time use the tab Page layout... First you need to click it to select it, and then in the group Page settings select item Fields... You will see images (icons) of fields and their sizes.

The first value in the list is a field Commonwhich is currently active. To create narrower fields, click the button Narrow... If you want to make the left and right margins much wider, click Wide... When you select the type of fields, they will automatically be applied to the entire document.

When you select fields, the background color of their icons will change. Pressing the button again Fields, by changing the background color in this way, it is possible to determine which margin size is set.
WINDOWBACKSTAGE
In order not to lose the changes made in the work, they must be saved, and the sooner you do this, the better. To do this, open the very first tab on the ribbon File... A large window called Backstage will appear, in which you can perform various operations, for example, save, open, print documents, and so on.
In the left pane of the window that appears, select Save... A new smaller window will appear. In this window, you need to specify where on your computer you want to save the document, as well as what name it will have. After saving the document, continue working by saving it periodically. It is also very convenient to save a document at any time by pressing the Ctrl + S keyboard shortcut.
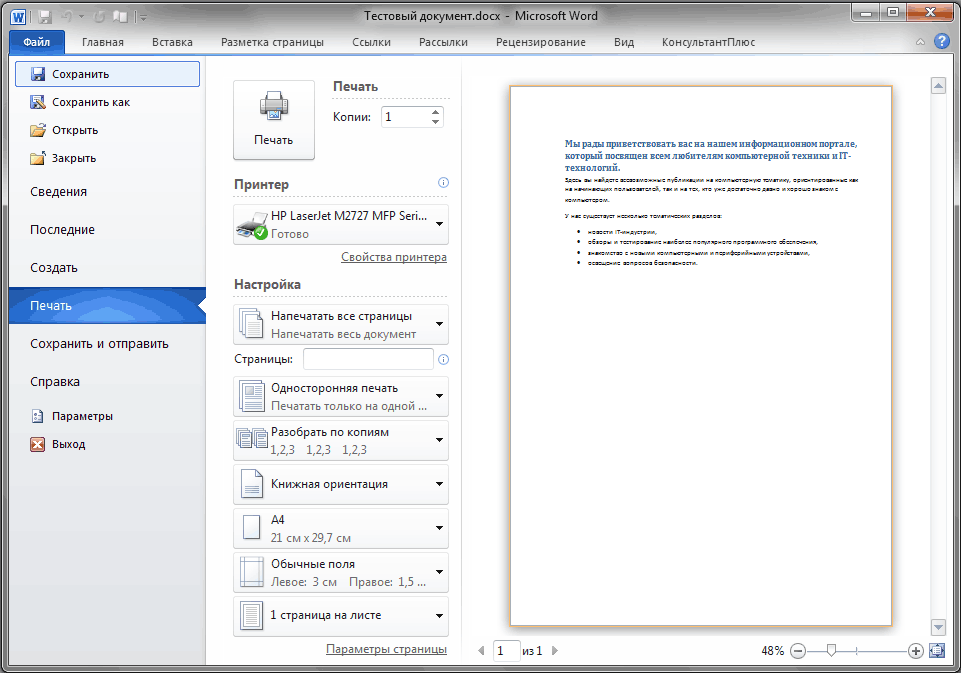
If the document is already ready to be printed, open the tab again File... In the left pane of the menu that opens, select the command Printing... A large window will appear in which you must click on the line Printing... Of course, in this case, a printing device - a printer or MFP - must be connected to the computer. As in many other cases, you can print a document using hotkeys - in this case, this is the keyboard shortcut Ctrl + P.
After the work on the text document is completed and the document is saved, close the file. To do this, open the tab File and in the left pane click Close.
To locate the document after you have closed it, browse the list Latest documents... Click a document in the list and it will open.
To complete work in Word in the tab Filechoose a team Outputat the very bottom of the menu or just click on the cross in the upper right corner of the program window.
CONCLUSION
On this, let me finish the first part of the tutorials on the most popular text editor Microsoft Word.
To consolidate the acquired skills, be sure to practice the knowledge gained by typing several short texts yourself and applying various formatting elements in them.
In the next part, we will learn how to cut and paste chunks of text, change line spacing, align, use formatting marks, and much more.
Read also:
Every user using Windows systems and the Microsoft Office suite of programs has come across MS Word in one way or another. This application is one of the most widespread, popular and demanded among users all over the world. However, many people mistakenly believe that Word is much more common in a program than it might seem at first glance.
What is Word?
Yes, indeed, initially, at the dawn of the office suite, this application was developed exclusively as a text editor, different from the standard Notepad.
The first and most important difference was that the letters were entered here not as it was done in Notepad or in the currently outdated DOS systems, but using the graphics mode. This made it possible to enter both regular and uppercase letters. In addition, a fairly large number of fonts appeared in the application that could be applied to the typed text.
Immediately it became possible to insert pictures, which put the program on a level above other text editors. Over time, the application has transformed into such a powerful tool for working with texts and related multimedia components that many developers, creating their own, began to simply copy the capabilities of Word, integrating them into their applications (OpenOffice, Lotus, etc.).
Key features of "Word"
As for the toolkit, everything cannot be fully described. However, some of the main points are worth dwelling on.

So, Word is mostly a text editor. Among all its features, the following should be noted separately:
- using a huge set of fonts;
- support for almost all known languages;
- spell checker with the ability to add words to main dictionaries;
- syntax checking;
- search for synonyms;
- text formatting;
- use of many pre-installed templates;
- arbitrary size (limited only by free space on the hard disk);
- changing the orientation (position) of the text;
- setting page parameters;
- printing documents;
- using the clipboard;
- import and export of different formats;
- using different colors for text and background;
- cross support for inserting and saving documents with Excel tables and Access databases;
- the ability to work with macros, XML documents and PDF files;
- inserting and saving graphics;
- availability of a special formula editor;
- work with tables;
- entering calculated formulas;
- autocomplete forms;
- using scripts and Visual Basic macros;
- the presence of a table of special characters;
- several modes of displaying documents;
- support for multi-column documents and more.
Additional tools
As you can see, Word is more than just a tool for editing text documents.

There are many more interesting possibilities. Everyone knows that the editor supports the insertion of graphics, but few people realize that it is just as easy to add sound or video to the text.
Among other things, it can be used as a simple tool for creating full-fledged web pages with hyperlinks based on the HTML language, the knowledge of which is not required by the user.
Finally, Word supports email clients like Outlook and can even send editable or finished files over the local network.
Instead of a total
In general, as you already understand, Word has evolved from a simple text editor into a powerful tool for working with a variety of file formats and enhanced support for web design and multimedia. Naturally, far from all the features of the program were touched upon here, but only the most basic ones, since it is impossible to mention absolutely everything that this unique program is capable of in the format of this article.
Our computer has many different programs. We use some of them often, while others we use extremely rarely or never at all. But there are programs in the computer that you just need to know and be able to use. And one of them is the program Microsoft Word.
Of course, if you use your computer only for playing games and communicating on the Internet, then you can easily do without Microsoft Word. But in this case, you can hardly be called a computer user. After all, a computer user is a person who can perform basic operations on a computer (create a folder, copy, delete) and work with popular computer programs, including Word and Excel. By the way, when an employer requires an employee to know a PC, this means, first of all, knowledge of the Microsoft Word program.
What is Word
Microsoft Word is a program for printing text and composing documents. Simply put, Microsoft Word (abbreviated as Word) is a printing program. That is, in this program you can print any type of text: an article, document, abstract, term paper, diploma, and even a book. Also in this program you can beautifully design text - add a picture or photo to it, highlight parts of it with different colors, change the font, size of letters and much more. You can also create a spreadsheet, print an ad, or make a poster in Microsoft Word. Plus, what is printed can be printed on paper, that is, printed on a printer.
What is Word
Word is a white sheet of paper that you can type on immediately using your computer keyboard. Moreover, this is not one sheet of paper: if you need to print a lot of text, and it does not fit on one sheet, the program will automatically add more sheets. Also, the printed text can be edited: change the size of letters, font, style and much more. To do this, Word has special buttons.
How to open Word
Look at the Desktop, that is, at the screen of your computer. Perhaps you will see this icon on it:
If this icon is not on the desktop, then click on the "Start" button in the lower left corner of the screen.
A list will open. Click on "Programs" (All Programs).
A new list will appear. Find the item "Microsoft Office" and click on it. If you do not find such an inscription, then, most likely, the office software package (including Microsoft Word) is not installed on your computer.
Finally, open Microsoft Word.


