As usual with passwords, you can lose, forget the password, fire the only employee who knew him, and much more. What if it was the root password on VMware ESX Server? How can I reset it? Read on to find out what you can do.
1. Reboot VMware ESX Server
If you do not know the root password for your VMware ESX Server, and you do not have passwords for root-equivalent accounts, then the first thing you need to do is restart VMware ESX Server.
2. Press "a" to modify kernel boot
Once the GRUB menu appears, press a to modify the boot:
3. We enter single user mode
At the end of the kernel arguments line, type "single" and press Enter:

4. Change the password
We can now change the root password using the passwd command:

You need to enter your new password twice.
5. Reboot ESX Server
After changing the password, restart the server to return to multi-user mode.

Good afternoon!. In the last article I described to you in detail the installation and configuration of VMware ESXI 6.5, where one of my subscribers asked me to cover a question that helps recover forgotten root password from host... In today's post, I will describe in detail the mechanism that allows reset ESXI 6.5 password, for older versions or newer, everything will be just as relevant. I am sure that even if you remember all the passwords, it is useful to know this functionality, you never know where it can come in handy.
Description of the task
When you may not have a root password on your VMware ESXI hypervisor:
- You came to a new company where the former responsible employee did not give you passwords. This can be for a number of reasons, very frequent cases when people are fired and they certainly do not like this, as a result of which they leave, taking all the passwords with them and not telling them to the management, you, as a beginner, are the scapegoat, since now you are responsible for this.
- It's trite, but you have lost it or forgot your password, a very common story when you installed an ESXI host, configured it and put it into operation. Virtual machines are spinning there and do not interfere with you, and the password to the web interface can generally be memorized in the browser or the server is generally controlled through vCenter 6.5.
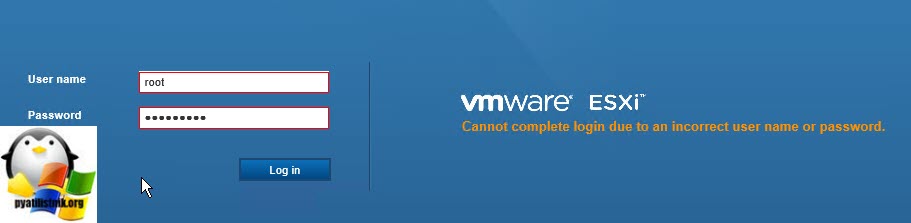
This is how the problem with authorization to the ESXI host looks like when it is impossible to specify the correct data.
This is how it looks in the console:


Cannot complete login due to an incorrect user name or password
VMware ESXI password reset and recovery methods

Resetting the root password in VMware ESXI 6.5, via Live-CD
About the first method, I see no reason to repeat the material, you can read everything at the link above, let's analyze the second method with you, with a downloadable CD and a flash drive based on it.
The first thing you must download any of your favorite LIVE-CDs, I usually use Slax because it is small, Ubuntu, Kali Linux or Fedora-Workstation-Live-x86_64, but the list is huge.
Here is a useful resource for you, which has combined a list of all Live-CDs from various developers https://livecdlist.com/

Next, you need to boot your ESXI host from this Live disk, if you have management ports (IDRAC, IMM, IPMI, ILO) on your servers, then it is possible to mount an ISO image in the virtual console, if on the management ports server with no active mount licenses, then your path is the bootable Rufus USB stick.

Change root password via LIVE-CD CentOS
When the bootable media is connected to the server, we reboot your ESXI host. I will give an example from LIVE-CD CentOS.
My bootable LIVE-CD CentOS gives this welcome menu, other disks will have their own. Select the "Troubleshooting" mode.


At the time of loading, you will have a quick setup wizard, at the first step of which you need to select the language inside the operating system, I will leave English. Click "Next"


If you wish, you can connect to your online resources through popular services such as Google or Microsoft.

Everything is ready, click "Start using CentOS Linux".

You will have a desktop like this.

At the very top, press the "Application" button and select the "Terminal" icon in the window that opens.

You will see a command prompt window, by default you will be there with the rights of a regular user, in order to elevate yourself to the administrator level, enter the command:

Now you need to get a list of partitions that your system sees, for this there is a command:

As a result, you will get a list of your partitions in the form of a list of devices named / dev / sda and a list by numbers, where you will see their size and file system type, FAT16 can be called Microsoft basis.
If you have GPT partitioning you can use parted utility.
We write parted and press Enter, as a result you will enter the utility interface, then enter / dev / print to display the list
Model: VMware, VMware Virtual S (scsi)
Disk / dev / sda: 75.2GB
Sector size (logical / physical): 512B / 512B
Partition Table: gpt
Disk Flags:
Number Start End Size File system Name Flags
1 32.8kB 3146kB 3113kB fat16 boot
5 4211kB 265MB 261MB fat16
6 266MB 527MB 261MB fat16
7 528MB 643MB 114MB
8 644MB 943MB 299MB fat16
9 944MB 75.2GB 74.2GB

As you can see, the output here is already more informative and the partitions are displayed with the correct markup.
Now how to understand which partition from / dev / sda we need. To do this, I will remind you of what partitions the disk on which VMware ESXI 6.5 or another is installed consists of. This is how the schematic diagram of the partitions on the disk where you have VMware ESXI installed looks like.

- Section system boot,this is the main boot partition
- Section bootbank, here is the image of the Vmware ESXI distribution kit, which, when loaded, enters the server's RAM
- Section altbootbank,this is a spare partition that duplicates the bootbank, in case it fails, some fault tolerance, for example, when updating, this partition helps to restore and roll back the ESXI host.
- vmkDiagnostic, here you will have system dumps, in case of purple screens of death (purple screen)
- Section store, required for storing VMware Tools packages
- scratch,vMware ESXI logs if you have a partition more than 5 gigabytes, then it will be created and the -host will be located on it
It is logical to assume that you and I will be interested in the bootbank area, it will approximately weigh 260-261 megabytes. Usually, this is the first of two sections, in my case it is / dev / sda5... I will mount it. In order to mount an inactive disk (partition) in Linux, there is the mount command.
We write in the terminal the command mount / dev / sda5 / mnt
And look at its contents using the ls command, we need to make sure that there is a state.tgz file

Now we need to copy this file to some directory, unpack it there, make changes and return it to its place. We do this:
Go to the tmp directory, via the cd / tmp command
Use the tar xzf /mnt/state.tgz command to extract the archive into the / tmp directory
If you look at the contents of the / tmp directory, you will find the file local.tgz

Now we need to unpack the local.tgz file, for this we run the command:
tar -xzf local.tgz
after which we will display the contents of the directory using the ls command. We see that the etc directory has appeared, go to it with the command cd / tmp / etc / and make a listing of ls there. Find the shadow file there, this is what we need.

We'll use the vi text editor to edit the shadow configuration file, which stores the hash password for the root user. Enter vi shadow.
In the editor that opens, our ESXI host password is in the first line, between the first and second colons, I highlighted it in the picture. In order to reset the ESXI host password, you need to delete this hash. To edit the shadow file, press the Insert button on your keyboard.

When you have removed the hash password, then press ESC and to save the file, enter: wq
Now that we have updated the shadow file and removed the root password in it, we need to repack state.tgz and put it in place of the new one.
Go up one directory cd ..
Rename and move (state.tg) mv /mnt/state.tgz /mnt/state.tgz.bakup
Remove (local.tgz) rm local.tgz
collect the file (local.tgz) tar czf local.tgz etc
collect the file (state.tgz) tar czf state.tgz local.tgz
Move the file (state.tgz) mv state.tgz / mnt /
Unmount the partition and reboot the host umount / tmp

After rebooting the VMware ESXI 6.5 host, you can safely log in with an empty root password, be sure to set a new password, or in the "System Customization" menu

Or in the web interface

In Vmware ESXI 5.5, you can see a warning

Changing the root password through the GUI
If you do not like terminal commands, then most LIVE-CDs have a graphical interface, in LIVE-CD CentOS to reset the root password, do the following. On the desktop, we find the "Home" button

Go to the "Other Location" item and find your VMware ESXi 6.5 among the list of partitions, I have it / dev / sda5, click on it and you will have it mounted.

You will see the mounted partition icon on your desktop.

To find the state.tgz file, you can use the search form.

Let me remind you that it is with the help of the state.tgz file that you can change the password from the ESXI host.

Copy the state.tgz file, for example, to the Downloads folder.

Let's extract the contents of the state.tgz archive into the Downloads folder, this is done through the context menu and the "Extract Here" item.

We will have the local.tgz file, unpack it too.

Open the shadow file to reset the password for the root user on the ESXI host.

We remove the hash of the password, it is on the first line between the first and second colon (:)

We delete it and bring it to this form.

We save the changes in the file shadow.

Go one level higher to the Downloads folder. Delete the local.tgz file from the folder and right-click on the etc folder and pack it through the "Compress" item.

Set the name to the archive local.tgz


Using the + button, add our new archive local.tgz to the empty state.tgz archive.

Select the new local.tgz and click Add.

In the end, it turned out like this.

We replace the old state.tgz in the lured partition / dev / sda5 with replacement, after which we reboot your server and check that you have an empty password for the VMware ESXI 6.5 host.

Changing the root password via vCenter Server
I'll also tell you about a specific method that will allow you to change the root password on VMware ESXI hosts. It is produced on your vCenter server by using Host Profile . Since we will be using host profiles, it is assumed that your ESXi host (s) are connected and available on the vCenter server and licensed with vSphere Enterprise Plus. This is only possible because the vpxa user on each ESXi host is added when the ESXi host is connected to the vCenter Server and has root privileges.
Right click any host, select Host Profile-Create Profile from Host.

We specify the name of the Host Profile.

Finishing the Host Profile creation

Go to the "Home" tab and open the Host Profiles icon.

Right click and choose Edit Profile.

Select Security Configuration and go to Administrator password, set the password you need for root.


Check the "Security Configuration" item.

We apply our Host Profile, for this put your host into Maintenance Mode


Select "Password_Reset Host Profile".

Click "Apply Profile" to apply.

Your host will reboot and the new root password will be applied to it. This method is good because it can reset ESXI password on a large number of hosts.

List of VMware Default Usernames and Passwords
Here is a comprehensive list of default username and passwords for most of the VMware products. If you "re like me, you tend to get alot of these confused. If I left any off, please let me know in the comments.
password: 123456
default ADM management console password is 123456 and the CLI password is ChangeMe
password: vmware
password: Supplied during OVA deployment
vCenter Log Insight
https: // log_insight-host /
password: password specified during initial configuration
password: vmware
password: vmware
For vSphere 5.1 \u003d Windows default username: [email protected]
For vSphere 5.1 \u003d Linux (Virtual Appliance) default username: [email protected]
password: specified during installation
Adding AD authentication to VMware SSO 5.1
For vSphere 5.5 \u003d default username: [email protected]
Appliance Configuration:
change the root password of the appliance Linux user. Otherwise, the first time when you try to log in to the appliance Web console, you will be prompted to change the password.
Orchestrator Configuration:
username: vmware
Orchestrator Client:
username: vcoadmin
password: vcoadmin
Web Operator
username: vcoadmin
password: vcoadmin
vCenter Orchestrator for Windows:
username: vmware
vCenter Orchestrator for vCloud Automation Center (built-in):
username: vmware
vCloud Automation Center Identity Appliance
vCloud Automation Center vCAC Appliance
password: password supplied during appliance deployment
username: [email protected]
password: SSO password configured during deployment
vCloud Automation Center built-in vCenter Orchestrator
:
username: vmware
password: vmware (after initial logon, this password is changed)
username: [email protected] (or the SSO admin username)
password: specified password for the SSO admin during vCAC-Identity deployment
password: vmware
password: vmware
username: administrator
password: specified during wizard setup
vCloud Director Appliance
password: Default0
OracleXEDatabase
username: vcloud
password: VCloud
vCloud Networking and Security
password: default
password: default
VMware Site Recovery Manager :
username: vCenter admin username
password: vCenter admin password
vShield Manager
password: default
password: default
root: specified during deployment
password: specified during deplyent
darwin_user password: specified during deployment
admin: specified during deployment
password: specified during OVA deployment
username: created during wizard
password: created during qizard
vFabric Hyperic vApp
password: hqadmin
username: windows credentials
password: windows credentials
vSphere Data Protection Appliance
https: //: 8543 / vdp-configure /
password: changeme
password: You configured the root password during the OVF deployment of the vSphere Replication appliance
Zimbra Appliance Administration Console
username: vmware
password: configured during wizard setup
VMware offers many appliances for their products. Unfortunately they are not all created equally. The installation and configuration procedures differ for most appliances and also the default usernames and passwords are different throughout the range of appliances. So here is a list of default usernames and passwords. For as far as I know them, if you miss one please let me know and I will add it to this list.
Appliance name (all versions unless specified differently) user password
vCenter Server Appliance root vmware
vSphere Data Protection root changeme
vSphere Management Assistant vi-admin vmware
vCenter Operations Manager Appliance administrative user for UI-login admin admin
vCenter Operations Manager Appliance root user root vmware
vShield Manager admin default
vSphere Replication root<*>
vCloud Director 5.5 root / guest<*>
vCloud Connector (server and node) admin vmware
Horizon Workspace root / admin<*>
vCenter Orchestrator Appliance Configuration vmware<*>
<*> for some appliances you configure the password during the OVA or OVF deployment.
Passwords are the things people tend to forget. Well, ESXi root passwords are not an exception either! Without the root password, you lose control over your hosts, so it's good to know how to reset it. Well, resetting an ESXi host password is the thing I gonna talk about in this article.
Want to know why I wrote this article? I want to help other VMware admins. You see, when things like that happen, the first thing you do you look through some official documentation, right? Unfortunately, the only thing VMware advices to reset passwords is re-installing the OS. No fun! What if I don’t want to (or cannot) do that? In this article, I’m looking for a better way to reset the password.
For this article, I use ESXi 6.7.0, 8169922, but everything I write here works good for ESXi 6.x or 5.x versions. Some methods to reset the passwords may be pretty risky. So, don’t blame me in case you mess things up.
Some theoretical findings
After thinking through some cases of how you guys lose passwords, I realized that these two scenarios are pretty common: you forgot the password, but you still can access the hosts via vCenter, and you lost the standalone host password from the standalone ESXi host and there's no way to access it.
Well, the last one looks really tough. But, I'll teach you today how to restore the password in both cases.
Changing the pass with vCenter
Let’s start with some bright scenario: you forgot the ESXi root password but there’s vCenter installed. I'd say that’s a pretty common issue. Admins manage the host through vCenter, but one day, they lose the password. Fortunately, that's not a big deal to restore the password.
First, let’s look at how to change the password via the flash vCenter Webclient. Note that things I write here do not work in the html one! Also note that you need your ESXi edition to be not lower than Enterprise Plus.
In order to reset the password, you need to extract, edit, and upload Host Profile. Here’s how you do that.
Go to vCenter, and extract the host profile exactly how I do in the screenshot below.
While extracting, specify the host name and add some description if needed.

Check the entered information and press Finish.

In vCenter, navigate to the Home tab and go to Host Profiles there.

Right-click the Host Profile and edit its settings.

There, you can specify the new name and description if needed.

Once you are done with changing Name and host description, go to the Edit host profile tab itself. Actually, you can change a bunch of settings there, but let’s stick to the initial plan and change only root password, ok? To accomplish this task, type the new password and confirm it in the self-titled fields.

Congratulations, you have changed the password! Let’s add the the host to the cluster now and apply the settings.

In the Attach / Detach Hosts and Clusters menu, select the host where you have changed the password. At this point, I'd like to mention that you can apply the changes to multiple hosts.

Right after adding the host, you can play around with the network settings, if you need it. Well, you can just click Finish to have the settings applied.

Next, you need to put the node in the maintenance mode, otherwise you won’t be able to apply any settings at all!

Confirm putting the selected host (or hosts, whatever) in maintenance mode. Note that you need to migrate your VMs unless you can shut down them for a while. In my case, there are no mission critical VMs on the host, so I’ve just powered them off beforehand.

Now, go back to the Objects tab and, finally, implement the host settings. Right-click the Host Profile and press Remediate.

Select the required host.

Verify all the settings and check whether you can apply the changes at all. Press Finish.

After the host reboots, exit the maintenance mode.

Now, let’s check whether the password reset has run smoothly. For that purpose, log in at the ESXi node via the Web Console, or the terminal using the new password.
Resetting the root password using Active Directory and vCenter
You can also change the password in vCenter using the Active Directory. You see, if you can add the ESXi host to the domain, you are able to use the domain credentials to access the node and reset the root password. Here’s how you do that.
Go to the AD Users and Computers on the domain controller and create a new workgroup - ESX Admins. Make sure to use exactly that name for the workgroup. Add to that group a new user which you will use later to reset the password. Well, it actually can be any user, but I decided to create a new one - TestUser.

Add the host with the forgotten password to the domain.

Next, try logging in the ESXi host with the TestUser credentials. Here's how you are to specify the user name: or Domain \\ User.

Once you log in the host, go to the Security & userstab to reset the root password.

From now on, you can use the new root password! Don’t forget to leave from the domain if you do not need the host to be in the domain anymore.

To apply the changes, reboot the host.
Note that changing the password with vCenter is pretty easy, but VMware does not recommend it for some reason after all.
Resetting root password on the standalone ESXi hosts
Now, as we know how to reset the password with vCenter, let’s look at some tough cases. Let’s say, you don’t have vCenter installed on the host. Once again, I do not want to re-install the server OS as VMware says. Seriously, that's not fun! Let’s look at something more interesting instead. Well, let’s say, what about changing the password right on the node itself?
Before I start, I’d like to mention that you won’t be able to trick ESXi security and change the root password on the node without shutting it down. This means that you, like it or not, do need to shut down each VM from the inside! If you screw things up, you won’t be able to start VMs without ESXi re-installation.
Also, you need the boot the CD image. I used Ubuntu GNOME in this article. Find out how to create a boot CD and download Ubuntu GNOME. You also need Rufus to write the boot CD image on the flash drive.

So, you need to boot from the flash disk, mount the required ESXi datastore, unpack the archive, and edit the file with passwords. Next, you upload the file back into the initial directory, and, after rebooting the host, you can access the it without the password.
Editing the “shadow” file
What’s “shadow” is?
For safety concerns, ESXi keeps passwords encrypted in some file… whatever, here’s how you still can reset the password. According to some unofficial sources, this file is called “shadow”. You can find it in one of those booting volumes in the / etc directory. Before the host boots, / etc is in the local.tgz archive. Here's the path: / etc \u003d\u003e local.tgz \u003d\u003e state.tgz. You can find it in one of those booting volumes in the / etc directory. Before the host boots, / etc is in the local.tgz archive. Here’s the path: state.tgz \u003d\u003e local.tgz \u003d\u003e / etc.
Here's how the disk is formatted in ESXi 6.0 or higher:
| Volume name | What it is for? | Volume size in my case |
| / dev / sda1 | Starts the system | 4 MB |
| / dev / sda2: / scratch: | System volume that is created while installing ESXi on the over-5 GB disk. | 4 GB |
| / dev / sda3: VMFS datastore: | Represents all the remaining disk space | |
| / dev / sda5: / bootbank: | The ESXi image | 250 MB |
| / dev / sda6: / altrbootbank: | The older system version image. You’ll see it as an empty volume if you have never updated the system | 250 MB |
| / dev / sda7: vmkDiagnostic (the first volume) | Keeps the core dump | 110 MB |
| / dev / sda8: / store | VMware Tools image | 286 MB |
| / dev / sda9: vmkDiagnostic (the second volume) | Keeps all the information connected with vSAN diagnostics. You can observe this volume only in over-8 GB datastores | 2.5 GB |
Among of all those volumes, we need only the / bootbank one as it keeps the ESXi archive. In this way, “shadow” should be somewhere there.
Chasing the “shadow”
So, let’s boot the host from the flash disk first and start the terminal.
Run the following cmdlet to acquire root privileges:
# sudo su
See through the disk names and find the one you need.
# fdisk –l | grep / dev / sda

Well, it seems that we need that 250 MB / dev / sda5 directory. Create the mnt directory.
# mkdir / mnt / sda5
Create the directory for the temporary files now.
# mkdir / temp
And, mount the / dev / sda5 directory using the cmdlet below.
# mount / dev / sda5 / mnt / sda5
Now, look for that state.tgz archive I was talking above.
# ls -l /mnt/sda5/state.tgz
Extract both state.tgz and local.tgz... Here are the commands you can use for that purpose:
Once you are done with unpacking, get rid of those old archives with the cmdlet below:
# rm /temp/*.tgz
Now, you are ready to do some magic with “shadow”. Open the file, edit it, and close it. As simple as it! To double-check the changes, open the file one more time.
# vi / temp / etc / shadow
Actually, here’s how “shadow” looks like inside. See, it contains all users' passwords.

To reset the password, just delete everything between the double colons. Remember, everything is encrypted? That's why passwords look that weird.

# vi / temp / etc / shadow
Next, go to the work directory.
# cd / temp
Now, add the “shadow” back to the archive.
# tar -czf local.tgz etc
Move the new archive to the initial directory.
# mv state.tgz / mnt / sda5 /
Unmount the / sda5 disk with the cmdlet below:
# umount / mnt / sda5
And, eventually reboot the host.
# reboot
Well, to make the stuff I’ve just written above more reader-friendly, here’re all commands you need to deploy step-by-step.

Well, you are almost there. Reboot the server now, and try accessing the host without any password. Well, check out what I’ve got.

Now, select Configure Password, and type a new password in the self-titled field.

Ok, this time, please write the root password, or just try no to forget it!
Replace one “shadow” with another
There’s another way to reset the ESXi root password using “shadow”. Actually, that’s nothing more than a variation of the method I described above.
So, another thing you can do to reset the ESXi password is just using another host “shadow” file! Yes, you can just copy the “shadow” file from another ESXi host with the known root password to the one more flash disk. To get the file with passwords from another host, you need WinSCP. The utility is available. The nice thing is that you can retrieve that file from the host with the known ESXi root password without even shutting it down.

Next, call the terminal with the Ubuntu GNOME and reset the password.
Update user privileges to root first. You can run the following command for that purpose:
# sudo su
Now, let’s see what you have on the disk.
# fdisk –l | grep sd
Create two temporary volumes afterward.
# mkdir / mnt / sda5
# mkdir / mnt / sdb1
Mount the ESXi disk and flash disk where the “shadow” resides using the following cmdlet.
# mount / dev / sda5 / mnt / sda5
# mount / dev / sdb1 / mnt / sdb1
Now, create the temporary volume for further work with archives.
# mkdir / temp
Create the volume where you are going to keep the state.tgz copy just in case something goes wrong.
# mkdir / mnt / sdb1 / save
Find the necessary file in the archive.
# ls -l /mnt/sda5/state.tgz
Copy the archive.
# cp /mnt/sda5/state.tgz / mnt / sdb1 / save
Run the following command to double-check whether the file has been copied:
# ls -l / mnt / sdb1 / save
Extract state.tgz using the cmdlet below:
# tar -xf /mnt/sda5/state.tgz –C / temp /
Find the temp file.
# ls –l / temp
Extract local.tgz.
# tar -xf /temp/local.tgz –C / temp /
Make sure that you extracted the / etc directory.
# ls –l / temp

Now, delete the local.tgz volume to ensure that it won’t be included into the new archive by accident.
# rm /temp/local.tgz
Find “shadow” in the / etc directory.
# ls -l / temp / etc
Replace the original “shadow” with the one from the host with known root password. Type the following cmdlet:
# cp / mnt / sdb1 / shadow / temp / etc

Now, deploy the following command to open the file and look through the saved credentials.
# vi / temp / etc / shadow
If you do not want some users to access the host, go ahead and just remove them from the listing! Here, I removed Test from the users that can access the host. Wait, why did I delete only Test? At this point, I'd like to warn you against deleting any users you are not familiar with. In my case, all users except Test are system ones. If you delete any of those guys, you may destabilize the OS!

Here’s how the “shadow”: file looks like once the unnecessary user.

Check whether all changes have been applied.
# vi / temp / etc / shadow
Type the following line to navigate to the / temp directory.
# cd / temp
Archive the / etc directory.
# tar -czf local.tgz etc
Check whether archiving has run smoothly.
# ls -l / temp /
Now, create the state.tgz volume.
# tar -czf state.tgz local.tgz
Again, check whether the volume has been created.
# ls -l / temp /
Move the archive to the working ESXi directory.
# mv state.tgz / mnt / sda5 /
Check the result one more time.
# ls -l / mnt / sda5 /
Unmount the sda5 directory.
# umount / mnt / sda5
Eventually, reboot the host.
# reboot
Enjoy!If everything is done right, you can access the host with the known password. Well, to make everything more or less convenient here’s the entire set of commands I used for this method.

If the host starts acting weird after reboot, there’s still a copy of the initial state.tgz. Well, it should be. You can mount both / sda5 and / sdb1 and retrieve the original state.tgz using the following cmdlet ... and try again!
# cp /mnt/sdb1/save/state.tgz / mnt / sda5 /
Conclusion
Today, I discussed four ways to reset an ESXi host root password. The first method is the easiest one and works wonderful if you have vCenter installed. If there’s no vCenter, you still can reset the password, but the thing is that the last two methods described here are a bit risky. Especially, you should be really careful with the last one. If any of system users is deleted, you gonna screw up the OS. So, be smart and don’t delete users you don’t recognize.
30/05/2011fdisk -l (we look at suitable FAT16 partitions where we have a bootloader)
ls -l / mnt / sda5 / (main, mounted as / bootbank at boot)
ls -l / mnt / sda6 / (backup, mounted as / altbootbank at boot)
In the case of a clean ESXi installation, the picture will be as follows:

We are interested in the file state.tgz - there is everything we need. If you have ESXi Embedded you need a file local.tgz (which in the first case is inside state.tgz).
Unpack first state.tgz, and then local.tgz with the gzip and tar commands to a temporary directory. Next, go to the folder in it / etcand open the file in it shadowcommand:
vi shadow

You will see something like this:

Now look at the picture below, we are removing the password hash from this file:

That is, we remove everything between the two colons. We exit from the file, having saved.
Now we pack all this back, for which in the temporary folder (we need to go up there from / etc) we execute the following command (update the archive with the changed folder):
tar -czvf local.tgz etc
If you are using ESXi Embedded, put the local.tgz file in the place where you took it from. If the usual ESXi - update the archive again:
tar -czvf state.tgz local.tgz
And also copy it to where it lies:

We reboot the server and already boot into VMware ESXi. We see this picture:
This means - everything worked out. Now we can enter the console as root with an empty password. Here's a simple way to reset a password on a VMware ESXi host.
Please enable JavaScript to view the